I still remember the day I realized that a tiny kitchen didn’t have to mean a tiny amount of storage. I was struggling to find a place for my cooking essentials, and a friend suggested I try using a pegboard for kitchen storage. At first, I thought it was a bit old-school, but after giving it a shot, I was hooked. The key to making it work is understanding how to use a pegboard for kitchen storage in a way that maximizes your space. It’s not just about slapping some hooks on a board and calling it a day – it’s about creating a thoughtful, efficient system that makes your kitchen workflow smoother.
In this article, I’ll share my personal approach to using a pegboard to supercharge your kitchen storage. You’ll learn how to choose the right pegboard for your space, design a layout that makes sense for your cooking style, and implement a system that keeps your essentials within easy reach. I’ll cut through the clutter and give you the straightforward, no-nonsense advice you need to make the most of this simple yet powerful tool. By the end of this guide, you’ll be equipped with the knowledge to transform your kitchen into a highly efficient cooking space that makes meal prep a breeze.
Table of Contents
Guide Overview: What You'll Need
Total Time: 1 hour 15 minutes
Estimated Cost: $20 – $40
Difficulty Level: Easy
Tools Required
- Drill (with screwdriver and drill bits)
- Level (for ensuring proper installation)
- Measuring Tape (for measuring wall space)
- Pencil (for marking wall and pegboard)
- Screwdriver (for tightening screws)
Supplies & Materials
- Pegboard (available in various sizes, e.g., 2 feet x 4 feet)
- Pegboard Hooks (assorted sizes and types)
- Wall Anchors (e.g., 1 inch or 1.5 inches long)
- Screws (e.g., 1 inch or 1.5 inches long)
- Wood Screws (for securing pegboard to wall studs, 2 inches long)
Step-by-Step Instructions
- 1. First, let’s start by assessing your kitchen layout to determine the best location for your pegboard. Consider the areas where you spend most of your time cooking, such as near the stove or sink, and think about how you can maximize the space to create a workflow-friendly zone.
- 2. Next, measure the available wall space where you plan to install the pegboard, taking into account any obstacles like windows, doors, or electrical outlets. Make sure to record your measurements accurately to ensure a proper fit and to avoid any costly mistakes.
- 3. Now, it’s time to choose the right pegboard for your kitchen. You’ll want to consider the size and material of the board, as well as the type of hooks and accessories you’ll need to hang your cooking essentials. Look for a pegboard that is durable, easy to clean, and has a versatile hook system.
- 4. Once you have your pegboard, it’s time to install it. Start by locating the wall studs to ensure a secure mounting, and then mark the spot where you’ll drill the holes for the screws. Use a level to make sure the pegboard is straight, and then screw it into place.
- 5. With the pegboard installed, it’s time to customize your hook layout. Think about the items you use most frequently, such as pots, pans, and utensils, and group them together in a way that makes sense for your cooking workflow. Use a variety of hooks and accessories, such as adjustable arms and slotted hooks, to create a flexible and efficient storage system.
- 6. Now that your pegboard is set up, it’s time to optimize your kitchen workflow. Take a step back and look at the big picture – how can you use your pegboard to streamline your cooking process? Think about the sequence of tasks involved in preparing a meal, and how you can use your pegboard to keep the necessary tools and ingredients within easy reach.
- 7. Finally, don’t forget to maintain your pegboard over time. Regularly clean the board and hooks to keep them free of dust and debris, and make adjustments to your hook layout as needed to ensure that your pegboard continues to support your kitchen workflow. By following these steps and staying organized, you can create a kitchen storage system that is both functional and efficient.
Pegboard Power for Kitchens
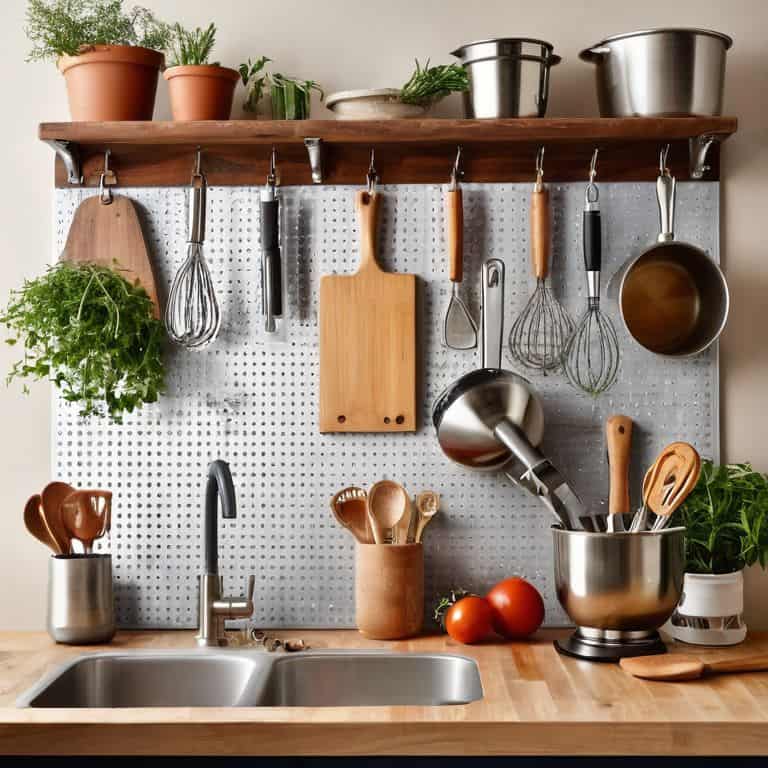
As I’ve experimented with pegboard installation tips, I’ve found that the key to a successful setup is to think about your kitchen workflow. Consider the tools and utensils you use most frequently and group them together in a way that makes sense for your cooking style. This might mean dedicating a section of your pegboard to kitchen tool organization systems, with hooks and bins specifically designed for your most-used items.
One of the benefits of using a pegboard is that it allows for customizable pegboard hooks, which can be tailored to fit your specific needs. For example, you might use a combination of short and long hooks to hang items like spatulas, whisks, and kitchen shears. By mixing and matching different types of hooks, you can create a system that is truly optimized for your kitchen.
To get the most out of your pegboard, it’s also important to think about maximizing kitchen storage space. This might involve using the wall space above your countertops to install a pegboard, or incorporating other kitchen wall organization ideas into your design. By taking a holistic approach to kitchen organization, you can create a space that is not only functional, but also efficient and easy to use.
Maximizing Storage With Custom Hooks
To take your pegboard to the next level, I recommend creating custom hooks tailored to your specific kitchen tools. By designing hooks that fit your most-used items, such as pots, pans, or utensils, you can ensure a snug and secure fit. This not only maximizes storage but also keeps your kitchen essentials organized and within easy reach. I like to use my 3D printer to craft custom hooks that fit my gear perfectly.
By using custom hooks, you can make the most of your pegboard’s potential and create a truly optimized kitchen workflow. For example, you can design hooks with a slight curve to cradle your favorite frying pan or create a series of small hooks to hang your utensils. The key is to think about the specific items you use most frequently and design your hooks around them. With custom hooks, you can turn your pegboard into a highly functional and efficient storage system.
Pegboard vs Slatwall Which Wins
When it comes to kitchen storage, two popular options are pegboards and slatwalls. But which one comes out on top? In my experience, pegboards offer more flexibility and customization. With a pegboard, you can easily move hooks and accessories around to suit your changing needs. Slatwalls, on the other hand, have fixed slats that can limit your configuration options.
For a tiny kitchen like mine, this flexibility is key. I can quickly reconfigure my pegboard to accommodate a new kitchen gadget or utensil, keeping my workflow optimized and clutter at bay.
Pegboard Perfection: 5 Tips to Revolutionize Your Kitchen Storage
- Design Your Pegboard Layout with Workflow in Mind: think about the tools and utensils you use most frequently and group them together for maximum efficiency
- Choose the Right Hooks for the Job: from pots and pans to spices and utensils, selecting the perfect hook for each item will keep your kitchen clutter-free and your pegboard organized
- Keep It Visual: use a pegboard with a built-in shelf or add a separate shelf above it to store less frequently used items, keeping your most-used tools front and center
- Make the Most of Your Wall Space: install multiple pegboards or combine a pegboard with other storage solutions, like a slatwall or cabinets, to create a comprehensive storage system
- Optimize and Adapt: don’t be afraid to reconfigure your pegboard as your cooking habits and needs change – it’s all about creating a system that works for you and your unique kitchen workflow
Key Takeaways for a Pegboard-Powered Kitchen
I’ve found that a well-designed pegboard can increase kitchen storage capacity by up to 30% while keeping frequently used items within easy reach
Customizing your pegboard with hooks tailored to your specific kitchen tools and gadgets is crucial for maximizing storage efficiency and streamlining your cooking workflow
By choosing a pegboard over a slatwall, you can achieve a more flexible and adaptable kitchen storage solution that can evolve with your changing cooking needs and preferences
Pegboard Wisdom
A pegboard is not just a tool for hanging kitchen utensils, it’s a gateway to a more streamlined you – every hook, every hanger, and every carefully considered placement is a declaration of war on kitchen chaos.
Leo Vance
Putting it all Together: A More Efficient You
As we’ve explored the world of pegboards for kitchen storage, it’s clear that maximizing space is just the beginning. From custom hooks to the age-old debate of pegboard vs slatwall, the key to a more efficient kitchen lies in optimizing your workflow. By applying the principles outlined in this guide, you’ll not only free up physical space but also mental energy, allowing you to focus on the cooking process itself. Remember, the goal is to create a kitchen that works in harmony with your needs, not against them.
So, as you embark on this journey to transform your tiny kitchen into a powerhouse of productivity, keep in mind that it’s the small, intentional decisions that add up to make a big difference. Don’t be afraid to experiment, to push the boundaries of what’s possible in your kitchen. With a pegboard as your trusty sidekick, you’ll be well on your way to creating a culinary haven that’s as functional as it is beautiful, where every movement has a purpose and every ingredient has its perfect place.
Frequently Asked Questions
What are the most effective types of items to hang on a pegboard in a kitchen?
For me, the most effective items to hang on a pegboard in a kitchen are frequently used utensils like pots, pans, colanders, and cooking spoons. I also like to hang my kitchen knives, spice racks, and even a paper towel roll to keep them within easy reach and free up counter space.
How can I customize my pegboard to fit my specific kitchen tools and gadgets?
To customize your pegboard, I recommend taking inventory of your kitchen tools and gadgets, then designing a layout that groups similar items together. Consider 3D printing custom hooks or using adjustable pegs to fit unusual shapes. This tailored approach will optimize your pegboard’s storage capacity and streamline your workflow.
What are some common mistakes to avoid when installing and using a pegboard for kitchen storage?
When installing a pegboard, avoid overloading it with too many hooks or bins, and don’t neglect to plan your layout – I like to create a ‘time and motion’ study to optimize my workflow. Also, be mindful of the weight capacity to prevent damage or accidents, and consider the reach and accessibility of your stored items.