I still remember the day I realized my tiny kitchen wasn’t a curse, but a challenge waiting to be solved. I was struggling to find space for my cooking utensils, and that’s when I discovered the world of diy kitchen storage. It’s amazing how a few simple tweaks can transform a cramped kitchen into a functional and beautiful space. I’ve learned that it’s not about having a big kitchen, but about being creative with the space you have. My journey with diy kitchen storage has been a game-changer, and I’m excited to share my knowledge with you.
In this article, I’ll be sharing my favorite no-fuss and budget-friendly diy kitchen storage solutions that will help you maximize your kitchen’s potential. From repurposing everyday items to building your own storage units, I’ll guide you through each step with clear instructions and photos. My goal is to empower you to take control of your kitchen and make it a space that reflects your personality and style. By the end of this article, you’ll be equipped with the knowledge and confidence to tackle your own diy kitchen storage projects and create a kitchen that’s both functional and beautiful.
Table of Contents
Guide Overview: What You'll Need
Total Time: 4 hours 30 minutes
Estimated Cost: $50 – $100
Difficulty Level: Intermediate
Tools Required
- Circular Saw (for cutting lumber)
- Drill Press (for precise drilling)
- Hand Saw (for cutting small pieces)
- Sander (for smoothing out wood)
- Tape Measure (for accurate measurements)
- Level (for ensuring even installation)
- Pencil and Marker (for marking cuts and positions)
Supplies & Materials
- 2-in x 4-in lumber (for shelving frames)
- 3/4-in plywood (for shelving boards)
- Wood Screws (1 1/2 inches long)
- Wood Glue (for bonding wood pieces)
- Sandpaper (for smoothing out surfaces)
- Paint or Stain (for finishing the storage unit)
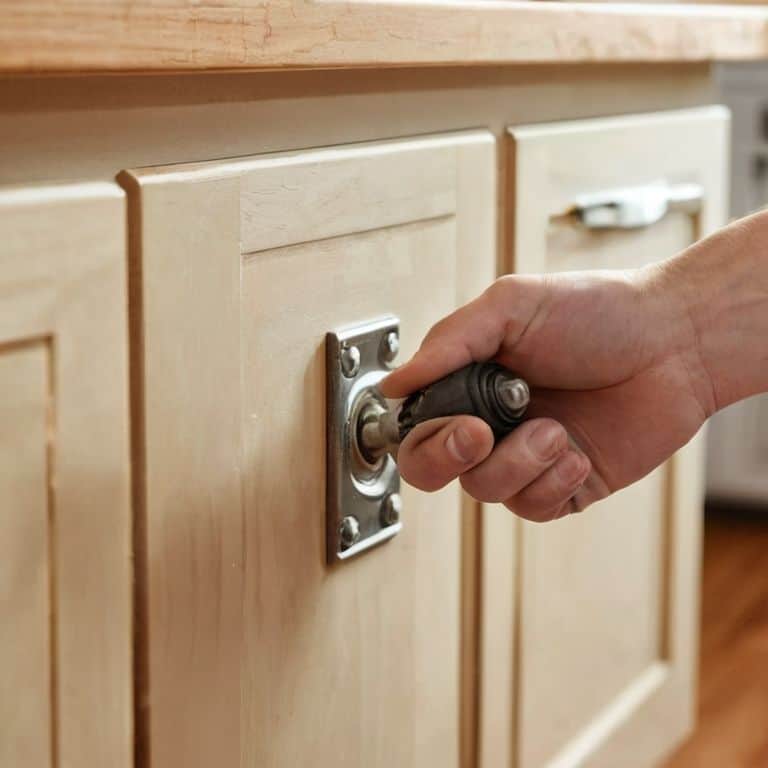
- Decorative Handles (for easy opening and closing)
Step-by-Step Instructions
- 1. To start, let’s assess our space and figure out what we’re working with – take a good look at your kitchen and identify the areas that need the most storage help. For me, it was the counters and the cabinets, which were always cluttered with appliances, spices, and who-knows-what. Take note of the measurements of your kitchen, including the width of your counters, the height of your ceilings, and the size of your cabinets.
- 2. Next, gather your materials – I like to think of this step as the treasure hunt part of the project. You’ll need some basic tools like a drill, a saw, and a screwdriver, as well as some materials like wood, baskets, or containers. Don’t be afraid to get creative and think outside the box – I’ve used everything from old pallets to vintage suitcases to create unique storage solutions.
- 3. Now it’s time to start building – for this project, we’re going to focus on creating a custom storage unit that fits your specific needs. Let’s say you want to build a spice rack – you’ll need to cut your wood to the right size, assemble the pieces, and attach them to the wall. Don’t worry if you’re not a seasoned carpenter – I’ll walk you through each step, and before you know it, you’ll be a DIY rockstar.
- 4. Once you have your basic unit built, it’s time to add some functional flair – this might include installing shelves, hooks, or baskets to maximize your storage space. For my own kitchen, I added a few adjustable shelves to accommodate my collection of cookbooks and kitchen gadgets. This is also a great time to think about the aesthetic you want to achieve – do you want a modern, sleek look, or a more rustic, vintage vibe?
- 5. With your storage unit built and functional, it’s time to add the finishing touches – this might include staining or painting your wood, adding decorative hardware, or installing lighting to highlight your new storage space. For my own project, I added some warm white LED lights to create a cozy ambiance and make my spices and cookbooks easy to find.
- 6. Now that your DIY storage project is complete, it’s time to load it up and start enjoying the benefits of your hard work – take a step back and admire your handiwork, then start filling up your new storage space with all the things that were previously cluttering up your kitchen. Don’t be afraid to get creative and mix it up – I like to store my spices in cute little jars, and my cookbooks on a decorative shelf.
- 7. Finally, take a step back and evaluate your space – how does it feel now that you’ve added your new storage unit? Are there any other areas that could use a little DIY magic? Don’t be afraid to keep tweaking and adjusting until your kitchen feels like the perfect blend of form and function. And remember, the best part of DIY is that it’s always a work in progress – so don’t be afraid to try new things, make mistakes, and learn as you go.
Diy Kitchen Storage Solutions
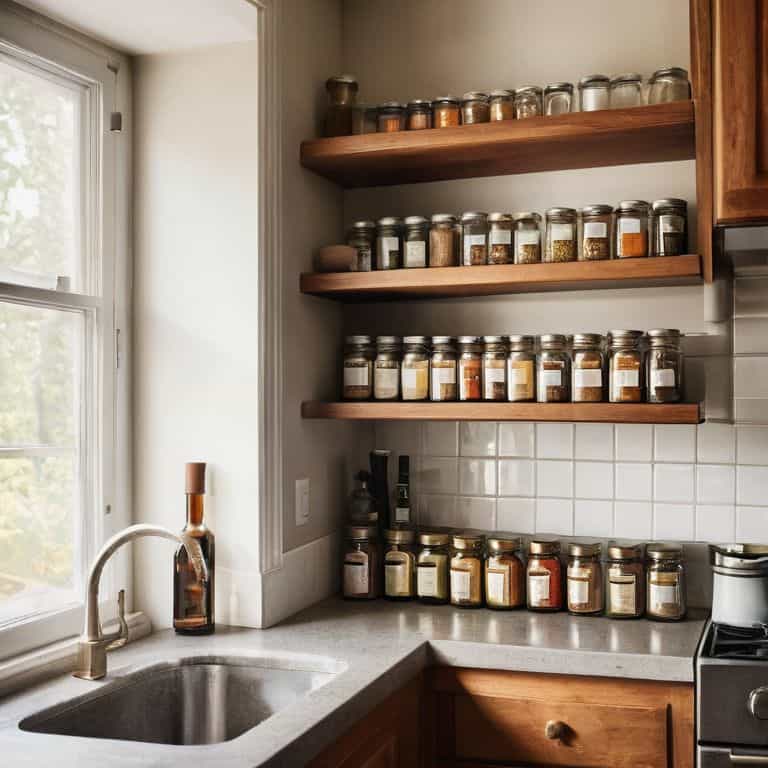
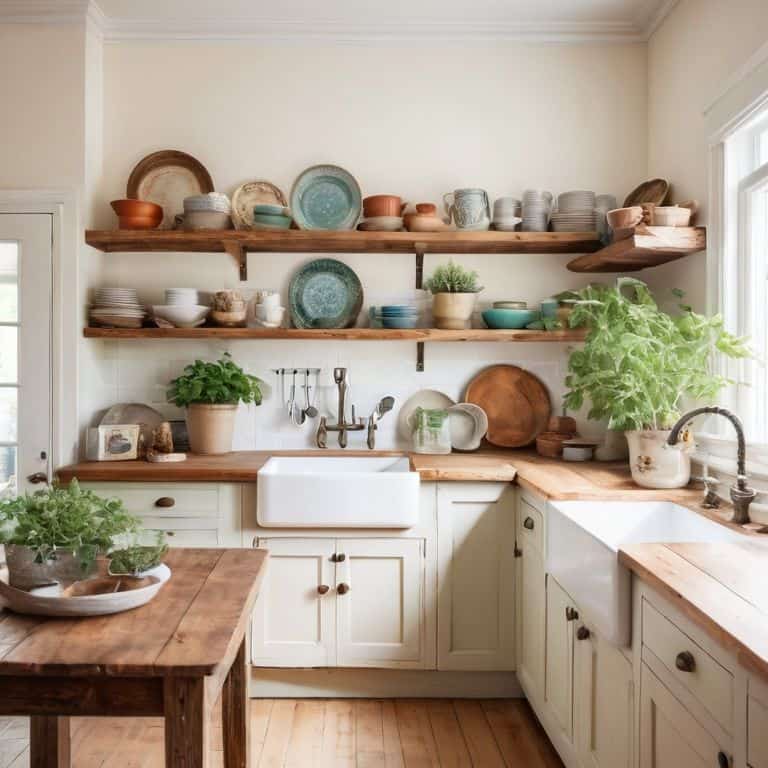
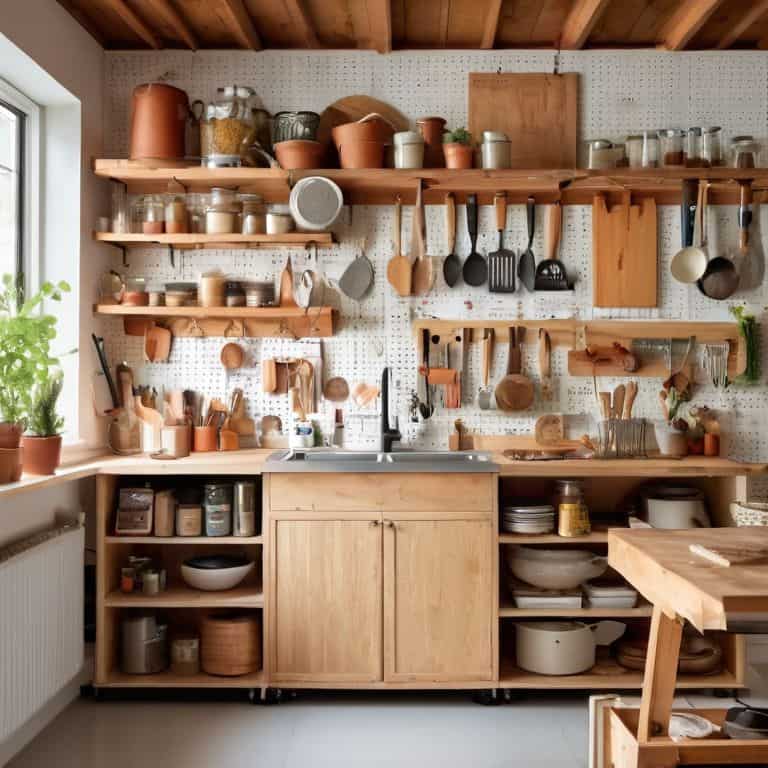
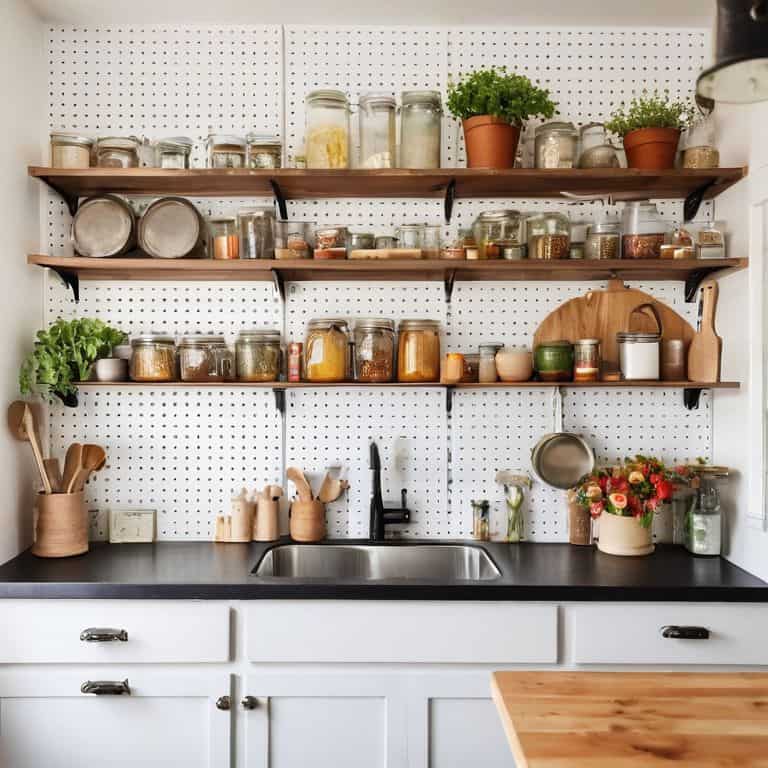
When it comes to maximizing corner storage, every inch counts in a tiny kitchen. I’ve found that using a combination of custom shelving solutions and cleverly designed kitchen cart organization ideas can make a huge difference. By installing shelves that fit snugly into the corners of your kitchen, you can create a lot of extra storage space for frequently used items like spices, oils, and cookbooks.
One of my favorite under sink storage hacks is to use a slide-out drawer or basket to store cleaning supplies, sponges, and other essentials. This keeps them out of the way but still easily accessible when you need them. Additionally, consider using space saving kitchen cabinets with retractable shelves or doors to make the most of your kitchen’s vertical space.
To take your kitchen storage to the next level, consider building a DIY kitchen island using reclaimed wood or materials you have on hand. You can find plenty of diy kitchen island plans online to get you started. With a little creativity and some basic building skills, you can create a beautiful and functional island that provides additional counter space, storage, and a convenient spot for food preparation.
Kitchen Cart Organization Ideas
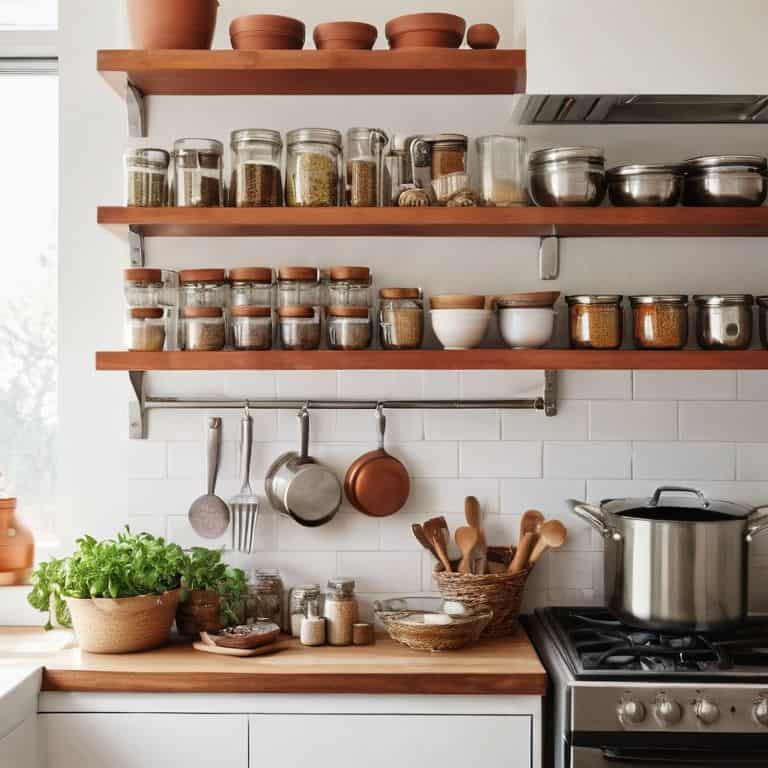
Now that we’ve tackled some of the bigger DIY kitchen storage projects, let’s dive into the details of kitchen cart organization. I’m obsessed with maximizing the space on my own kitchen cart, and I’ve found that a few simple tweaks can make all the difference. By adding a pegboard to the side of my cart, I’ve been able to hang my most-used utensils and free up valuable counter space.
I’ve also started using small baskets and containers to corral tiny items like spices, oils, and baking supplies. It’s amazing how much more functional my cart has become – and it looks cute, too! With a little creativity, you can turn your kitchen cart into a highly functional hub that keeps all your essentials within easy reach.
Maximizing Corner Storage Hacks
To make the most of my tiny kitchen, I’ve had to get creative with corner spaces. One of my favorite hacks is using a rotating carousel to store spices, oils, and condiments. It’s amazing how much you can fit in a small corner with one of these! I also love repurposing old baskets or containers to hang from the ceiling or mount on the wall, keeping frequently used items like utensils or pot lids within easy reach.
By maximizing corner storage, you can free up valuable counter and cabinet space for more essential items. Plus, it’s a great excuse to get crafty and upcycle some old materials – like that scrap wood I just can’t seem to part with! With a little DIY magic, even the tightest kitchen corners can become functional and beautiful.
Taming the Chaos: 5 Essential DIY Kitchen Storage Tips
- Start by purging your kitchen of items you no longer need or use, it’s liberating and will help you focus on what’s truly essential
- Assign a home for each item in your kitchen, this simple trick will help maintain order and make the most of your DIY storage solutions
- Think vertically, use walls and ceilings to maximize storage without sacrificing precious floor space, it’s a game-changer for tiny kitchens
- Repurpose and upcycle items you might otherwise throw away, like turning old mason jars into utensil holders or using a vintage ladder as a pot rack
- Keep it accessible, ensure your DIY storage solutions are functional and easy to use, the last thing you want is to create a beautiful storage system that’s a pain to navigate
Key Takeaways for a Clutter-Free Kitchen
By implementing creative DIY storage solutions, you can transform your tiny kitchen into a functional and beautiful space that works for you, not against you
Maximizing corner storage and utilizing kitchen cart organization ideas can help you make the most of your kitchen’s limited real estate, keeping essentials within easy reach
With a little creativity and some basic DIY skills, you can create custom storage solutions that not only solve practical problems but also add a personal touch to your kitchen, making it truly feel like home
Empowering Your Space
A tiny kitchen isn’t a limitation, it’s an invitation to innovate – with a little creativity and some DIY magic, even the smallest spaces can become highly functional and beautiful.
Maya Torres
Wrapping Up Your DIY Kitchen Storage Journey
As we conclude our exploration of DIY kitchen storage solutions, let’s recap the key takeaways. We’ve covered the importance of maximizing corner storage and explored innovative ways to repurpose everyday items into functional kitchen organizers. From kitchen cart organization ideas to clever diy storage hacks, we’ve delved into a world of creative possibilities for taming your tiny kitchen chaos. By applying these principles, you’ll be well on your way to creating a more efficient, beautiful, and functional cooking space.
So, as you embark on your own DIY kitchen storage adventures, remember that the true power lies not in the tools or materials, but in your own creativity and resourcefulness. Don’t be afraid to experiment, try new things, and make mistakes – it’s all part of the journey. With a little patience, imagination, and elbow grease, you can transform your tiny kitchen into a culinary haven that’s truly one-of-a-kind, and that’s the greatest DIY reward of all.
Frequently Asked Questions
What are some creative ways to repurpose old furniture for DIY kitchen storage?
I love breathing new life into old furniture. Consider repurposing an antique dresser as a kitchen island or transforming a vintage ladder into a pot rack. You can also upcycle old crates into shelves or turn a retro side table into a storage cart. Get creative and think outside the box – or in this case, the furniture piece!
How can I maximize my kitchen's vertical space for storage without making it look cluttered?
To maximize vertical space without clutter, I swear by wall-mounted shelves, hooks, and magnetic boards. Install them above countertops, near entry points, or by the stove to keep essentials within reach. Just remember, edit your decor and group similar items together to maintain a tidy look!
What are some budget-friendly materials I can use to build my own DIY kitchen storage solutions?
I’m all about repurposing affordable materials. Consider thrift store crates, reclaimed wood, or even old pallets to build your DIY kitchen storage solutions. You can also upcycle items like mason jars, wire baskets, or vintage cabinets to add functional charm to your space. Get creative and hunt for budget-friendly gems!