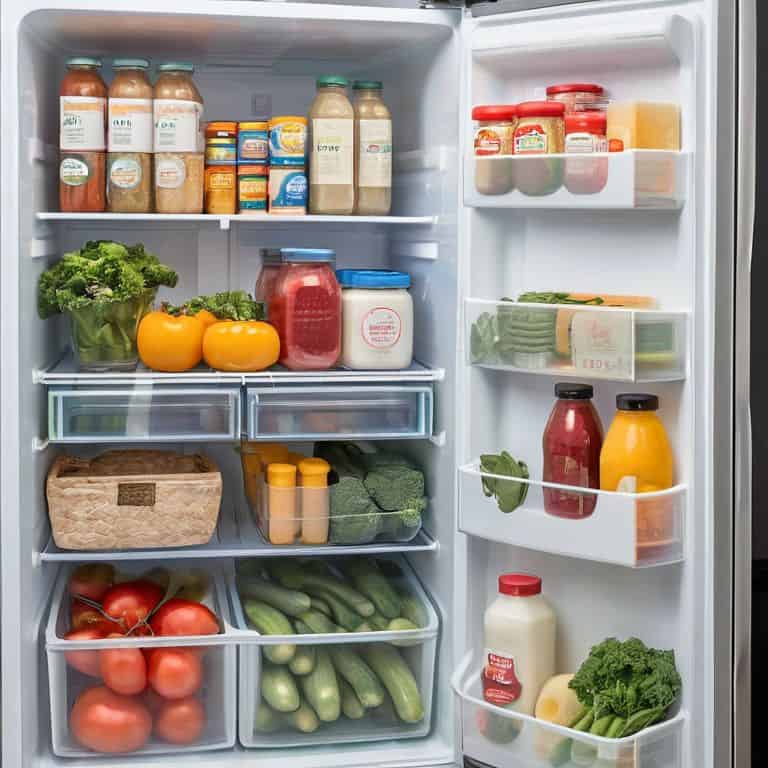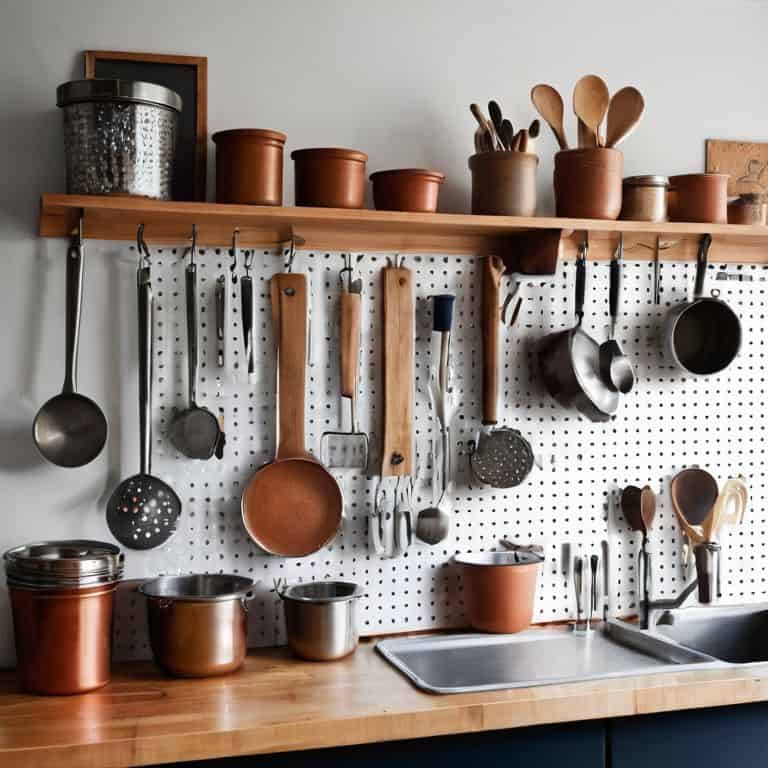
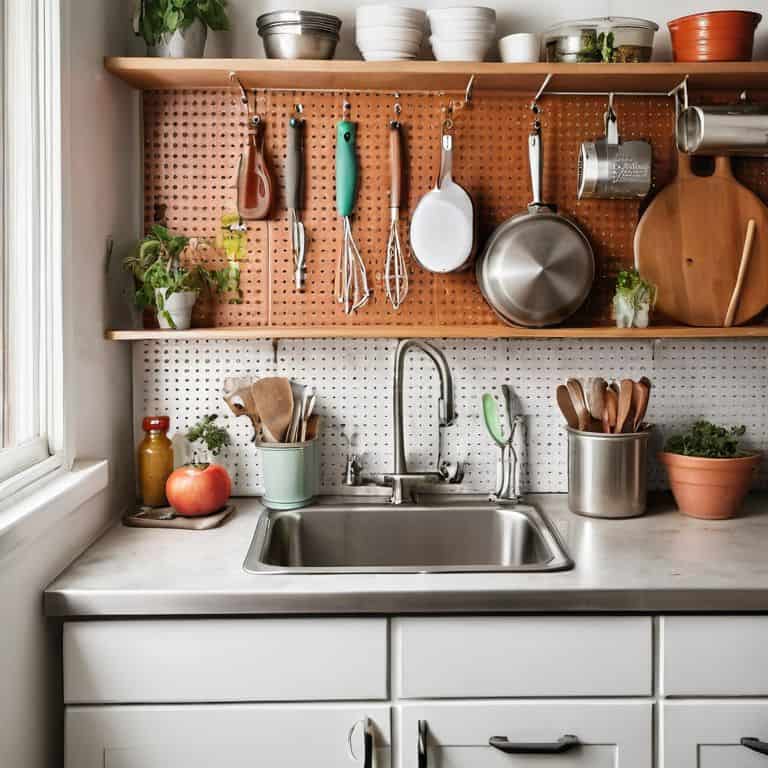
I still remember the day I realized that a clutter-free kitchen wasn’t just a myth, but a reality I could achieve in my tiny sailboat home. It all started when I stumbled upon a pegboard, and I was amazed at how it could transform my kitchen into a peaceful space. I learned how to use a pegboard for kitchen storage, and it was a total game-changer. The common myth that pegboards are only for garages or workshops is far from the truth – they can be a simple yet effective solution for kitchen organization.
In this article, I’ll share my personal experience and provide you with practical tips on how to maximize your kitchen storage using a pegboard. You’ll learn how to choose the right pegboard, design a customized layout, and install it with ease. I’ll also share some of my favorite budget-friendly hacks for making the most of your pegboard. By the end of this guide, you’ll be equipped with the knowledge to turn your kitchen into a functional and beautiful space that brings you joy. Whether you’re a sailor like me or just someone looking to optimize your kitchen, I’m excited to share my expertise with you and help you discover the power of pegboards in kitchen organization.
Table of Contents
Guide Overview: What You'll Need

Total Time: 1 hour 45 minutes
Estimated Cost: $20 – $40
Difficulty Level: Easy
Tools Required
- Drill (with screwdriver and drill bits)
- Level (for ensuring proper installation)
- Measuring Tape (for accurate measurements)
- Pencil (for marking holes and lines)
- Wrench (for tightening screws)
Supplies & Materials
- Pegboard (available in various sizes, e.g., 2 feet x 4 feet)
- Pegboard Hooks (in assorted sizes and types)
- Wall Anchors (e.g., 1/2 inch or 1 inch)
- Screws (e.g., 1 inch or 2 inches long)
- Wood Screws (for mounting pegboard to wall studs)
- Pegboard Accessories (e.g., bins, baskets, or trays)
Step-by-Step Instructions
- 1. First, let’s start with the basics: assessing your kitchen. Take a good look at your kitchen and identify the areas where clutter tends to accumulate. For me, it’s always the countertops and the cabinets near the stove. I like to think of this step as a chance to reset my space and get a fresh perspective on what I need to organize.
- 2. Next, you’ll need to choose the right pegboard for your kitchen. Consider the size of your wall, the type of items you want to hang, and the style of your kitchen. I’m a big fan of minimalist designs, so I opted for a simple, white pegboard that blends seamlessly into my kitchen decor. Make sure to measure your wall and choose a pegboard that fits comfortably, leaving some extra space around the edges for a clean look.
- 3. Now it’s time to install your pegboard. This is the part where most people might feel a little overwhelmed, but trust me, it’s easier than you think. Start by locating the studs in your wall using a stud finder, and then mark the spot where you want to hang your pegboard. Use a level to ensure it’s straight, and then screw it into place. I like to use a drill with a built-in level to make this step even easier.
- 4. With your pegboard installed, it’s time to add your hooks and accessories. This is where the magic happens, and you get to customize your pegboard to fit your specific needs. I’m a big fan of using magnetic hooks for hanging small items like spices, oils, and cleaning supplies. You can also use slotted hooks for hanging larger items like pots, pans, and utensils.
- 5. Once you have your hooks and accessories in place, it’s time to start organizing your kitchen. Begin by grouping similar items together, like all your cooking utensils or baking supplies. Then, use your pegboard to hang these items in a way that makes sense for your workflow. I like to think of this step as creating a workflow, where everything has its own designated spot and is easy to access.
- 6. As you start to fill up your pegboard, remember to keep it balanced. You don’t want your pegboard to look too cluttered or overwhelming, so make sure to leave some empty space between each item. I like to use a mix of short and long hooks to create visual interest and keep my pegboard looking tidy. And don’t forget to step back and admire your work – it’s amazing how a little bit of organization can make a big impact on the overall feel of your kitchen.
- 7. Finally, remember to maintain your pegboard over time. This means regularly cleaning it, checking that all your hooks and accessories are still secure, and making adjustments as needed. I like to set a monthly reminder to give my pegboard a quick once-over and make sure everything is still organized and functional. By following these steps and staying on top of your organization, you can keep your kitchen clutter-free and enjoy the peace of mind that comes with a well-organized space.
Sailing Into Kitchen Efficiency
As I reflect on my time living on a sailboat, I realize that maximizing kitchen storage space was crucial to our daily lives. We had to be creative with the limited space available, and that’s where pegboards came in handy. I remember installing our first pegboard in the kitchen, and it was a game-changer. We were able to hang our most frequently used tools and utensils, keeping them within easy reach.
One of the most important pegboard installation tips I can offer is to plan carefully before drilling any holes. Consider the layout of your kitchen and the items you want to hang. You’ll want to position your pegboard in a spot where it’s easy to access, but not in the way of foot traffic. I also recommend using customizable pegboard hooks to ensure that your items fit snugly and don’t get jostled around.
By implementing a pegboard system, you’ll be amazed at how much more efficient your kitchen can be. It’s all about kitchen wall organization ideas that make sense for your unique space. Whether you’re a seasoned sailor or a busy homeowner, a well-designed pegboard can be the key to a more peaceful and productive kitchen experience.
Maximizing Space With Custom Hooks
As I reflect on my sailboat days, I realized that custom hooks were a lifesaver for maximizing space. I’d hang pots, pans, and even utensils from the ceiling or walls, keeping them out of the way but still accessible. In your kitchen, you can achieve the same efficiency by installing hooks tailored to your specific needs. For instance, a hook for your favorite cooking utensils or a spot to hang your go-to apron can make a world of difference.
By adding custom hooks to your pegboard, you’ll be amazed at how much more organized your kitchen becomes. I love using strong magnets or adhesive hooks to create a “launching pad” for frequently used items, like oven mitts or a stand mixer. This simple hack keeps my countertops clear and my kitchen feeling more streamlined. Give it a try and see the joy that a few well-placed hooks can bring to your cooking space!
Pegboard Installation Tips for Joy
As I reflect on my sailboat days, I realize that efficient installation is key to a pegboard’s success. To achieve a clutter-free kitchen, consider the “one-in, one-out” rule I live by. Before installing your pegboard, take stock of the items you want to hang. Group similar tools together and plan your layout accordingly. This mindful approach will ensure your pegboard becomes a haven of organization, rather than a chaotic mess.
When installing, remember that vertical space is your friend. I like to think of pegboards as a blank canvas, waiting for your unique touch. By attaching hooks and magnets strategically, you can maximize storage while maintaining a sense of calm. With a little creativity, your pegboard will become the heart of your kitchen, making cooking and meal prep a joy.
5 Ways to Unlock Your Pegboard's Full Potential
- Start by mapping out your kitchen’s ‘zones’ to determine the most convenient spot for your pegboard, considering the workflow and frequency of use for each item
- Choose hooks and accessories that fit your specific needs, such as a combination of small hooks for spices, medium hooks for utensils, and large hooks for bulky items like stand mixers
- Implement a ‘home’ for each item on your pegboard to maintain organization and make cleaning easier, using labels or a pegboard with built-in markers to keep track of what goes where
- Experiment with different pegboard layouts to maximize vertical space, considering a mix of horizontal and vertical arrangements to accommodate items of varying sizes and shapes
- Establish a regular ‘maintenance routine’ to ensure your pegboard remains clutter-free and functional, setting aside time each week to wipe down the board, straighten up hooks, and reassess your storage needs
3 Key Takeaways for a Clutter-Free Kitchen
I’ve learned that pegboards are a simple yet effective way to turn my kitchen into a calm and organized space, and with a few hooks and some creativity, you can do the same
By maximizing your kitchen’s vertical space with a pegboard, you can free up countertops and cabinets, making it easier to cook, clean, and enjoy the space
Remember, the key to maintaining a clutter-free kitchen is to adopt a ‘one-in, one-out’ rule, and with a pegboard, you’ll be motivated to keep your space organized and functional, every single day
Unlocking Kitchen Serenity
A pegboard is more than just a tool for kitchen storage – it’s a canvas for crafting a space that sparks joy, one hook and one hang at a time.
Miles Corbin
Embracing a Clutter-Free Kitchen

As we’ve sailed through the world of pegboard kitchen storage, we’ve covered the essential steps to transform your kitchen into a calm, clutter-free zone. From the initial installation to maximizing space with custom hooks, it’s clear that a pegboard can be a game-changer for small kitchens. By applying these simple, clever systems, you’ll be empowered to maintain a sense of order and serenity in the heart of your home. Whether you’re a busy professional or an avid home cook, a well-organized kitchen is within reach.
As you embark on your own kitchen organization journey, remember that it’s all about embracing a mindset of intentional living. By thoughtfully curating your kitchen tools and gadgets, you’ll not only gain a sense of pride and accomplishment but also reclaim precious time to focus on the things that truly matter. So, go ahead and take the first step towards a more streamlined, peaceful kitchen – your future self will thank you!
Frequently Asked Questions
What are the best types of items to hang on a pegboard in the kitchen?
For me, the best items to hang on a pegboard in the kitchen are the ones I use daily, like pots, pans, utensils, and even my favorite coffee mugs. I also love hanging spices, oils, and frequently used kitchen tools to keep them within easy reach, freeing up counter and cabinet space.
How can I customize my pegboard to fit my specific kitchen layout and style?
To customize your pegboard, I recommend mapping out your kitchen’s unique dimensions and traffic flow. Consider the items you use most and where you’d like to access them. Then, choose hooks and accessories that fit your style, from modern to rustic. I love using a mix of standard and custom hooks to create a tailored look that’s both functional and visually appealing.
What are some creative ways to use pegboard hooks beyond just hanging kitchen utensils and tools?
I love experimenting with pegboard hooks beyond the usual utensils and tools. Try hanging a basket for storing snacks, a magnetic strip for spices, or even a small tray for corraling tiny items like tea bags or coffee creamers. You can also use hooks to suspend a foldable drying rack or a small shelf for extra counter space.