I still remember the day I realized that a guide to under-shelf baskets for extra storage was the key to unlocking my tiny kitchen’s full potential. I was struggling to find space for my cooking essentials, and it seemed like no matter how hard I tried, I just couldn’t seem to get everything to fit. But then I stumbled upon the secret to making the most of my limited counter space: under-shelf baskets. It was a game-changer. I was able to maximize my storage and keep my kitchen organized, even with a minimalist approach.
In this article, I’ll share my honest, no-hype advice on how to use under-shelf baskets to supercharge your kitchen storage. You’ll learn how to choose the right baskets for your space, how to install them for maximum efficiency, and how to use them to keep your kitchen organized and clutter-free. Whether you’re a fellow tiny kitchen dweller or just looking for ways to optimize your cooking space, this guide is for you. I’ll cut through the noise and give you the practical tips and tricks you need to make the most of your under-shelf baskets and take your kitchen to the next level.
Table of Contents
Guide Overview: What You'll Need
Total Time: 1 hour 45 minutes
Estimated Cost: $20 – $40
Difficulty Level: Easy
Tools Required
- Drill (with screwdriver and drill bits)
- Tape Measure
- Level
- Pencil (for marking shelves)
- Screwdriver (for tightening screws)
Supplies & Materials
- Under-shelf Basket (choose size based on shelf dimensions)
- Wood Screws (1-2 inches long)
- Shelf Liner (optional, for protecting shelf surface)
- Basket Mounting Hardware (usually included with under-shelf basket)
Step-by-Step Instructions
- 1. First, assess your space to determine where under-shelf baskets can be most effectively utilized. Take a close look at your kitchen counters, cabinets, and shelves to identify areas where items tend to clutter or where storage is lacking. Consider the workflow of your kitchen, thinking about where you spend most of your time and what items you need to access frequently.
- 2. Next, measure your shelves to decide on the size of under-shelf baskets that will fit best. Use a tape measure to record the width, depth, and height of the space under your shelves. This will help you choose baskets that maximize storage without obstructing the area or making it difficult to access the items stored.
- 3. Now, select the right basket material that suits your kitchen’s aesthetic and functional needs. You can choose from a variety of materials such as metal, plastic, or wicker, each offering different advantages. For instance, metal baskets can provide durability and ease of cleaning, while wicker baskets add a touch of warmth and textural interest to your kitchen.
- 4. Once you’ve selected your baskets, install them under your shelves. This might involve screwing them into place, using adhesive strips, or simply placing them under the shelf if they are designed to sit freely. Ensure they are securely fastened to prevent them from tipping over or sliding out when loaded with items.
- 5. With your under-shelf baskets in place, it’s time to organize and optimize the items you store in them. Think about the frequency of use for each item and store those used most often in easy-to-reach locations. Group similar items together, such as baking supplies or cooking utensils, to create a logical workflow that simplifies your cooking process.
- 6. To maintain the efficiency and clutter-free status of your under-shelf storage, establish a routine to regularly clean and reassess the items stored in your baskets. Remove any expired, broken, or unnecessary items, and consider rotating seasonal supplies to keep your kitchen organized and relevant to your current needs.
- 7. Finally, review and adjust your under-shelf basket system over time to ensure it continues to meet your evolving kitchen needs. As you become more comfortable with your new storage solution, you may find opportunities to further refine your workflow or identify additional areas where under-shelf baskets could enhance your kitchen’s functionality.
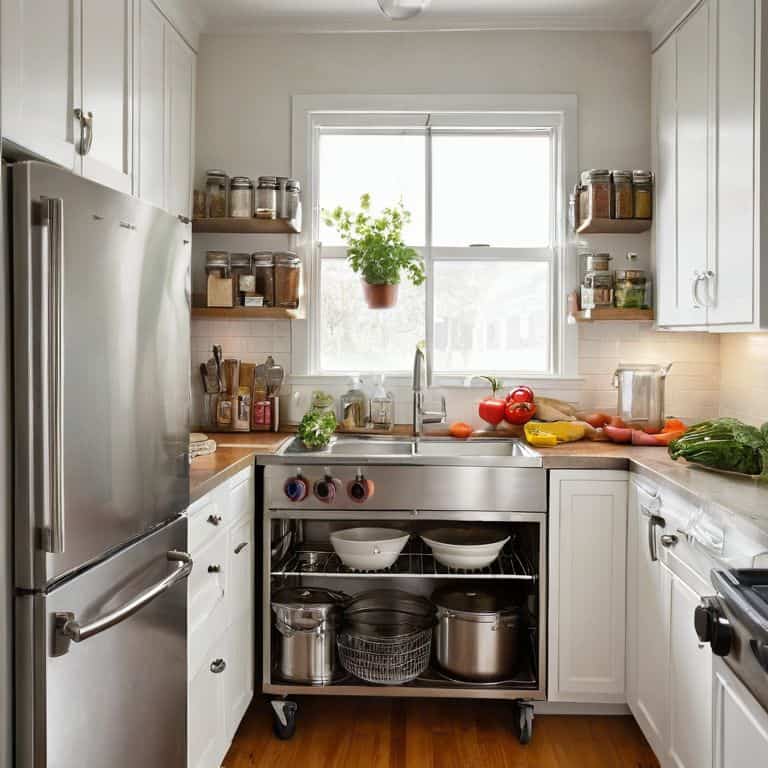
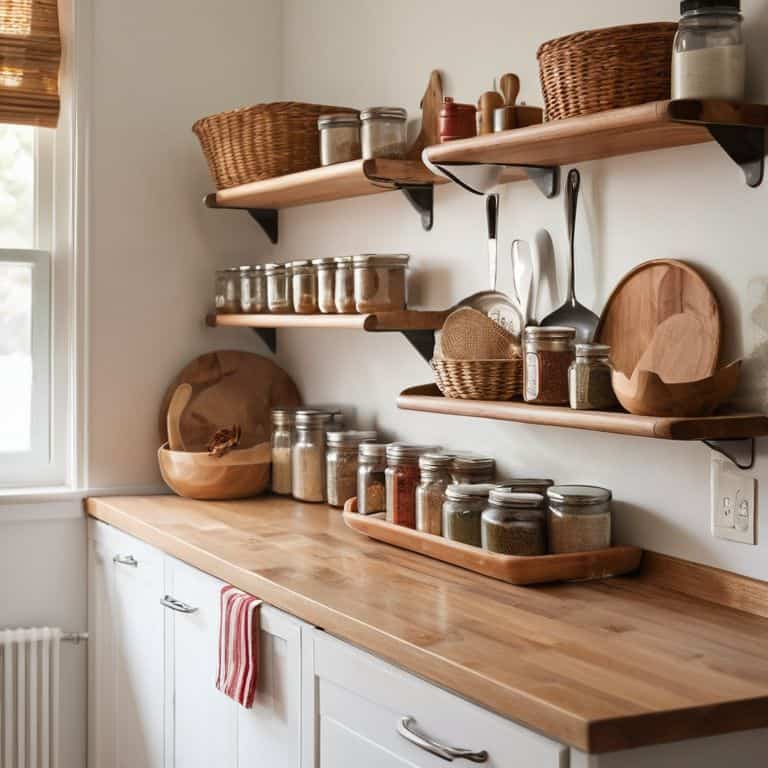
Turbocharge Storage

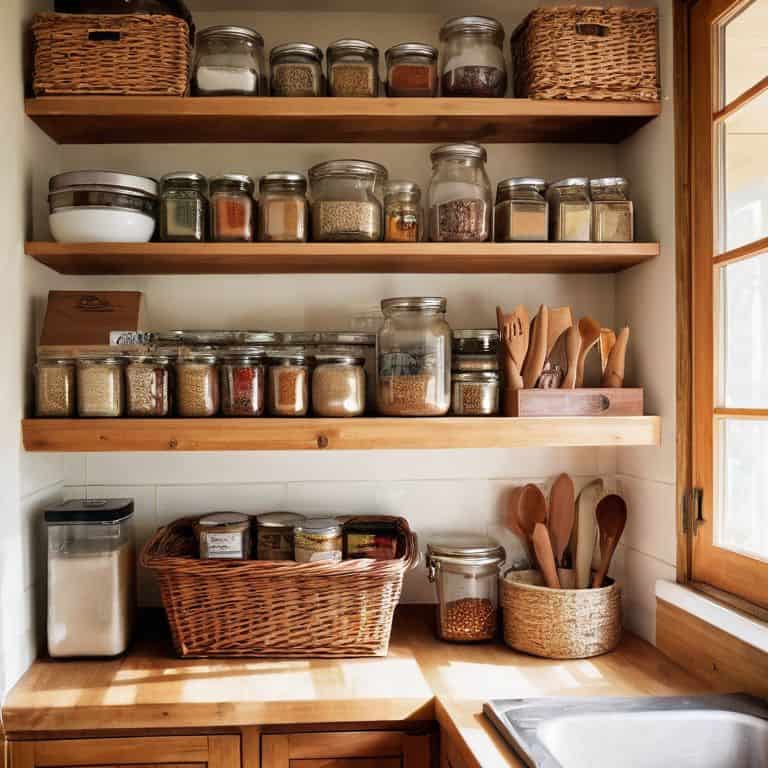
To turbocharge storage in your tiny kitchen, consider the often-overlooked areas beneath your shelves. Under shelf storage ideas can be a game-changer, providing a convenient spot for frequently used items like spices, oils, or cleaning supplies. By utilizing this space, you can free up valuable cabinet and counter real estate for more pressing needs.
When selecting storage solutions, look for customizable storage baskets that can be tailored to your specific needs. These can be especially useful in maximizing pantry space, where items of varying sizes and shapes often coexist. Adjustable shelf dividers can also help maintain order and prevent clutter from building up. By implementing these strategies, you can create a more efficient and streamlined kitchen workflow.
In addition to under-shelf storage, don’t forget to explore hidden storage solutions that can help keep your kitchen organized and clutter-free. This might include cleverly designed utensil holders or magnetic strips for spices and oils. By combining these approaches, you can create a kitchen that is both functional and visually appealing, with everything in its assigned place and a clear path for food preparation and cooking.
Customizable Bins for Kitchen Efficiency
To take your under-shelf storage to the next level, I recommend using customizable bins. These can be 3D printed or purchased to fit your specific needs, ensuring a snug fit under your shelves. By assigning a specific bin to each type of item, you can maintain a clutter-free environment and make the most of your space.
I’ve designed my own custom bins to store spices, oils, and cleaning supplies, keeping them organized and within easy reach. This simple addition has streamlined my kitchen workflow, saving me time and reducing stress. With customizable bins, you can create a tailored storage system that suits your unique cooking habits and preferences, making your tiny kitchen feel more efficient and functional.
Maximizing Space With Under Shelf Baskets
To truly maximize space, I like to think of under-shelf baskets as a “nested” storage solution. By installing them under existing shelves, you’re essentially creating a secondary layer of storage that doesn’t encroach on your main countertop or floor space. This is especially crucial in tiny kitchens, where every inch counts. I’ve found that using under-shelf baskets to store items like spices, oils, or cleaning supplies helps keep my countertops clear and my workflow optimized.
By leveraging this often-wasted space, you can free up more prominent storage areas for larger or more frequently used items, creating a more efficient kitchen ecosystem. It’s all about creating a logical hierarchy of storage, where everything has its designated place and purpose.
5 Essential Tips for Under-Shelf Basket Storage
- Measure Your Space: Before purchasing under-shelf baskets, take precise measurements of your kitchen’s shelves and counters to ensure a perfect fit
- Choose the Right Material: Select baskets made from durable, easy-to-clean materials that fit your kitchen’s style, such as stainless steel, wood, or plastic
- Optimize Basket Placement: Position under-shelf baskets in high-traffic areas, like near food preparation stations, to maximize efficiency and reduce clutter
- Assign a Home for Each Item: Use under-shelf baskets to categorize and store specific kitchen essentials, like spices, oils, or cleaning supplies, making them easy to find and access
- Maintain Your System: Schedule regular clean-outs and reorganizations of your under-shelf baskets to prevent clutter buildup and maintain your kitchen’s optimized workflow
Key Takeaways for Tiny Kitchen Storage
I’ve found that under-shelf baskets can increase storage capacity by up to 30% in tiny kitchens, making them a game-changer for small-space cooking
By implementing customizable bins and maximizing vertical space, you can create a kitchen workflow that’s not only efficient but also highly personalized to your cooking habits
Remember, the key to turbocharging your tiny kitchen’s storage is to focus on functional design and precision placement – every item should have a designated spot and serve a purpose to minimize clutter and optimize your cooking experience
Unlocking Hidden Potential
The key to a functional tiny kitchen lies not in the size of the space, but in the efficiency of its design – and under-shelf baskets are the unsung heroes of maximizing every inch.
Leo Vance
Conclusion: Unlocking Your Kitchen's Full Potential
As we’ve explored in this guide, under-shelf baskets are a simple yet powerful tool for maximizing storage in tiny kitchens. By following the step-by-step instructions and implementing the Turbocharge Storage and Customizable Bins for Kitchen Efficiency strategies, you can significantly increase your kitchen’s functionality. Remember, the key to making the most of under-shelf baskets is to assess your specific needs and choose the right size, material, and design for your space. With a little creativity and planning, you can turn even the most cramped kitchen into a highly efficient cooking zone.
As you start to implement these under-shelf basket solutions, I encourage you to think about the bigger picture: how can you apply the principles of workflow optimization and minimalism to other areas of your life? By embracing this mindset, you’ll not only create a more functional kitchen, but also cultivate a sense of clarity and focus that can benefit you in countless ways. So, go ahead, get creative, and watch your tiny kitchen transform into a thriving hub of culinary innovation and joy!
Frequently Asked Questions
What are the most common sizes for under-shelf baskets and how do I choose the right one for my kitchen?
When it comes to under-shelf baskets, I’ve found that the most common sizes range from 6 to 12 inches in width. To choose the right one, measure your shelf and consider the items you’ll store. I like to use a tape measure and jot down the dimensions to ensure a perfect fit.
Can under-shelf baskets be installed on any type of shelf, or are there specific requirements for the shelf material or design?
When it comes to installing under-shelf baskets, the shelf material and design do matter. Most baskets work best with solid, sturdy shelves made of wood, metal, or glass. Avoid installing them on flimsy or thin shelves, as they may not support the weight. Additionally, shelves with a lip or edge work better, as they prevent the baskets from sliding off.
How do I keep my under-shelf baskets organized and prevent them from becoming cluttered over time?
To keep my under-shelf baskets organized, I use a simple trick: assigning a specific category to each basket and implementing a ‘one in, one out’ policy. This ensures they don’t become cluttered over time. I also label each basket, so I can easily find what I need and maintain my kitchen’s workflow efficiency.