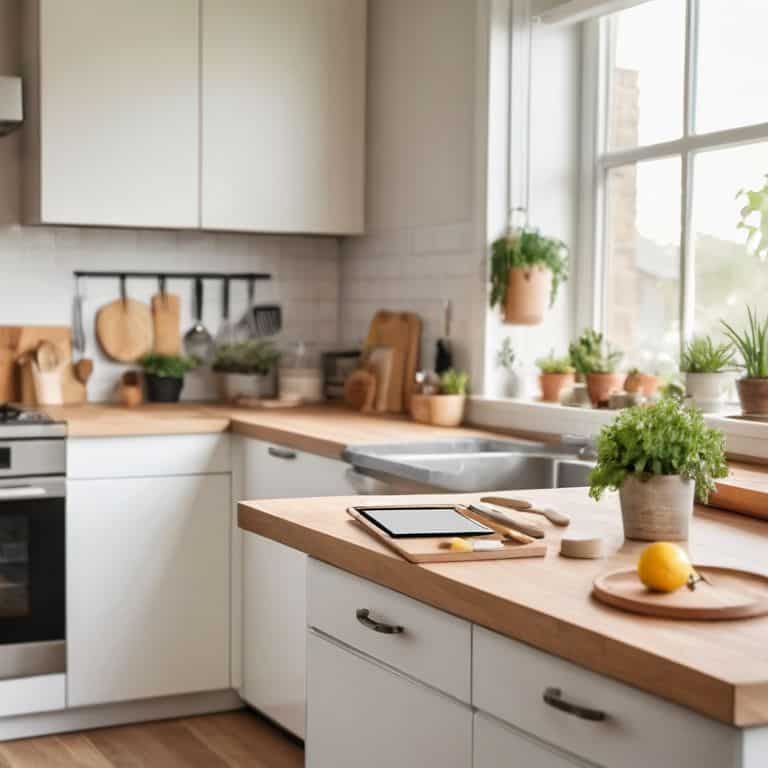
I still remember the day I realized that how to arrange your kitchen for a better workflow wasn’t just about throwing some fancy gadgets and tools into the mix. I was living in a tiny apartment, struggling to cook a decent meal without wanting to pull my hair out. The kitchen was cluttered, and every movement felt like a chore. That’s when I decided to apply my engineering background to the problem, and let me tell you, it’s been a game-changer. I started analyzing my workflow, mapping out every step of my cooking process, and identifying areas where I could optimize my movements.
In this article, I’ll share my no-nonsense approach to arranging your kitchen for a better workflow. You’ll learn how to create a lean kitchen that works smarter, not harder. I’ll provide you with practical, step-by-step advice on how to streamline your cooking process, from meal prep to cleanup. My goal is to empower you with the knowledge to transform your kitchen into a highly efficient space, regardless of its size. By the end of this guide, you’ll be equipped with the tools and expertise to tackle even the most daunting cooking tasks with ease and confidence.
Table of Contents
Guide Overview: What You'll Need
Total Time: 2 hours 30 minutes
Estimated Cost: $50 – $100
Difficulty Level: Intermediate
Tools Required
- Tape Measure for measuring kitchen dimensions
- Level to ensure straight alignments
- Pencil and Paper for planning and sketching the layout
Supplies & Materials
- Shelves or Storage Units to optimize kitchen storage
- 2-in x 4-in lumber for potential custom shelving
- Adhesive Hooks for hanging utensils or accessories
Step-by-Step Instructions
- 1. First, let’s start by purging your kitchen of any unnecessary items that can hinder your workflow. Go through your cabinets, drawers, and countertops, and get rid of any gadgets, appliances, or dishes that you haven’t used in the past year. This will help you declutter your space and focus on the essentials.
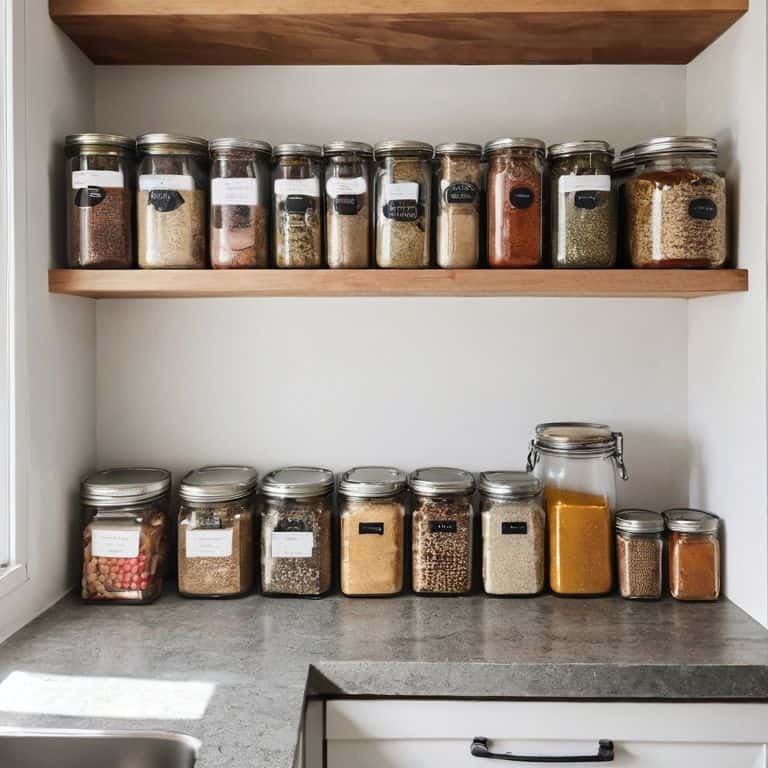
- 2. Next, categorize your kitchen items into zones, such as baking, cooking, and food preparation. This will help you group similar items together and create a more efficient workflow. For example, you can store all your baking supplies, such as flour, sugar, and baking powder, in one area, and your cooking utensils, such as pots, pans, and utensils, in another.
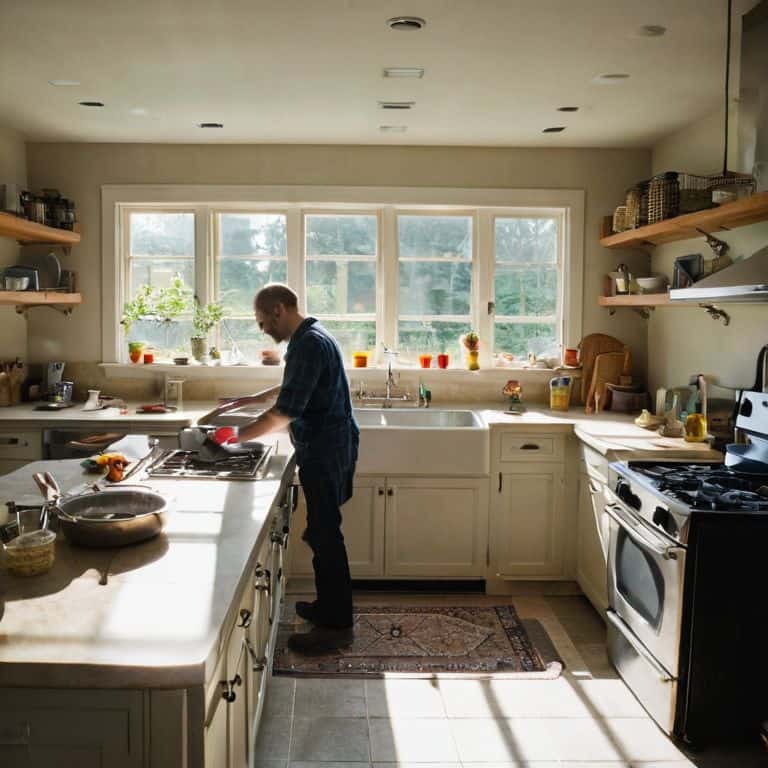
- 3. Now, let’s talk about the work triangle. This is the area between your sink, stove, and refrigerator, and it’s where most of the action happens in the kitchen. To optimize your workflow, try to position your most frequently used items, such as your coffee maker or toaster, within this triangle. This will help reduce walking distances and make your kitchen feel more efficient.
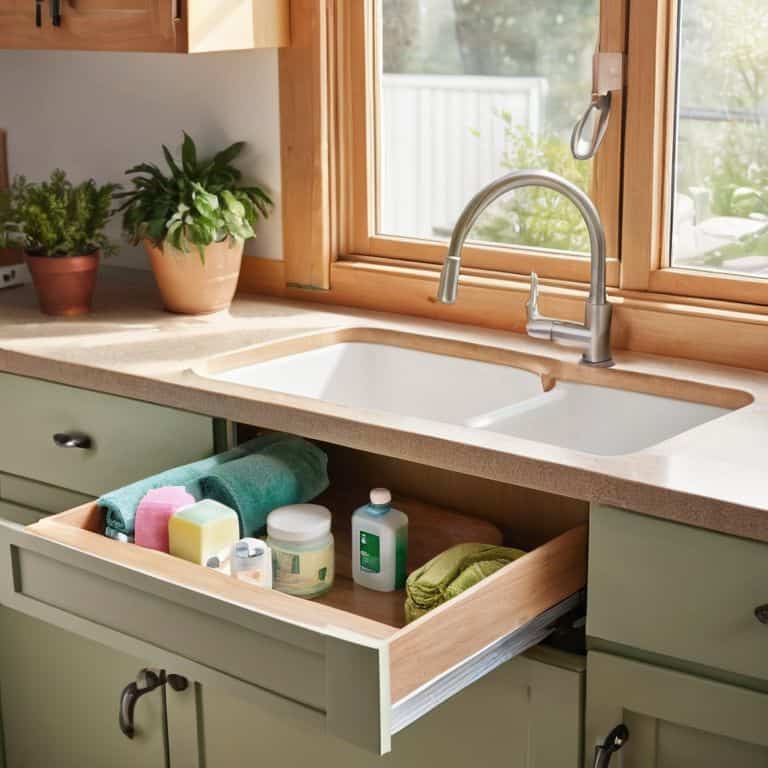
- 4. The next step is to optimize your storage. This means using your cabinets, drawers, and shelves to store items in a way that makes sense for your workflow. For example, you can store your heavy pots and pans in a lower cabinet or on a easy-to-reach shelf, and your lighter items, such as spices or oils, in a higher cabinet or on a harder-to-reach shelf.
- 5. Now, let’s focus on creating a landing strip for your kitchen. This is a designated area, usually near the entrance of the kitchen, where you can place your keys, wallet, and other items that you need to access quickly. This will help keep your countertops clear and create a sense of flow in the kitchen.
- 6. The sixth step is to designate a cleaning station. This is an area of the kitchen where you can store your cleaning supplies, such as soap, sponges, and trash bags, and quickly clean up spills or messes. This will help keep your kitchen clean and make it easier to maintain.
- 7. Finally, let’s talk about implementing a maintenance routine. This means setting aside time each week to clean and maintain your kitchen, and making sure that everything is in its place. This will help keep your kitchen running smoothly and prevent clutter from building up. By following these steps, you can create a kitchen workflow that is efficient and effective, and makes cooking and cleaning a breeze.
Solving Kitchen Workflow
When it comes to kitchen layout design principles, I always stress the importance of creating a functional workflow. This means considering the path you take when preparing meals, from fetching ingredients to cooking and cleaning up. By analyzing your movements and identifying areas of inefficiency, you can make targeted changes to streamline your process. For instance, placing frequently used utensils and appliances in easy-to-reach locations can save you a significant amount of time in the long run.
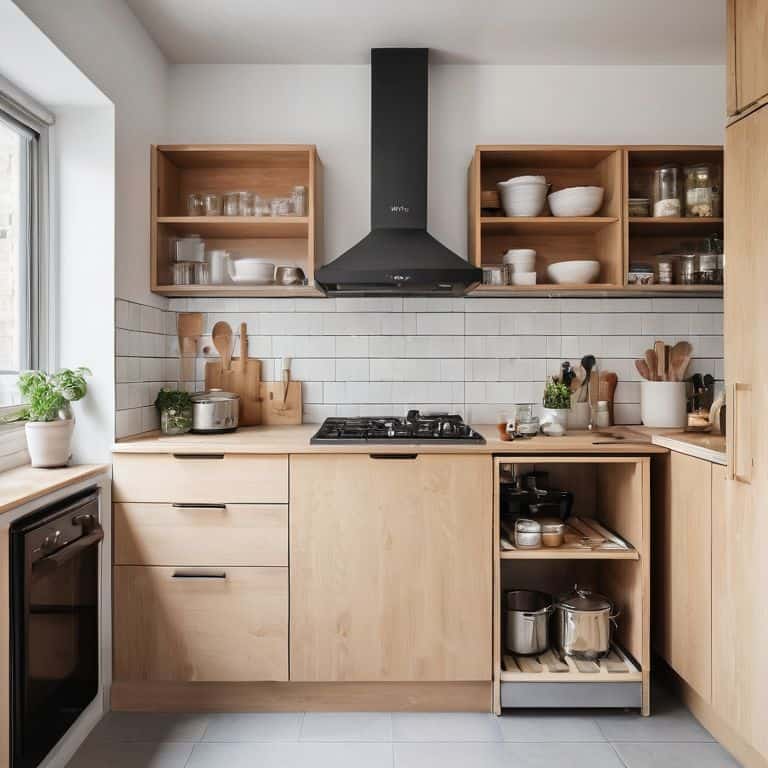
To take your workstation organization to the next level, consider implementing optimal cabinet storage solutions. This might involve using dividers, baskets, or other organizers to maximize your cabinet space and keep essentials within easy reach. By doing so, you can reduce clutter and minimize the time spent searching for items, allowing you to focus on the task at hand. Additionally, countertop space management tips can help you maintain a clean and clear surface, further enhancing your overall workflow.
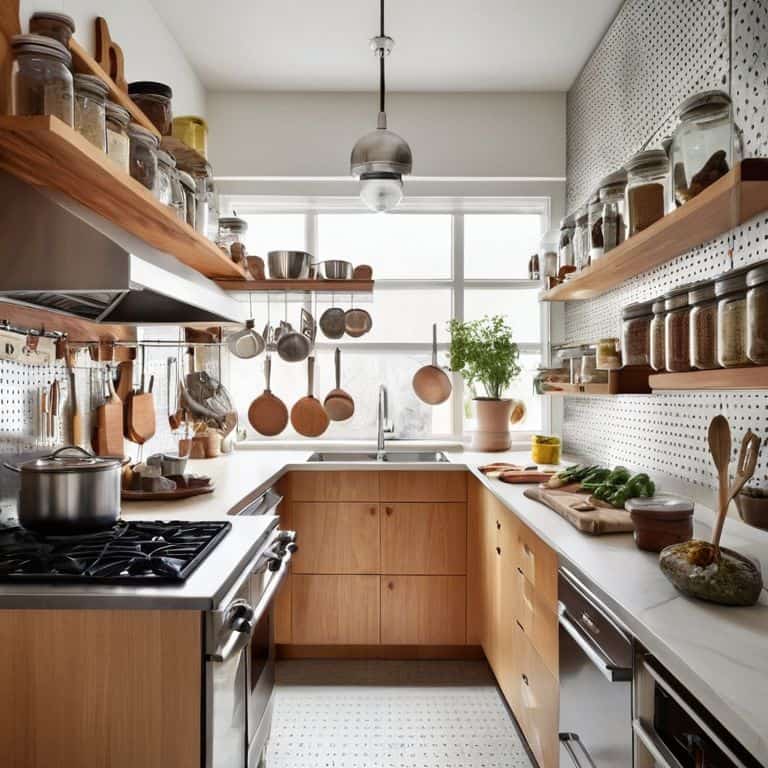
In small kitchens, every inch counts, and efficient appliance placement strategies can make a huge difference. By strategically positioning your appliances, you can create a more fluid workflow and reduce congestion in high-traffic areas. For example, placing your coffee maker or toaster near the edge of the countertop can help keep the central area clear, making it easier to move around and prepare meals.
Designing Smart Kitchen Layouts
To create a smart kitchen layout, I apply the same principles I use in my 3D printing and minimalist backpacking hobbies – maximizing space and minimizing waste. In my own tiny kitchen, I’ve implemented a “work triangle” concept, where the sink, stove, and refrigerator form the points of a triangle. This design allows for efficient movement between tasks, reducing walking distance and increasing productivity. By analyzing your kitchen’s unique dimensions and work patterns, you can create a customized layout that streamlines your cooking process.
I like to think of it as a “time and motion” study for your kitchen. By mapping out your most frequent tasks and movements, you can identify areas for improvement and optimize your layout accordingly. This might involve rearranging your cabinets, installing a pot lid organizer, or even designing a custom kitchen cart to fill a specific workflow gap. The key is to create a logical, efficient flow that makes cooking easier and more enjoyable.
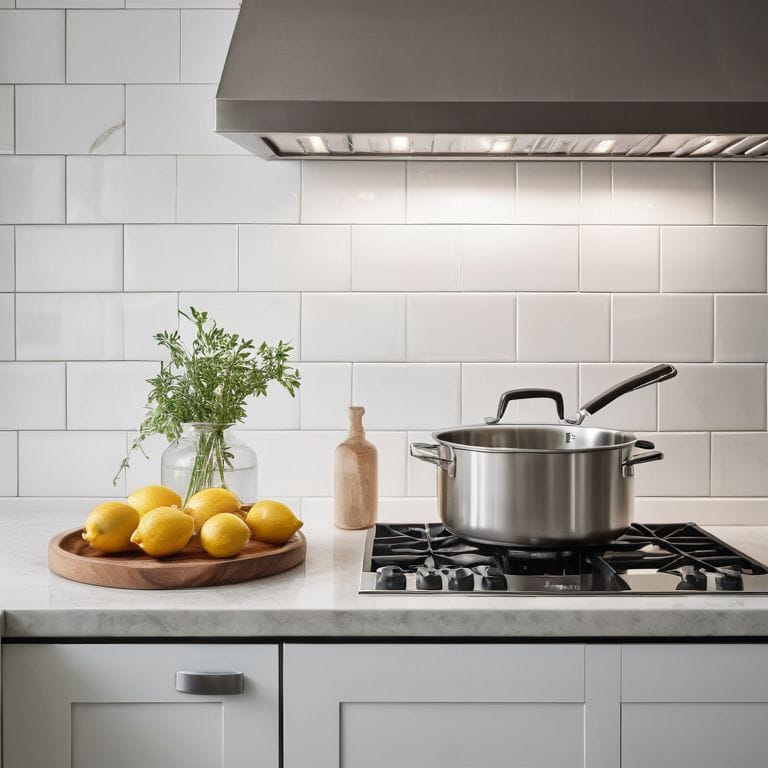
Optimizing Countertop Space
To optimize countertop space, I apply the same principles I use when designing custom 3D-printed kitchen organizers. It’s all about assigning a home for each item and ensuring that every movement has a purpose. I categorize my countertop tools into three zones: high-use, medium-use, and low-use. The high-use zone is typically near my cooking station, where I place frequently used items like my chef’s knife and cutting board. By doing so, I minimize walking distances and reduce clutter, allowing for a more streamlined workflow.
By implementing this zoning system, I’ve significantly reduced clutter and increased efficiency in my tiny kitchen. It’s amazing how such a simple tweak can make a huge difference in cooking productivity. Now, every item on my countertop has a designated spot, and I can focus on what really matters – cooking up a storm in my tiny but mighty kitchen.
5 Workflow Wins: Tips to Tame Your Tiny Kitchen
- Start with a ‘clean slate’ by clearing everything off your countertops and sorting items into categories to reveal what you really need within arm’s reach
- Designate ‘work zones’ for specific tasks like food prep, cooking, and cleaning to minimize cross-traffic and maximize efficiency
- Implement a ‘home for everything’ philosophy, assigning a designated spot for each kitchen tool and ingredient to reduce time spent searching
- Optimize your cabinet and drawer space with custom organizers or dividers to keep frequently used items front and center
- Create a ‘workflow loop’ by positioning your most-used appliances and tools in a logical sequence to streamline meal prep and cleanup
Key Takeaways for a Smarter Kitchen
By applying workflow optimization principles, you can turn even the smallest kitchen into a highly efficient cooking space
Designing smart kitchen layouts and optimizing countertop space are crucial steps in creating a lean, mean cooking machine
Implementing clever storage solutions and streamlining your kitchen movements can significantly reduce cooking time and stress, making the most of your tiny kitchen
Workflow Wisdom
A tiny kitchen isn’t about sacrificing functionality, it’s about amplifying intention – every tool, every ingredient, and every movement should serve a purpose, and that’s where the magic of workflow optimization begins.
Leo Vance
Streamlining Your Kitchen: The Final Touches
As we’ve explored the world of kitchen workflow optimization, it’s clear that creating a functional tiny kitchen requires a combination of clever design, strategic planning, and a willingness to rethink traditional kitchen layouts. From solving kitchen workflow challenges to designing smart kitchen layouts and optimizing countertop space, every step has been geared towards helping you turn your kitchen into a lean, mean cooking machine. By applying these principles, you’ll be able to move with ease, find what you need when you need it, and ultimately, cook smarter, not harder.
So, as you put the finishing touches on your kitchen makeover, remember that the true power of a well-designed space lies not just in its aesthetics, but in the efficiency and freedom it brings to your daily routine. With your newfound knowledge of kitchen workflow optimization, you’ll be empowered to take on any culinary challenge that comes your way, and that’s a truly liberating feeling.
Frequently Asked Questions
How can I determine the most efficient layout for my kitchen given its unique dimensions and constraints?
To determine the most efficient layout, I recommend creating a scale drawing of your kitchen, including doors, windows, and fixtures. Then, map out your typical workflow, identifying high-traffic areas and frequently used zones. This will help you visualize and optimize the space, ensuring a logical and efficient layout tailored to your unique kitchen dimensions.
What are some strategies for optimizing workflow in a kitchen with limited countertop space?
To optimize workflow in a kitchen with limited countertop space, I recommend the ‘zone defense’ approach. Divide your countertop into zones for specific tasks, like food prep or cooking. Use wall-mounted tools and a cart or island to expand your workspace, keeping essentials within easy reach. This will help you cook smarter, not harder, even in the tightest spaces.
Are there any specific 'time and motion' studies or workflow analysis techniques that can be applied to a home kitchen to improve efficiency?
I’m a big fan of applying ‘time and motion’ studies to kitchen workflow. Techniques like the ‘work triangle’ and ‘zone cooking’ can be super effective. I also use a ‘swimlane’ diagram to map out my kitchen tasks and identify bottlenecks. By analyzing your movements and optimizing your workflow, you can save time and reduce stress in the kitchen.