I still remember the frustration of throwing away expired yogurt and moldy leftovers from my tiny fridge. It was a food graveyard, and I knew I had to tackle the problem of how to organize your fridge to reduce food spoilage. As a systems engineer, I saw this as a fascinating design challenge. I applied the same principles of workflow and efficiency that I use in my work to my own kitchen, and the results were astounding. By streamlining my fridge’s layout and implementing a few simple strategies, I was able to maximize storage and keep my food fresh for longer.
In this article, I’ll share my personal approach to how to organize your fridge to reduce food spoilage, including the step-by-step guide to optimizing your fridge’s layout and the top tips for maintaining a clutter-free and efficient food storage system. You’ll learn how to prioritize your food items, utilize vertical space, and implement a “first-in, first-out” policy to minimize waste. By the end of this guide, you’ll be equipped with the knowledge and skills to transform your fridge into a well-oiled machine, saving you time, money, and reducing food waste in the process.
Table of Contents
Guide Overview: What You'll Need

Total Time: 1 hour 15 minutes
Estimated Cost: $20 – $40
Difficulty Level: Easy
Tools Required
- Measuring Tape (for measuring fridge shelves)
- Label Maker (for labeling containers)
- Cleaning Supplies (for cleaning fridge surfaces)
Supplies & Materials
- Stackable Containers (for storing food)
- Adjustable Shelves (for customizing fridge layout)
- Fridge Organizers (such as baskets or bins)
- Magnetic Whiteboard (for tracking expiration dates)
- Markers (for writing on whiteboard)
Step-by-Step Instructions
- 1. First, let’s start with the basics: purging your fridge of all expired, spoiled, or unused items. This step is crucial in reducing food waste and creating a clean slate for your organization system. Take everything out of your fridge and sort items into three categories: keep, donate, and discard.
- 2. Next, clean and sanitize your fridge to prevent any lingering bacteria or odors from affecting your newly organized space. Mix a solution of equal parts water and white vinegar in a spray bottle, and use it to wipe down all shelves, walls, and compartments. This will ensure a fresh start for your organized fridge.
- 3. Now, it’s time to categorize and group similar items together. This could include dairy products, meats, fruits, vegetables, and condiments. By grouping similar items, you’ll be able to see what you have, avoid duplicates, and make the most of your fridge’s storage capacity. Consider using stackable containers to store items like yogurt, cheese, or eggs.
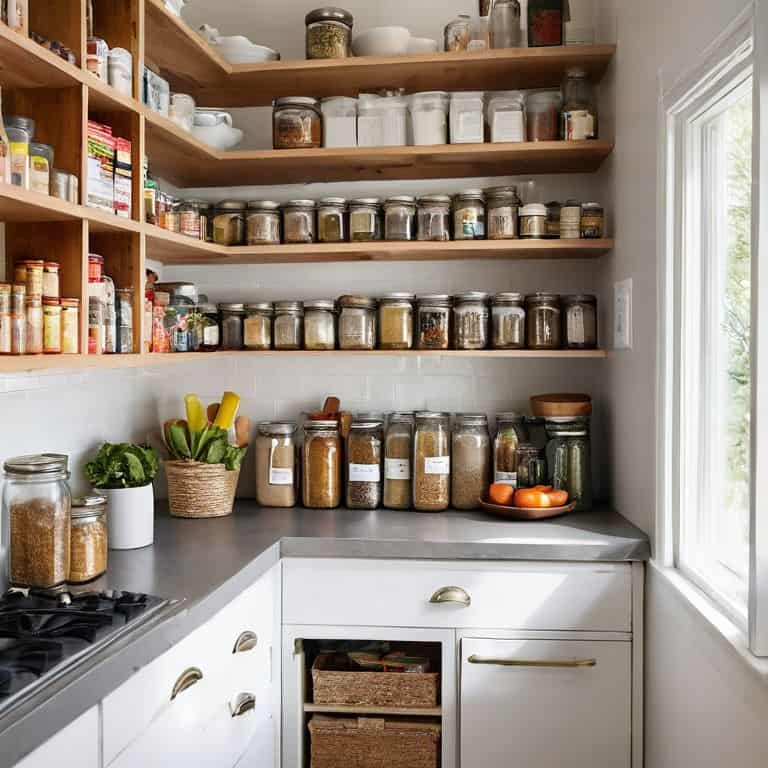
- 4. To maximize your fridge’s vertical space, consider investing in a set of adjustable shelves or a fridge organizer system. These can help you customize your storage to fit your specific needs and keep items off the floor, making the most of your fridge’s vertical real estate. Measure your fridge’s dimensions carefully before purchasing any storage solutions to ensure a proper fit.
- 5. Once you have your shelves and storage solutions in place, it’s time to assign a home for each item in your fridge. This means designating a specific shelf or container for each category of food, and making sure that everything has a labeled and easily accessible spot. This will help you maintain your organized system and prevent clutter from building up in the future.
- 6. To prevent food from getting lost in the back of the fridge and spoiling, implement a “first in, first out” policy for perishable items. This means that older items should be placed at the front of the shelf, while newer items are stored behind them. You can also use expiration date labels to keep track of how long items have been in the fridge and ensure that they’re consumed before they go bad.
- 7. Finally, establish a regular maintenance routine to keep your fridge organized and clutter-free. Set aside some time each week to check expiration dates, wipe down shelves, and tidy up any messy areas. By making organization a habit, you’ll be able to enjoy the benefits of a streamlined fridge and reduce food waste for the long haul.
Optimizing Fridge Space
When it comes to optimizing fridge space, I’m all about creating a system that works for you, not against you. One of my favorite hacks is using fridge storage containers to keep items like leftovers, condiments, and snacks organized and easily accessible. By assigning a home for each type of food, you can prevent clutter from building up and make the most of your fridge’s limited real estate.
To take your fridge organization to the next level, consider implementing a food expiration date tracking system. This can be as simple as using a whiteboard or sticky notes to keep track of when items were opened or stored. By keeping tabs on what’s nearing its expiration date, you can plan your meals and snacks accordingly and reduce the likelihood of food going to waste. I also recommend setting your fridge to optimal fridge temperature settings to ensure that your food stays fresh for as long as possible.
By combining these strategies with regular fridge cleaning and maintenance, you can create a kitchen workflow that’s both efficient and effective. Remember, the key to shelf life extension techniques is to be intentional about how you store and manage your food. By taking a few extra minutes each week to tidy up and plan ahead, you can save time and money in the long run and enjoy a more streamlined cooking experience.
Mastering Fridge Storage Containers
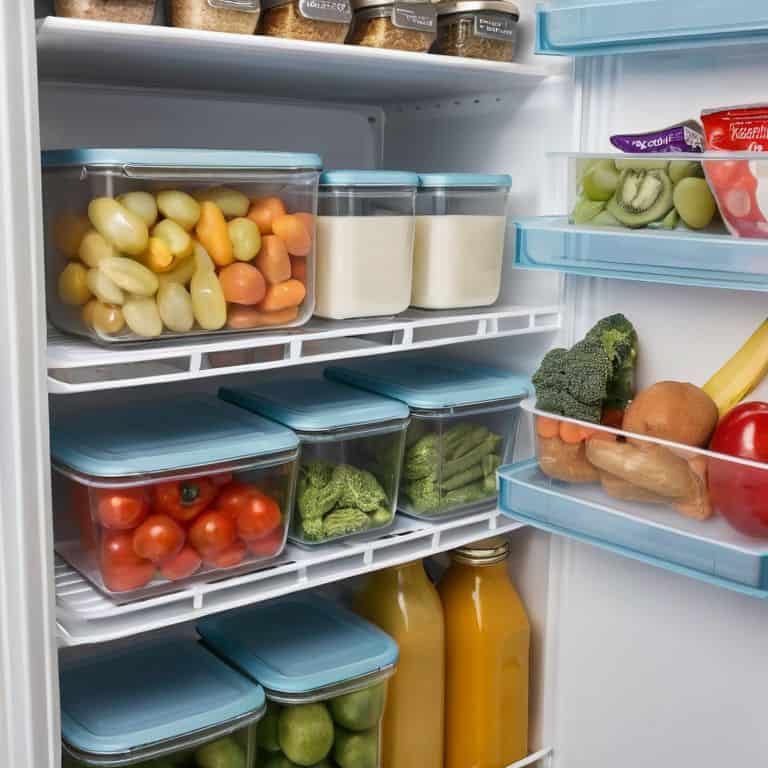
To truly maximize fridge space, I rely on a carefully curated set of storage containers. These aren’t just any containers, but ones designed with a purpose – to keep items fresh, visible, and easily accessible. I’ve found that using stackable, BPA-free containers with tight-fitting lids is essential for maintaining a clutter-free fridge. By assigning a specific container to each type of food, such as dairy, meats, or leftovers, I can quickly identify what’s inside and ensure everything has its designated spot.
This approach may seem meticulous, but trust me, it’s a game-changer. By standardizing my containers, I can easily swap out expired or spoiled items, reducing waste and keeping my fridge organized. Plus, the uniform size and shape make the most of the fridge’s vertical space, allowing me to store more items without sacrificing visibility or accessibility.
Tracking Expiration Dates
To take my fridge organization to the next level, I implemented a simple yet effective expiration date tracking system. I use a combination of labels and a whiteboard to keep tabs on what’s approaching its expiry date. This way, I can plan my meals around the items that are nearing the end of their shelf life, reducing waste and ensuring everything gets used.
I’ve found that this system not only helps me stay on top of expiration dates but also informs my grocery shopping, allowing me to avoid buying duplicates of items I already have at home. By streamlining my fridge’s contents and keeping track of what needs to be used soon, I’ve significantly reduced food waste and made the most of my limited storage space.
5 Crucial Hacks to Tame the Fridge Beast
- Designate a ‘Eat Me First’ Zone: Set aside a shelf or bin for items nearing expiration to ensure they get used before they go bad
- Implement a ‘First In, First Out’ Policy: Store new items behind older ones to maintain a natural rotation and reduce waste
- Utilize Vertical Space with Adapters: Max out your fridge’s capacity with stackable containers, baskets, or shelves to keep items organized and easy to find
- Label and Date Everything: Use a label maker to identify contents and expiration dates, making it easier to keep track of what’s inside and what needs to be used soon
- Schedule Regular Fridge Audits: Set a reminder to regularly clean out expired or spoiled items, and reorganize your fridge to maintain optimal storage and minimize waste
Key Takeaways for a More Efficient Fridge
I’ve implemented a ‘first-in, first-out’ system using my custom 3D printed storage containers to ensure older items are consumed before they expire, reducing waste and saving me money
By applying the principles of workflow optimization to my fridge organization, I’ve streamlined my meal prep and reduced the time spent searching for ingredients, making cooking a more enjoyable experience
Through meticulous tracking of expiration dates and strategic placement of frequently used items, I’ve minimized food spoilage and maximized the storage capacity of my fridge, proving that even the smallest of kitchens can be incredibly efficient
The Fridge Optimization Mantra
A well-organized fridge is not just about storing food, it’s about creating a system that respects the shelf life of each ingredient, minimizing waste and maximizing the potential of every meal.
Leo Vance
Putting it all Together: A More Efficient Fridge
As we’ve gone through the steps to organize your fridge and reduce food spoilage, it’s clear that optimizing fridge space is key. From using the right storage containers to tracking expiration dates, each element plays a crucial role in creating a system that works for you, not against you. By implementing these strategies, you’ll be able to find what you need when you need it, and more importantly, ensure that your food remains fresh for a longer period. This isn’t just about organization; it’s about maximizing the potential of your fridge and making the most of the space you have.
In the end, it’s all about creating a workflow that works. Your fridge shouldn’t be a source of stress or a place where good food goes to waste. By applying the principles outlined here, you can turn it into a highly efficient tool that supports your cooking habits and helps you save time and money. Remember, the goal is to make your tiny kitchen – and by extension, your life – easier to manage. So, take a deep breath, apply these tips, and watch how your relationship with your fridge transforms from one of frustration to one of harmony and productivity.
Frequently Asked Questions
How often should I clean and purge my fridge to maintain optimal organization and reduce spoilage?
I clean and purge my fridge every two weeks, just before grocery shopping. This ensures I’m using up leftovers and making space for new ingredients. I also do a deep clean every 3 months, tossing expired items and scrubbing shelves. This routine keeps my fridge organized, reduces waste, and saves me time in the long run.
What types of foods should be stored in the fridge's high-humidity drawers to maximize freshness?
For maximum freshness, I store high-moisture foods like leafy greens, carrots, and berries in the fridge’s high-humidity drawers. These drawers maintain a consistent humidity level, keeping these items crisp and fresh for a longer period. It’s all about creating the right environment for each food type to thrive.
Can I use DIY storage solutions, such as 3D printed containers, to optimize my fridge space and keep costs down?
I’m a big fan of DIY solutions, especially 3D printing. In fact, I’ve designed and printed my own custom fridge containers to maximize space. Not only can they be tailored to specific items, but they’re also cost-effective and fun to create. Just ensure they’re food-grade and easy to clean to maintain fridge hygiene.