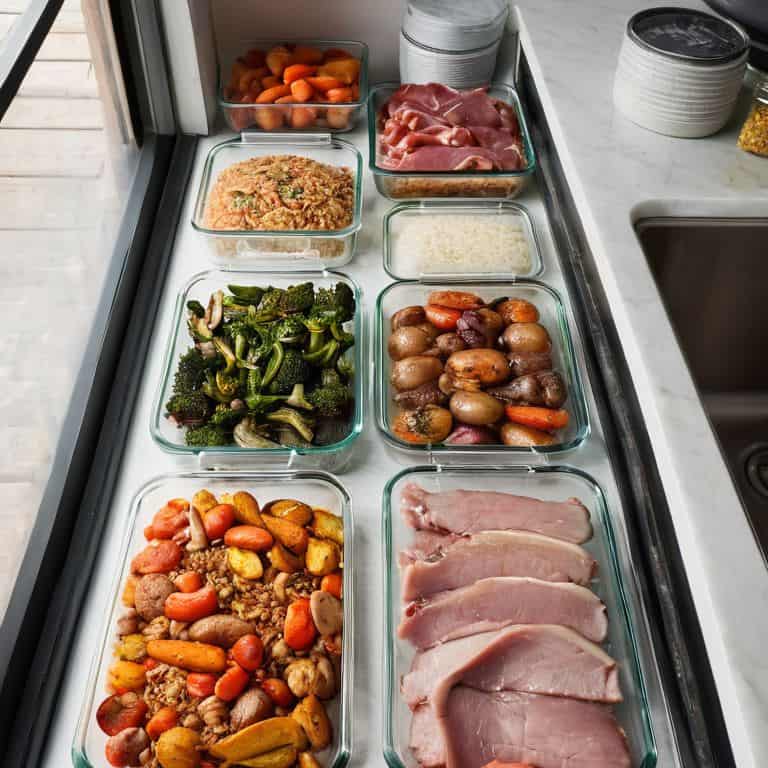
I still remember the frustration of rummaging through my tiny kitchen, only to find last night’s dinner had turned into a science experiment. It was then that I realized the importance of how to properly store leftover food to reduce waste. The common myth that we need a huge kitchen to store leftovers efficiently is simply not true. In fact, with a few clever tricks and a focus on workflow optimization, even the smallest of kitchens can become a model of efficiency.
In this article, I’ll share my personal strategies for storing leftovers like a pro, gleaned from years of experimenting in my own tiny kitchen. You’ll learn the best practices for using airtight containers, labeling, and organizing your fridge to maximize space and minimize waste. I’ll cut through the clutter and give you straightforward, no-nonsense advice on how to make the most of your kitchen, no matter its size. By the end of this guide, you’ll be equipped with the knowledge to transform your kitchen into a lean, mean, cooking machine, and make how to properly store leftover food to reduce waste a breeze.
Table of Contents
Guide Overview: What You'll Need
Total Time: 30 minutes to 1 hour
Estimated Cost: $10 – $20
Difficulty Level: Easy
Tools Required
- Airtight Containers various sizes
- Labels for dating and identifying contents
Supplies & Materials
- Plastic Wrap for covering bowls or dishes
- Aluminum Foil for wrapping food
- Ziplock Bags for storing small items like herbs or leftovers
Step-by-Step Instructions
- 1. First, let’s start by preparing your leftovers for storage – this means cooling them down to room temperature as quickly and safely as possible to prevent bacterial growth. I like to use a _shallow metal pan_ to speed up the cooling process, it’s a trick I learned from my days optimizing workflows in manufacturing plants.
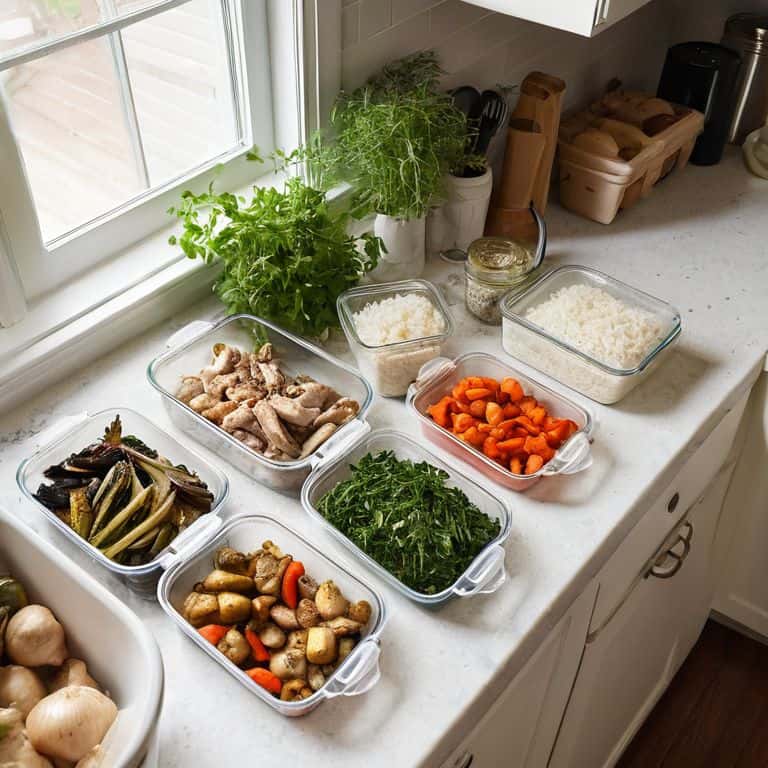
- 2. Next, you’ll want to choose the right containers for storing your leftovers. I’m a big fan of _airtight containers_ because they prevent moisture and other flavors from getting in and spoiling your food. Look for containers that are specifically designed for storing food, and make sure they’re _easy to clean_ and _stackable_ to save space in your tiny kitchen.
- 3. Now it’s time to label and date your containers. This might seem like a small step, but trust me, it’s a _game-changer_ for keeping track of what you have in the fridge and how long it’s been there. I use a _label maker_ to keep things organized and easy to read – it’s a small investment that pays off in the long run.
- 4. Once your containers are labeled and filled, it’s time to store them in the fridge. I like to use a _first-in, first-out_ system to ensure that older leftovers get used before they go bad. This means storing the newest leftovers behind the older ones, so they’re not as easily accessible.
- 5. To take your leftover storage to the next level, consider implementing a “leftover zone” in your fridge. This means designating a specific shelf or area for storing leftovers, and keeping it _organized and tidy_. I like to use _stackable shelves_ or _basket inserts_ to maximize space and keep everything visible.
- 6. Another key step in reducing waste is to plan your meals around your leftovers. Take some time each week to review what you have in the fridge and plan your meals accordingly. This might mean using last night’s roast chicken to make chicken salad for lunch, or turning last week’s vegetable soup into a hearty stew.
- 7. Finally, don’t forget to clean and maintain your containers on a regular basis. This means washing them in hot soapy water, and _sanitizing them_ with a mixture of water and vinegar. I like to _schedule this task_ into my weekly routine, so it becomes a habit and doesn’t get forgotten.
Mastering Leftover Storage

To take your leftover storage to the next level, it’s essential to consider reheating frozen meals safely. When reheating, make sure to check the food’s internal temperature to avoid foodborne illness. I like to use a food thermometer to ensure my meals are heated to a safe temperature. Additionally, best practices for labeling leftovers can help you keep track of what you have in the fridge or freezer, making it easier to plan meals and reduce waste.
Another crucial aspect of mastering leftover storage is understanding the shelf life of common leftovers. Different foods have varying shelf lives, and it’s essential to be aware of these to avoid spoilage. For example, cooked meats and poultry can be safely stored in the fridge for 3-4 days, while cooked vegetables can last up to 5 days. Using container sizes for food storage that are appropriate for the amount of food you’re storing can also help prevent waste and keep your fridge organized.
By following these tips and implementing a few simple strategies, such as reducing cross contamination in kitchens, you can create a more efficient and safe food storage system. I also like to use freezer organization tips, such as using bins and labels, to keep my freezer tidy and make it easier to find what I need. By taking the time to optimize your leftover storage, you can save time, reduce waste, and enjoy your meals with confidence.
Best Labeling Practices
To take your leftover storage to the next level, labeling is key. I use a simple, color-coded system to indicate the type of dish and the date it was cooked. This way, I can easily see what I have in the fridge or freezer and how long it’s been there. I also include reheating instructions, so I don’t have to guess whether something can be microwaved or needs to be oven-baked.
By implementing this labeling system, you’ll be able to quickly identify what you have on hand and plan your meals accordingly. It’s all about creating a workflow that works for you, even in a tiny kitchen. With labeled containers, you’ll save time and reduce food waste, making the most of your space and ingredients.
Reheating Frozen Meals Safely
When it’s time to reheat those frozen meals, safety is key. I’ve found that a simple labeling system helps me keep track of what’s been frozen for too long. To reheat, I use a combination of my microwave and toaster oven to ensure even heating. It’s all about minimizing hot spots that can lead to foodborne illness.
For example, when reheating a frozen soup, I’ll start by microwaving it for a minute or two, then finish it off in the toaster oven at 350°F for about 10 minutes, or until it’s steaming hot. This two-step process ensures my meal is not only delicious but also safe to eat.
5 Key Tips to Store Leftovers Like a Pro
- Use airtight containers to prevent moisture and air from getting in, keeping your leftovers fresh for longer
- Label each container with the date, contents, and any relevant reheating instructions to avoid mystery meals
- Store leftovers in a logical and accessible spot, like a designated shelf or bin, to streamline your kitchen workflow
- Freeze items like soups, casseroles, or individual portions of meals for later use, and consider using a ‘first-in, first-out’ system to ensure older items get used before they expire
- Implement a ‘leftover night’ into your meal planning, where you intentionally use up leftover ingredients to reduce waste and get creative with new recipes
Key Takeaways for a More Efficient Tiny Kitchen
Store leftovers in airtight containers and label them immediately to maintain a clutter-free kitchen and ensure you know what you have in stock
Implement a ‘first-in, first-out’ policy for your leftovers to avoid expired or spoiled food, reducing waste and saving you money
Designate a specific area in your tiny kitchen for leftover storage, such as a designated shelf or drawer, to optimize your workflow and make meal planning easier
The Key to a Waste-Free Kitchen
By treating leftover storage as a deliberate design problem, not a chaotic afterthought, we can transform our tiny kitchens into precision instruments of culinary efficiency, where every container, every label, and every reheated meal serves a purpose.
Leo Vance
Conclusion: Optimizing Your Leftover Storage
As we’ve explored throughout this guide, properly storing leftover food is an art that requires a combination of the right tools, techniques, and mindset. From mastering leftover storage to reheating frozen meals safely and implementing best labeling practices, each step plays a crucial role in reducing waste and making your tiny kitchen more efficient. By following these steps and adapting them to your unique kitchen workflow, you’ll not only save time and money but also contribute to a more sustainable food culture.
So, the next time you’re faced with last night’s leftovers, remember that you have the power to transform your kitchen into a well-oiled machine. With a little creativity and a lot of workflow optimization, you can turn what once seemed like a limitation into an opportunity for innovation and culinary exploration. Keep experimenting, keep optimizing, and most importantly, keep cooking – your tiny kitchen will thank you!
Frequently Asked Questions
How long can I safely store leftovers in the fridge before they go bad?
For most leftovers, the fridge safe zone is 3 to 4 days. I like to use the ‘First In, First Out’ rule to ensure older items get consumed before they go bad. Just remember, if it looks or smells off, it’s best to err on the side of caution and toss it – better safe than sorry in your tiny kitchen!
Can I freeze any type of leftover food, or are there certain foods that don't freeze well?
Not all leftovers are created equal when it comes to freezing. As a general rule, high-fat foods like cooked meats and oily fish freeze well, while high-water foods like cucumbers and lettuce don’t. I’ve found that cooked pasta, rice, and soups are also great candidates for freezing, but it’s best to avoid freezing dairy-based sauces or mayonnaise-based dishes as they can separate or become watery.
What are some creative ways to reuse leftover containers to reduce waste in my tiny kitchen?
I love repurposing leftover containers – it’s a great way to reduce waste in tiny kitchens. Try using old jars for spice storage or as a DIY utensil holder. You can also transform plastic containers into mini herb gardens or use them to store kitchen utensils, keeping your countertops clutter-free and your workflow optimized.