I still remember the day I realized that how to organize a small pantry wasn’t about throwing a bunch of storage solutions at the problem, but about creating a _workflow_ that actually made sense. I was living in a tiny apartment, with a kitchen that could barely fit a toaster, let alone a pantry. But I was determined to make it work, and I spent hours studying the layout, trying to figure out the most efficient way to store my food and cookware. It wasn’t easy, but the end result was worth it: a kitchen that was not only functional, but actually _enjoyable_ to cook in.
In this article, I’ll share my hard-won knowledge with you, and give you the practical advice you need to turn your own small pantry into a culinary command center. We’ll cover everything from _optimizing shelf space_ to streamlining your storage, and I’ll show you how to create a system that works for you, not against you. Whether you’re a busy professional or a culinary enthusiast, I’ll give you the tools you need to make the most of your small pantry, and start cooking with confidence. So let’s get started, and turn that tiny pantry of yours into a _recipe for success_!
Table of Contents
Guide Overview: What You'll Need

Total Time: 1 hour 45 minutes
Estimated Cost: $20 – $40
Difficulty Level: Easy
Tools Required
- Tape Measure (for measuring shelves)
- Level (for ensuring even installation)
- Drill (with screwdriver and drill bits)
- Pencil (for marking walls and shelves)
- Step Stool (for reaching high shelves)
Supplies & Materials
- Shelf Liners (for protecting shelves from spills)
- Stackable Containers (for storing dry goods)
- Adjustable Shelves (for customizing storage space)
- Label Maker (for labeling containers and shelves)
- 2-in x 4-in Lumber (for building custom shelves, if needed)
Step-by-Step Instructions
- 1. First, let’s purge the pantry by taking everything out and sorting items into three categories: keep, donate/sell, and discard. This is a crucial step in understanding what you have, what you need, and what’s just taking up valuable space. Be ruthless – if you haven’t used it in the past year, it’s probably safe to get rid of it.
- 2. Next, give the pantry a good _deep clean_ to remove any dust, dirt, or pests that may have made themselves at home. This will give you a fresh start and help you _optimize your storage_ solutions. Use a gentle cleaner and a soft brush to get into any tight spaces or corners.
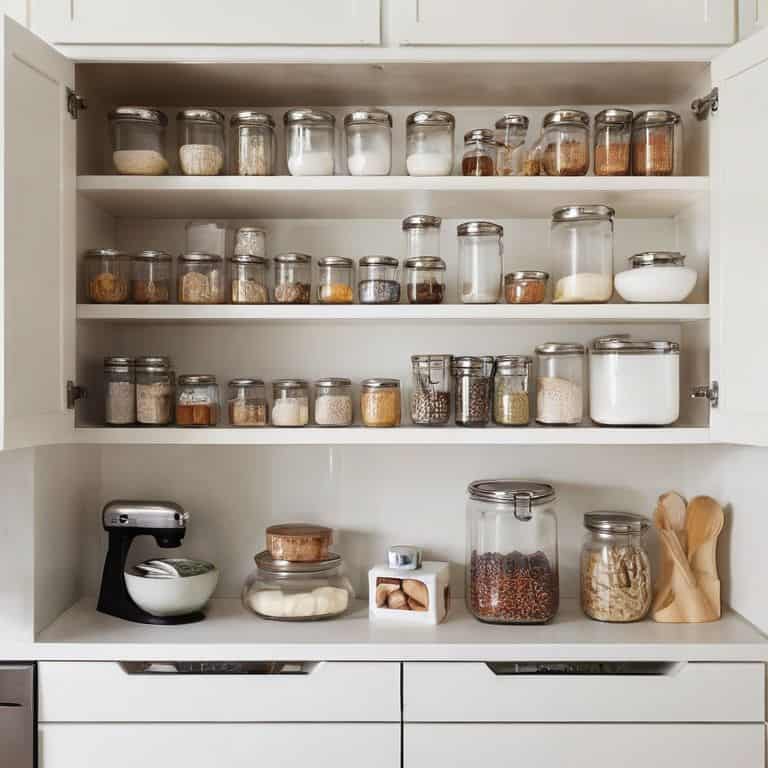
- 3. Now it’s time to categorize and group similar items together. This might include baking supplies, snacks, canned goods, and spices. By grouping like items, you’ll be able to see what you have and make the most of your storage space. Consider using _stackable containers_ or baskets to keep items like flour, sugar, and pasta organized.
- 4. Once you have your categories, it’s time to assign a home for each group. This means designating a specific shelf or area of the pantry for each type of item. Be mindful of the items you use most frequently and place them in easy-to-reach locations. Less frequently used items can be stored on higher or lower shelves.
- 5. To make the most of your pantry’s vertical space, consider investing in a _wall-mounted shelf_ or storage unit. This will help keep your floors and countertops clear while providing additional storage for items like spices, oils, or cleaning supplies. Look for a unit with adjustable shelves to accommodate items of different sizes.
- 6. Now, let’s talk about _maximizing your shelf space_. One of the best ways to do this is by using double-layered shelves or stackable baskets. These will allow you to store items like canned goods, jars, or bags of snacks in a compact and accessible way. Just be sure to leave enough space between each layer for easy retrieval.
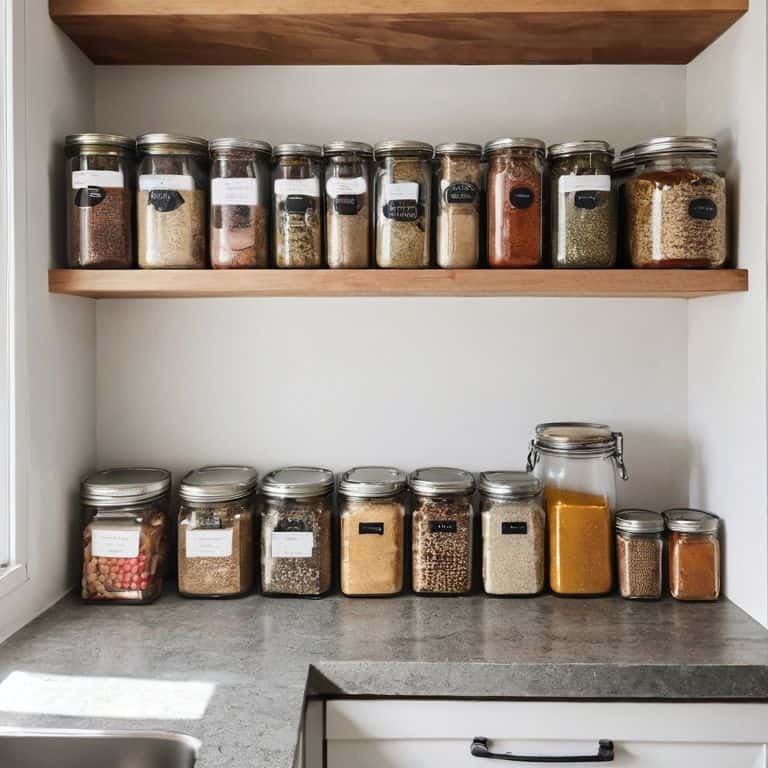
- 7. Finally, take some time to label and sign your pantry. This might seem like a small thing, but it can make a big difference in terms of finding what you need quickly and easily. Use a label maker or chalkboard labels to identify each category or group, and consider creating a _master list_ of your pantry’s contents to post on the door or wall. This will help you keep track of what you have and what you need to restock.
How to Organize a Small Pantry

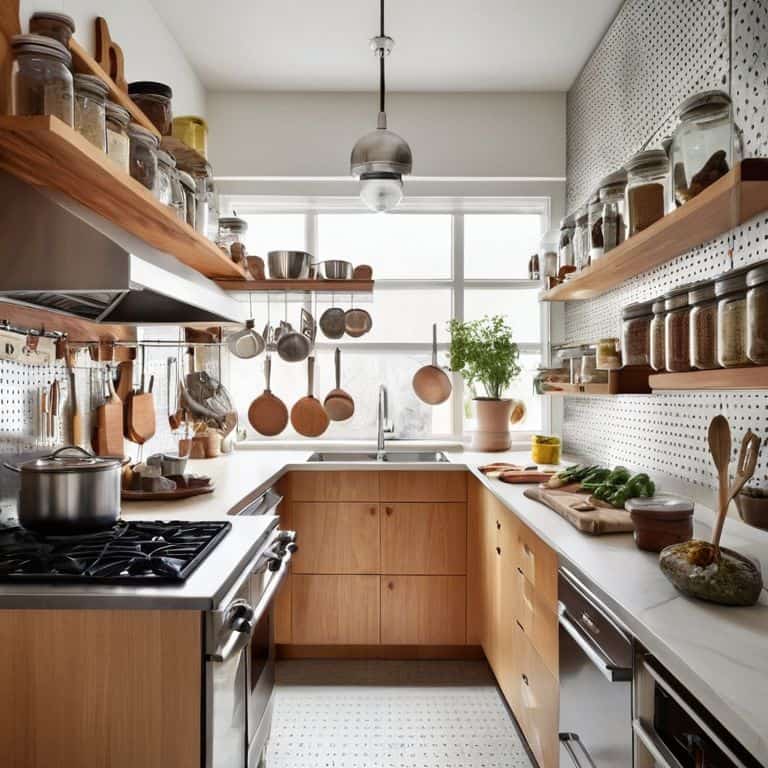
To take your pantry organization to the next level, consider maximizing vertical storage. This can be achieved by installing shelves or using stackable containers that make the most of your pantry’s ceiling height. By doing so, you’ll be able to store more items without cluttering the floor or countertops. I’ve found that customizable pantry systems can be a game-changer in this regard, allowing you to tailor your storage to your specific needs.
When it comes to storing food, efficient food rotation methods are crucial to ensuring that older items are consumed before they expire. One approach is to use a “first in, first out” system, where new items are placed behind older ones. This can be facilitated by using space saving container ideas, such as baskets or bins with labels, to keep similar items together and make them easy to access.
In addition to these strategies, it’s also important to consider optimal pantry temperature control. Most pantries are designed to be cool and dry, which helps to preserve the freshness of stored food. By maintaining a consistent temperature and humidity level, you can help to prevent spoilage and keep your food fresh for longer. I’ve also experimented with DIY pantry shelving solutions, which can be a cost-effective and customizable way to optimize your pantry’s storage capacity.
Efficient Food Rotation Methods
To keep your pantry running like a well-oiled machine, you need to implement efficient food rotation methods. This means ensuring that older items are consumed before they expire, making way for newer additions. I like to use the “first in, first out” rule, where I place new purchases behind existing ones, encouraging me to use up the older items first.
I also use a simple labeling system to keep track of expiration dates and storage times. By doing so, I can quickly identify which items need to be used up soon, and plan my meals accordingly. This approach has helped me reduce food waste and keep my pantry organized, making cooking a whole lot easier and more efficient.
Maximizing Vertical Storage Hacks
To maximize vertical storage, I recommend installing shelves or a pegboard on the back of the pantry door. This will allow you to store items like spices, oils, and cleaning supplies, keeping them organized and out of the way. You can also use stackable containers or baskets to make the most of your shelf space.
By utilizing the often-wasted space on the door and walls, you can significantly increase your pantry’s storage capacity. I like to use 3D printed custom hooks to hang items like colanders or utensils, keeping them organized and easily accessible. This approach will help you create a functional and efficient pantry that makes the most of your limited space.
Pantry Optimization Essentials
- Assign a Home for Each Item: Ensure every food item, spice, and cooking supply has a designated spot in your pantry to maintain order and simplify meal prep
- Implement a ‘First In, First Out’ Policy: Use labels or a chalkboard to track expiration dates and consumption order, guaranteeing older items get used before they go bad
- Utilize the ‘Dead Space’: Don’t neglect the often-wasted space between shelves or at the back of the pantry – use baskets, hooks, or magnetic strips to maximize storage
- Group Similar Items Together: Categorize your pantry into zones (e.g., baking supplies, snacks, or breakfast items) to streamline your cooking workflow and reduce time spent searching
- Maintain the ‘One In, One Out’ Rule: For every new item you add to your pantry, remove or donate an old one to prevent clutter from building up and keep your space functional and stress-free
Key Takeaways for a Super-Efficient Small Pantry
Tackle your tiny pantry with a ‘zone defense’ strategy, grouping similar items together to streamline your cooking workflow
Leverage the power of vertical storage, using wall-mounted shelves, baskets, or a pegboard to maximize your pantry’s hidden potential
Implement a ‘first-in, first-out’ food rotation system, ensuring older items get used before they expire and reducing food waste in your compact kitchen
Pantry Wisdom
A small pantry is not a limitation, but a challenge to be clever – every jar, every spice, and every ingredient has a purpose and a place, and when everything has its assigned spot, that’s when the real cooking magic happens.
Leo Vance
Putting it all Together: A Harmonious Pantry
As we’ve explored the world of small pantry organization, it’s clear that maximizing space is key. From utilizing vertical storage hacks to implementing efficient food rotation methods, every trick in the book counts when it comes to making the most of your tiny pantry. By applying these principles, you’ll be well on your way to creating a culinary command center that makes cooking easier and more enjoyable. Remember, the goal is to create a system that works for you, not against you.
So, as you embark on your pantry-organizing journey, keep in mind that it’s all about finding harmony in the details. Don’t be afraid to experiment and try new things – and most importantly, have fun with it! With a little creativity and a lot of workflow optimization, you can turn even the smallest of pantries into a thriving hub of culinary activity. Happy organizing, and happy cooking!
Frequently Asked Questions
How can I prioritize which food items to store at eye level versus higher or lower shelves in my small pantry?
To prioritize storage, I use the ‘high-use, high-access’ rule: place frequently used items like canned goods, oils, and spices at eye level for easy access. Less frequently used items, like special occasion dishes or infrequently cooked ingredients, can be stored on higher or lower shelves, keeping your most-used items front and center.
What are some creative ways to use the back of the pantry door for additional storage?
I’m a big fan of exploiting underutilized space, and the back of the pantry door is a goldmine. Consider installing a spice rack, a pegboard for hanging baskets, or even a narrow shelf for canned goods. You can also use adhesive hooks or a magnetic board for added storage. Every little bit counts in a tiny pantry, and this is a great way to squeeze out some extra functionality.
How often should I purge and reorganize my pantry to maintain maximum efficiency and prevent clutter buildup?
To maintain maximum efficiency, I recommend scheduling a pantry purge every 3-6 months. Set a reminder to review your inventory, discard expired items, and reorganize your storage. This routine will help prevent clutter buildup and ensure your pantry remains a well-oiled machine, making cooking and meal prep a breeze.