I still remember the day I realized that diy kitchen shelving wasn’t just about adding more storage, but about creating a space that actually worked for me. I was standing in my tiny kitchen, surrounded by piles of cookbooks, utensils, and who-knows-what, feeling like I was drowning in clutter. The myth that you need a big budget or a lot of space to create a functional kitchen had me convinced that I was stuck with a cramped, inefficient space. But I was determined to prove that wrong, and that’s exactly what I did with some clever diy kitchen shelving solutions.
In this article, I’ll share my favorite, no-nonsense tips and tricks for creating your own diy kitchen shelving. You’ll learn how to maximize your space without breaking the bank or sacrificing style. From repurposing everyday items to building your own custom shelves, I’ll guide you through the process with step-by-step photos and clear instructions. My goal is to empower you to take control of your kitchen, no matter how small it may be, and turn it into a cooking powerhouse that you love spending time in. So, let’s get started and create a kitchen that’s both beautiful and functional, one shelf at a time!
Table of Contents
Guide Overview: What You'll Need
Total Time: 4 hours
Estimated Cost: $50 – $100
Difficulty Level: Intermediate
Tools Required
- Drill (with screwdriver and drill bits)
- Level (to ensure shelves are straight)
- Measuring Tape (for accurate measurements)
- Saw (circular or handheld, for cutting lumber)
- Sandpaper (for smoothing out wood surfaces)
- Stud Finder (to locate wall studs)
- Wrench (for tightening bolts and screws)
Supplies & Materials
- 2-in x 4-in lumber (for shelf frames)
- 3/4-in plywood (for shelf boards)
- Wood Screws (1 1/2 inches and 2 1/2 inches long)
- Wall Anchors (for securing shelves to walls)
- Wood Glue (for reinforcing shelf frames)
- Finishing Nails (1 1/2 inches long, for attaching shelf boards)
- Paint or Stain (optional, for finishing the shelves)
Step-by-Step Instructions
- 1. First, let’s assess our space and determine where our new shelving will go. Take a good look at your kitchen and decide what area needs the most attention – is it above the counter, near the stove, or maybe by the sink? Consider the workflow of your kitchen and where you need easy access to frequently used items.
- 2. Next, gather your materials – you’ll need some wooden planks or boards for the shelves, brackets or supports to hold them up, a drill for making holes, and some screws to secure everything in place. I like to use reclaimed wood whenever possible to add some character to my DIY projects. Make sure you have all the necessary tools and materials before you start.
- 3. Now it’s time to measure and mark the walls where you’ll be installing your shelves. Use a level to ensure your marks are straight, and a pencil to lightly mark the spot where you’ll drill your holes. Double-check your measurements to avoid any mistakes – it’s easier to fix now than later.
- 4. With your marks in place, start drilling holes for your brackets or supports. Be careful not to drill too deeply, as you don’t want to damage any pipes or wiring behind the walls. Once your holes are drilled, screw in your brackets, making sure they’re securely attached to the wall.
- 5. Cut your wooden planks to the desired length for your shelves. You can use a saw or a cutter, depending on the type of wood and the tools you have available. Sand down any rough edges to create a smooth surface – this will help prevent any splinters or scratches.
- 6. Place your shelves onto the brackets, ensuring they’re evenly spaced and securely supported. You may need to adjust the position of your brackets slightly to get the shelves to fit perfectly. Use your drill to screw the shelves into place, making sure they’re sturdy and level.
- 7. Finally, add any finishing touches to your shelves – you can stain or paint the wood to match your kitchen decor, or add some decorative trim to give it a more polished look. Stand back and admire your handiwork – you’ve just created your own custom shelving unit, perfect for storing kitchen essentials and keeping your space organized and clutter-free.
Diy Kitchen Shelving Secrets
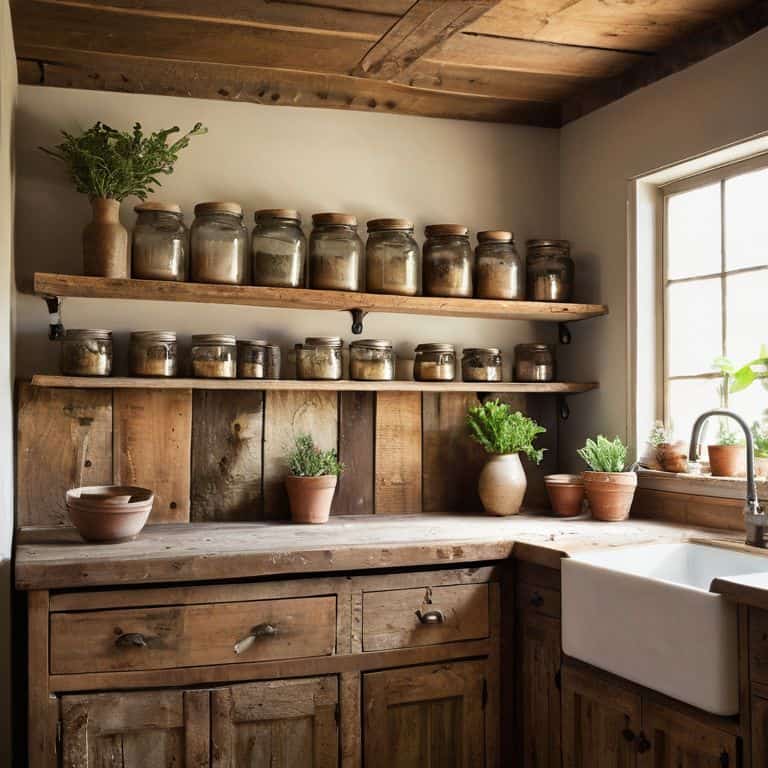
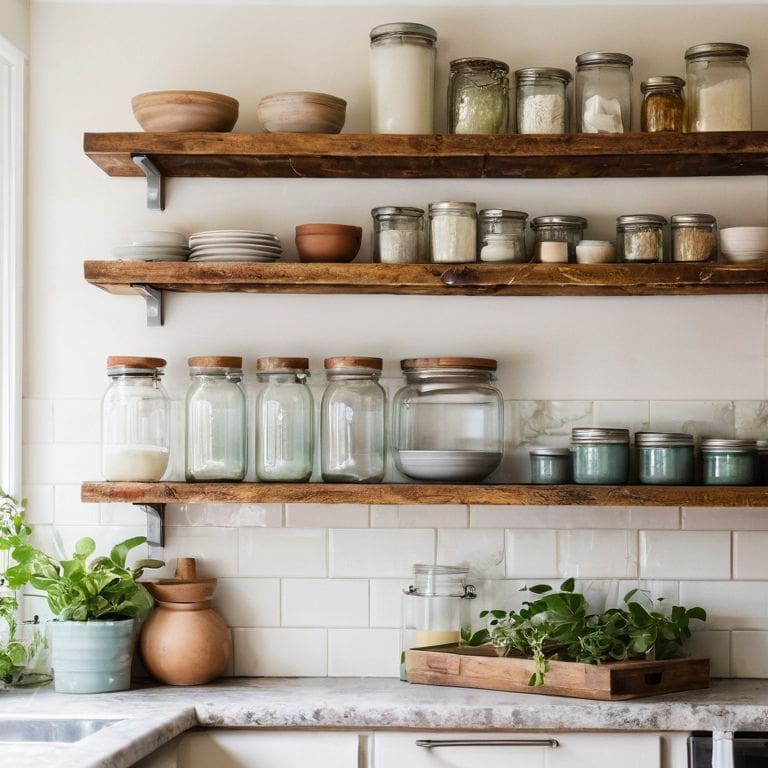
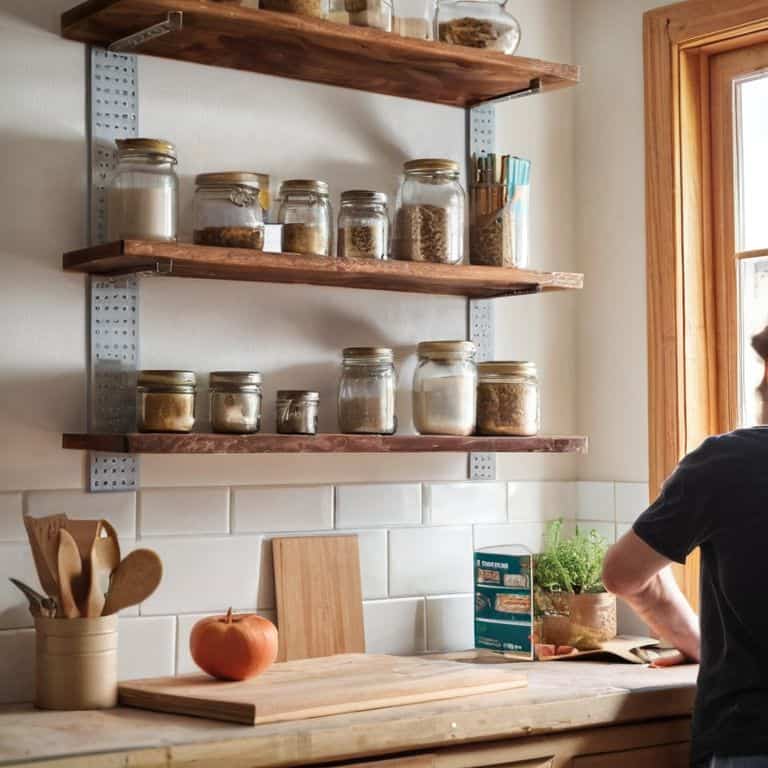
As I delve into the world of DIY kitchen storage, I’ve discovered that reclaimed wood shelving ideas can add a touch of warmth and character to even the smallest of kitchens. One of my favorite secrets is to scour local flea markets for unique, one-of-a-kind wooden pieces that can be repurposed as shelves or storage units. Not only is this approach budget-friendly, but it also reduces waste and gives new life to old materials.
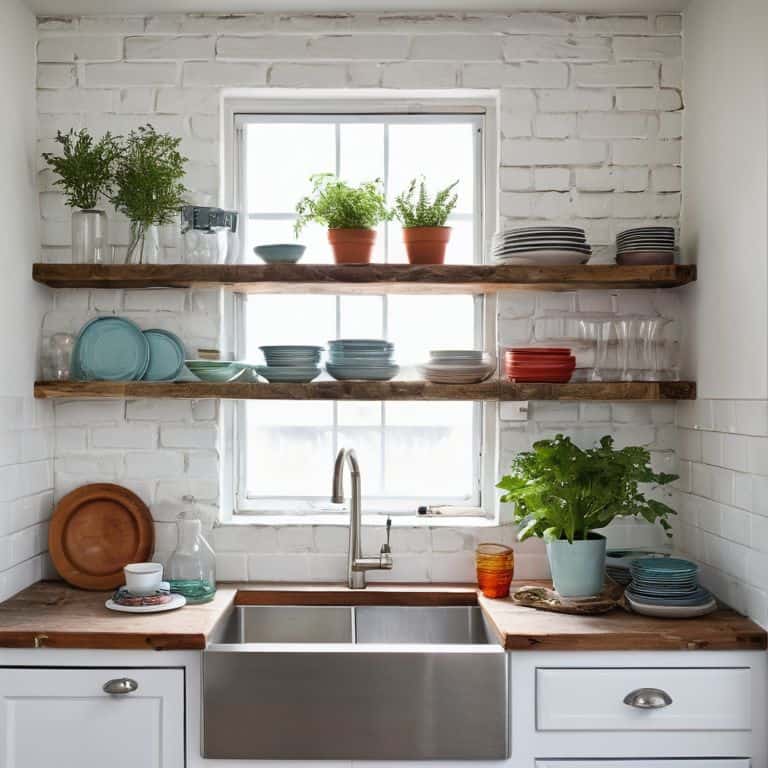
When it comes to small kitchen organization tips, I always emphasize the importance of maximizing vertical space. This can be achieved by installing easy DIY floating shelves or using industrial pipe kitchen storage solutions. These space-saving designs not only keep your kitchen countertops clutter-free but also add a sleek, modern touch to the overall aesthetic. By thinking outside the box and exploring unconventional materials, you can create a kitchen that is both functional and visually stunning.
To take your kitchen decor to the next level without breaking the bank, consider space saving kitchen designs that incorporate multi-functional elements. For instance, a kitchen cart with built-in storage can provide additional counter space while keeping frequently used items within easy reach. By embracing a resourceful and creative approach to kitchen design, you can achieve a beautiful and functional space that reflects your personal style, all while staying within your budget and making the most of your tiny kitchen.
Floating Shelves for Fearless Decor
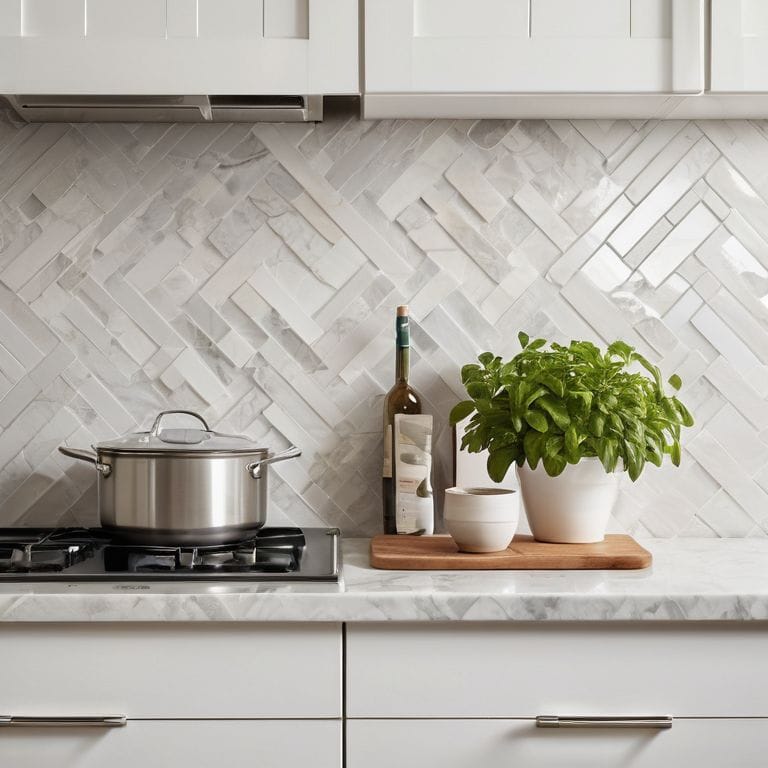
Floating shelves are a game-changer for tiny kitchens, adding a touch of minimalist chic while keeping your countertops clutter-free. I love how they seem to defy gravity, making the most of your wall space. To create your own, you’ll need some sturdy wood, a drill, and a few wall anchors. Choose a wood that fits your kitchen’s vibe – I’m obsessed with reclaimed wood for its unique character. Once you’ve cut your shelves to size, simply attach the anchors to the wall and slide the shelves into place. The result is a sleek, airy feel that’s perfect for displaying your favorite cookbooks, vintage jars, or kitchen gadgets.
Reclaiming Space With Reclaimed Wood
Reclaiming Space with Reclaimed Wood is all about giving new life to old materials. I’m obsessed with scouring flea markets for unique pieces to upcycle into functional kitchen storage. Consider transforming an old wooden crate into a spice rack or turning a vintage wooden ladder into a pot rack. Not only will you be reducing waste, but you’ll also add a touch of character to your kitchen. With a little creativity, reclaimed wood can become a stunning addition to your DIY kitchen shelving, proving that even the smallest spaces can be both beautiful and functional.
Shelving Hacks to Save Your Sanity
- Measure Twice, Drill Once: Always double-check your measurements before drilling into your walls to avoid unnecessary holes and damage
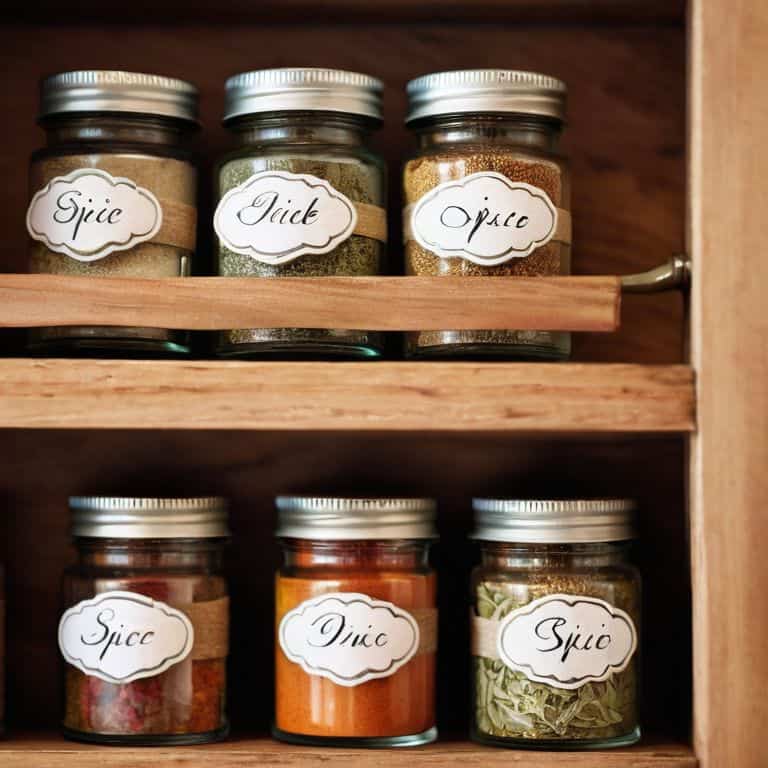
- Choose the Right Wood: Select materials that are durable, water-resistant, and easy to clean, such as reclaimed wood or bamboo, to ensure your shelves withstand the kitchen environment
- Opt for Adjustable Shelves: Incorporate adjustable shelves or brackets to allow for flexibility and accommodate items of varying sizes, from spice jars to kitchen appliances
- Consider the Weight: Be mindful of the weight capacity of your shelves and walls, and use appropriate hardware and supports to prevent collapse or damage
- Add a Personal Touch: Incorporate decorative elements, such as painted trim, metal brackets, or carved details, to give your DIY kitchen shelves a unique and personalized flair
Key Takeaways for Tiny Kitchen Triumphs
Embracing DIY kitchen shelving can transform your small kitchen into a functional and beautiful space, proving that size is just a number
With a little creativity, reclaimed wood and floating shelves can become your best friends in maximizing storage and style, making your kitchen a true reflection of your personality
Empowered with the right tools and mindset, anyone can become a DIY rockstar, carving out their own shelving sanity and turning their tiny kitchen into a cooking powerhouse, no matter the budget or space constraints
Shelving Wisdom
A well-designed DIY kitchen shelf is not just a storage solution, it’s a declaration of independence from cramped cooking quarters and a celebration of the beauty in functional freedom.
Maya Torres
Bringing It All Together: Your Dream DIY Kitchen Shelving
As we’ve explored the world of DIY kitchen shelving, we’ve touched on some game-changing ideas to maximize your space. From reclaiming wood to create unique shelves, to installing floating shelves that add a touch of elegance, each project is a testament to the power of creativity in small spaces. By applying these DIY kitchen shelving secrets, you’re not just solving storage problems; you’re crafting a space that reflects your personality and style. Whether you’re a seasoned DIY enthusiast or a beginner looking to make your mark, these projects are designed to be accessible and fun, proving that with a little imagination, even the tiniest kitchens can become culinary havens.
As you embark on your own DIY kitchen shelving journey, remember that it’s about more than just adding storage or aesthetic appeal – it’s about empowering yourself to see your space as a canvas for creativity and functionality. With every drill hole and every perfectly placed shelf, you’re not just building a better kitchen; you’re building a better you. So, don’t be afraid to get creative, to experiment, and to make mistakes. Because in the end, it’s the journey, not the destination, that makes a DIY project truly unforgettable.
Frequently Asked Questions
What are some creative ways to repurpose old materials for DIY kitchen shelving?
I love repurposing old materials! Think beyond traditional wood – old pallets, crates, and even ladders can become unique kitchen shelves. Get creative with metal pipes, mason jars, or reclaimed doors too!
How do I determine the right size and number of shelves for my tiny kitchen?
For my tiny kitchen, I measure the wall space and consider what I need to store. I think about the items I use daily and group similar things together. Then, I decide on shelf size and number based on those groups – it’s all about creating zones that make sense for my cooking flow!
What are some tips for installing floating shelves securely in a rental kitchen without damaging the walls?
For rental-friendly floating shelves, I swear by adhesive strips or 3M command hooks – they’re removable and won’t damage the walls. Make sure to follow the weight limit and press firmly for a secure hold. I also like to add a dab of clear silicone sealant for extra grip. Easy peasy, and your landlord will thank you!