I still remember the first time I tried to cook a meal in my tiny apartment kitchen – it was a disaster. I was determined to create a kitchen workflow that would make cooking easier, but I had no idea where to start. As a systems engineer, I’ve always been fascinated by efficiency and optimization, and I saw my kitchen as the ultimate challenge. I began by analyzing every move I made, every tool I used, and every ingredient I needed. It wasn’t long before I realized that the key to a functional tiny kitchen wasn’t about having more space, but about streamlining my workflow.
In this article, I’ll share my personal story of how I transformed my tiny kitchen into a well-oiled machine. You’ll learn how to create a kitchen workflow that works for you, not against you. I’ll provide you with practical, no-hype advice on how to optimize your kitchen’s layout, choose the right tools, and develop a cooking routine that saves you time and reduces stress. By the end of this guide, you’ll be equipped with the knowledge and skills to turn your tiny kitchen into a efficient cooking space that you’ll actually enjoy spending time in. Whether you’re a busy professional or a culinary enthusiast, my goal is to help you maximize your kitchen’s potential and make cooking a breeze, no matter how small your space may be.
Table of Contents
Guide Overview: What You'll Need
Total Time: 2 hours 30 minutes
Estimated Cost: $50 – $100
Difficulty Level: Intermediate
Tools Required
- Tape Measure for measuring kitchen dimensions
- Pencil and Paper for planning and sketching workflow
- Stopwatch for timing tasks and optimizing workflow
- Label Maker for labeling storage containers and zones
Supplies & Materials
- 6 inches by 2 inches adhesive-backed hooks for hanging utensils and tools
- Shelves or storage units for organizing kitchen essentials
- Ergonomic kitchen mats for comfort during food preparation
- Zone dividers or bins for separating kitchen tasks and ingredients
Step-by-Step Instructions
- 1. First, let’s start by mapping out your kitchen – take a good look around and note the location of every element, from appliances to utensil drawers. This will help you visualize how you move through the space and identify areas for improvement. Consider making a simple diagram or sketch to help you see the layout more clearly.
- 2. Next, think about your cooking habits – what types of meals do you prepare most often, and what tools do you use for each task? This will help you identify the most critical components of your workflow and ensure they’re easily accessible. Make a list of your top 5-10 most common cooking tasks to reference later.
- 3. Now, let’s talk about work zones – divide your kitchen into distinct areas for tasks like food prep, cooking, and cleaning. This will help you create a more efficient flow and reduce clutter. Consider using a marker or tape to temporarily mark out these zones on your countertops or floor.
- 4. With your work zones in mind, it’s time to optimize your storage – think about the tools and ingredients you need for each task, and make sure they’re stored in a way that minimizes walking distance and maximizes ease of access. This might involve rearranging your cabinets, investing in a cart or island, or using wall-mounted storage solutions.
- 5. Once you have your storage sorted, let’s focus on streamlining your movements – think about the most common paths you take through the kitchen, and look for ways to reduce backtracking or unnecessary walking. This might involve relocating frequently used items or creating a “landing strip” near the entrance for keys, mail, and other essentials.
- 6. Now that you’ve optimized your layout and storage, it’s time to put it all into practice – choose a simple recipe and cook it using your new workflow. Pay attention to any areas where you feel like you’re wasting time or energy, and make adjustments as needed. Remember, the key to a successful kitchen workflow is continuous improvement.
- 7. Finally, take some time to review and refine your workflow – after a few days or weeks of using your new system, take a step back and evaluate what’s working and what’s not. Make any necessary adjustments, and don’t be afraid to try new things or experiment with different layouts and storage solutions. With a little patience and practice, you’ll be cooking like a pro in your tiny kitchen in no time.
Turbocharge Kitchen Workflow
To turbocharge kitchen workflow, it’s essential to consider the kitchen layout optimization and how it impacts your cooking experience. By arranging your kitchen in a way that minimizes walking distances and reduces clutter, you can significantly streamline your cooking tasks. I’ve found that implementing efficient meal prep techniques, such as prep stations and ingredient grouping, can also make a huge difference in the overall workflow.
When it comes to streamlining cooking tasks, scheduling cooking tasks effectively is crucial. By prioritizing tasks and allocating specific time slots for each activity, you can ensure a smooth and efficient cooking process. This approach also helps with kitchen ergonomics for comfort, as you’ll be able to maintain a comfortable pace and avoid unnecessary strain.
In my own tiny kitchen, I’ve applied workstation organization ideas to maximize space and efficiency. By designating specific areas for food preparation, cooking, and cleaning, I’ve been able to create a logical workflow that makes cooking a breeze. This approach has allowed me to focus on the cooking process itself, rather than wasting time searching for ingredients or utensils.
Kitchen Layout Optimization Hacks
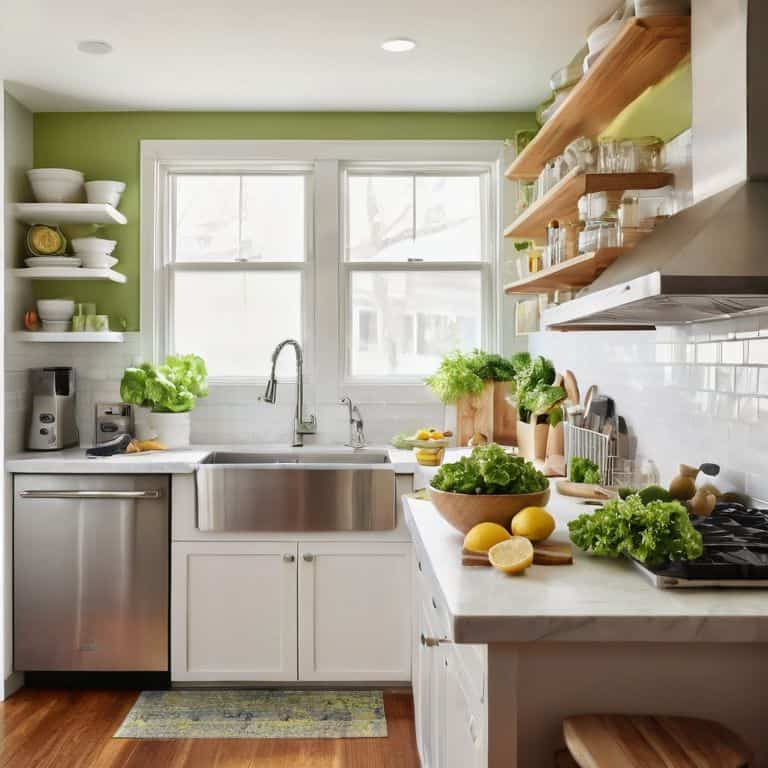
To truly turbocharge your kitchen workflow, you need to optimize your layout. I like to think of it as a 3D puzzle – every item should have a designated spot, and every movement should have a purpose. For me, that means using wall-mounted shelves and a pegboard to keep frequently used tools within easy reach. I’ve also invested in a few clever storage solutions, like a spice rack that fits on the side of my cabinet and a sliding drawer organizer that keeps my utensils in order.
By streamlining your kitchen’s layout, you can reduce wasted motion and make cooking a whole lot easier. Try mapping out your most common workflows – like prepping veggies or cooking meals – and rearranging your space to minimize walking distances and maximize efficiency. It’s amazing how much of a difference a little planning can make!
Streamlining Cooking Tasks Efficiently
To streamline cooking tasks efficiently, I swear by the “workstation workflow” approach. This means designating specific areas for tasks like chopping, cooking, and plating. By grouping similar tasks together, you can minimize movement and maximize productivity. For instance, I’ve set up a dedicated chopping station near my sink, complete with a built-in knife block and a compact trash can for scraps.
This simple setup has been a game-changer for my tiny kitchen. By focusing on one task per station, I can stay focused and avoid clutter. Plus, it makes cleanup a breeze – everything has its place, and I can quickly wipe down each station as I finish using it. Give it a try and watch your cooking workflow transform!
5 Essential Tips to Create a Kitchen Workflow That Flows
- Designate a ‘Landing Strip’ Near the Entrance: Assign a specific spot near the kitchen entrance as a ‘landing strip’ where you can place your keys, bags, and other items to maintain a clutter-free environment
- Implement the ‘Zone Defense’ Strategy: Divide your kitchen into zones, such as a cooking zone, prep zone, and cleaning zone, to optimize movement and reduce wasted steps
- Optimize Your Tool and Ingredient Storage: Store frequently used tools and ingredients in easy-to-reach locations, and consider using a ‘first in, first out’ system to minimize waste and maximize efficiency
- Streamline Your Cooking Tasks with a ‘Workstation’ Approach: Set up specific workstations for tasks like meal prep, cooking, and cleaning to reduce transition time and increase productivity
- Schedule Regular ‘Workflow Audits’ to Identify Bottlenecks: Regularly assess your kitchen workflow to identify areas for improvement, and make adjustments as needed to ensure your kitchen remains a well-oiled machine
Key Takeaways for a Turbocharged Tiny Kitchen
By applying workflow optimization principles, you can turn your tiny kitchen into a highly efficient cooking space that rivals larger kitchens in productivity
Streamlining your kitchen layout and cooking tasks through clever hacks and tool organization can save you time and reduce stress in the cooking process
Implementing a ‘time and motion’ study approach to your recipes and kitchen workflow can help you identify and eliminate unnecessary movements, making your cooking routine more enjoyable and efficient
The Workflow Wisdom
A kitchen workflow is not just about moving ingredients from one place to another, it’s about orchestrating a symphony of tasks, tools, and spaces to create a culinary experience that’s greater than the sum of its parts.
Leo Vance
Bringing It All Together: A Turbocharged Kitchen Workflow
In creating a kitchen workflow, we’ve covered the essential steps to transform your tiny kitchen into a well-oiled machine. From kitchen layout optimization to streamlining cooking tasks, each element plays a crucial role in maximizing efficiency. By applying these principles, you’ll not only save time but also reduce stress, making cooking a more enjoyable experience. Remember, the key to a successful workflow is consistency and adaptability – be willing to adjust your approach as you find what works best for you and your unique kitchen space.
As you implement these workflow hacks, keep in mind that the goal is not just about efficiency, but also about empowering your cooking experience. With a turbocharged kitchen workflow, you’ll have more time to focus on the creative aspects of cooking, experimenting with new recipes, and savoring the joy of preparing meals for yourself and others. So, don’t be afraid to get creative, try new things, and make your kitchen workflow truly your own – after all, a functional and enjoyable kitchen is the heart of any home.
Frequently Asked Questions
How do I determine the most efficient workflow for my unique kitchen layout?
To determine the most efficient workflow for your unique kitchen layout, start by mapping out your space and tracking your movements while cooking. Identify bottlenecks and areas of congestion, then apply the principles of workflow optimization to streamline your process. I like to call this a ‘kitchen motion study’ – it’s a game-changer for tiny kitchens like mine.
What are some common kitchen workflow mistakes that I should avoid?
When it comes to kitchen workflow, I’ve seen people trip up on a few common mistakes. Don’t fall into the trap of cluttered countertops, inadequate storage, or poorly planned meal prep. These errors can grind your workflow to a halt. Instead, focus on assigning a home for each tool, optimizing your cooking zone, and streamlining tasks to keep your tiny kitchen humming.
Can I apply kitchen workflow optimization principles to other areas of my home, such as a small office or bathroom?
Absolutely, the principles of kitchen workflow optimization can be applied to other small spaces, like a home office or bathroom. I call it ‘workflow portability.’ By analyzing tasks, eliminating waste, and optimizing storage, you can create efficient workflows in any compact area, making your entire home more functional and stress-free.