I still remember the day I decided to hang a pot rack in my tiny kitchen – it was a game-changer. But, let’s be real, the thought of drilling into the wall and potentially creating a mess was daunting. I had to figure out how to hang a pot rack safely, and I quickly learned that it’s not as complicated as it seems. In fact, with the right tools and a bit of planning, you can easily install a pot rack that’s both functional and stylish. The common myth that you need a huge kitchen or a lot of experience to hang a pot rack is simply not true.
In this article, I’ll share my personal experience and provide you with step-by-step guidance on how to hang a pot rack safely. You’ll learn how to choose the right materials, measure your space, and drill into the wall with confidence. I’ll also share some budget-friendly tips and tricks for making the most of your pot rack. By the end of this article, you’ll be equipped with the knowledge and skills to install a beautiful and functional pot rack in your own kitchen, no matter how small it may be. So, let’s get started and make the most of our tiny kitchens!
Table of Contents
Guide Overview: What You'll Need
Total Time: 1 hour 45 minutes
Estimated Cost: $50 – $100
Difficulty Level: Intermediate
Tools Required
- Drill (with screwdriver and drill bits)
- Level (to ensure proper alignment)
- Stud finder (to locate wall studs)
- Wrench (for tightening screws)
- Measuring tape (for accurate measurements)
- Pencil (for marking wall and ceiling)
- Ladder (sturdy, to reach the ceiling)
Supplies & Materials
- Pot rack (choose a suitable size and style)
- Wood screws (2 inches or 2.5 inches long, depending on ceiling type)
- Wall anchors (if ceiling is drywall or plaster)
- 2-in x 4-in lumber (for additional support, if needed)
- Chain or rope (for hanging pots, if not included with pot rack)
Step-by-Step Instructions
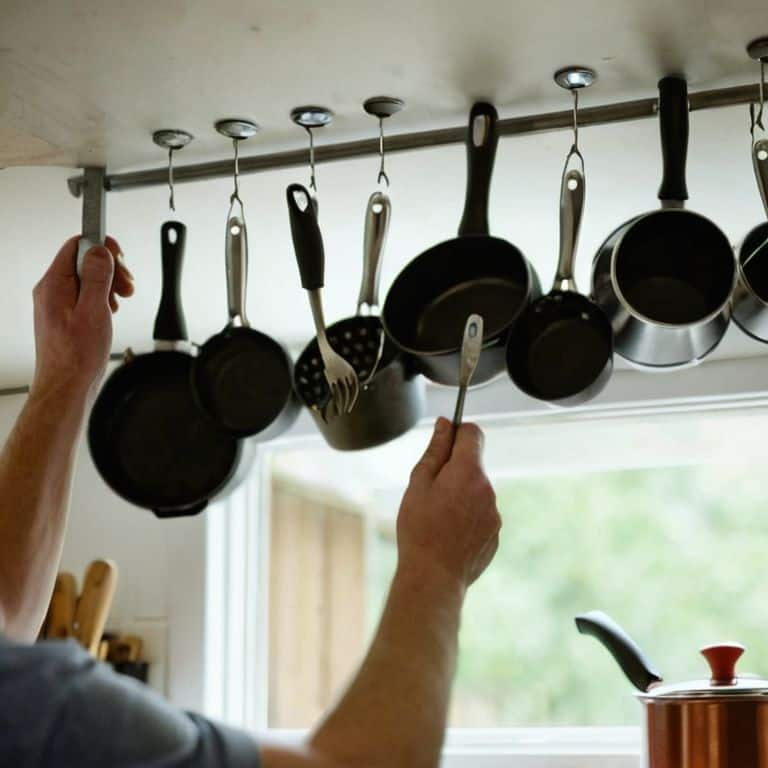
- 1. First, let’s gather our tools and materials, including a pot rack, a drill, wall anchors, screws, a level, and a measuring tape. Make sure you have all the necessary items before starting the project to avoid any last-minute trips to the hardware store.
- 2. Next, choose the perfect spot for your pot rack, taking into consideration the height and location of your stove, sink, and any other kitchen elements. You want your pot rack to be easily accessible and out of the way of foot traffic.
- 3. Now, measure the width of your pot rack and mark the spot on the wall where you want to install it, using a pencil to make a small mark. Then, use your level to ensure the mark is perfectly straight and your pot rack will be level.
- 4. Using your drill, make pilot holes in the wall at the marked spot, making sure they are deep enough to accommodate the wall anchors. This step is crucial to avoid any wall damage and ensure a secure hold.
- 5. Insert the wall anchors into the pilot holes and screw them into place, making sure they are securely fastened. Then, hang your pot rack on the screws, adjusting it as needed to make sure it is level and secure.
- 6. To add an extra layer of security and stability, use additional screws to attach the pot rack to the wall, making sure they are spaced evenly apart. This will prevent the pot rack from swinging or falling and give you peace of mind.
- 7. Finally, test your pot rack by hanging a few pots and pans on it, making sure it can hold the weight and is stable and secure. If everything looks good, you’re done and can enjoy your new pot rack, proudly knowing you installed it yourself.
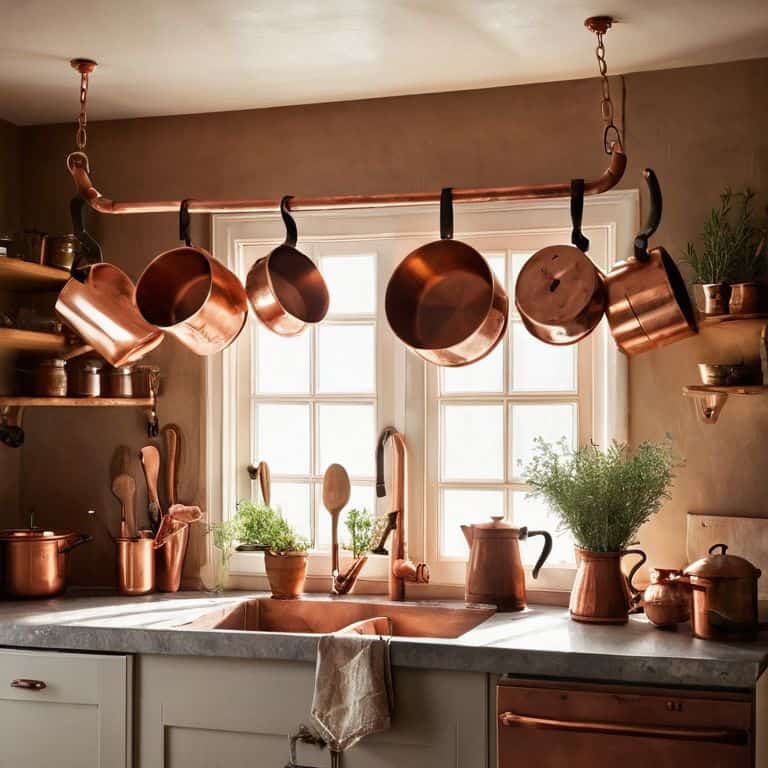
Hang Pot Rack Safely
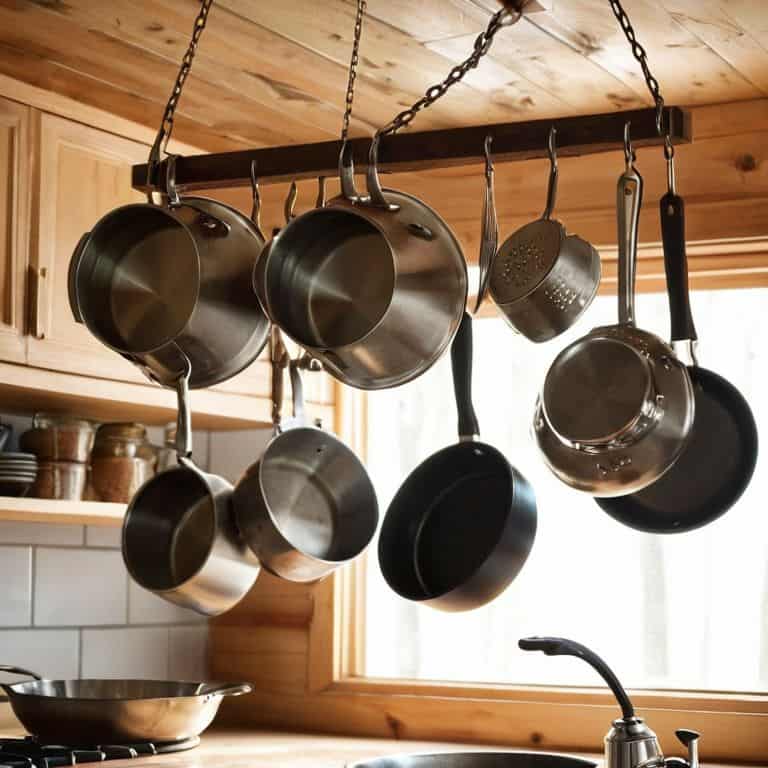
When it comes to pot rack weight distribution, it’s essential to consider the overall load you’ll be placing on the rack. A sturdy pot rack can hold a significant amount of weight, but even distribution is key to preventing it from becoming unbalanced. To achieve this, I like to group my heaviest pots and pans in the center of the rack, with lighter items towards the edges.
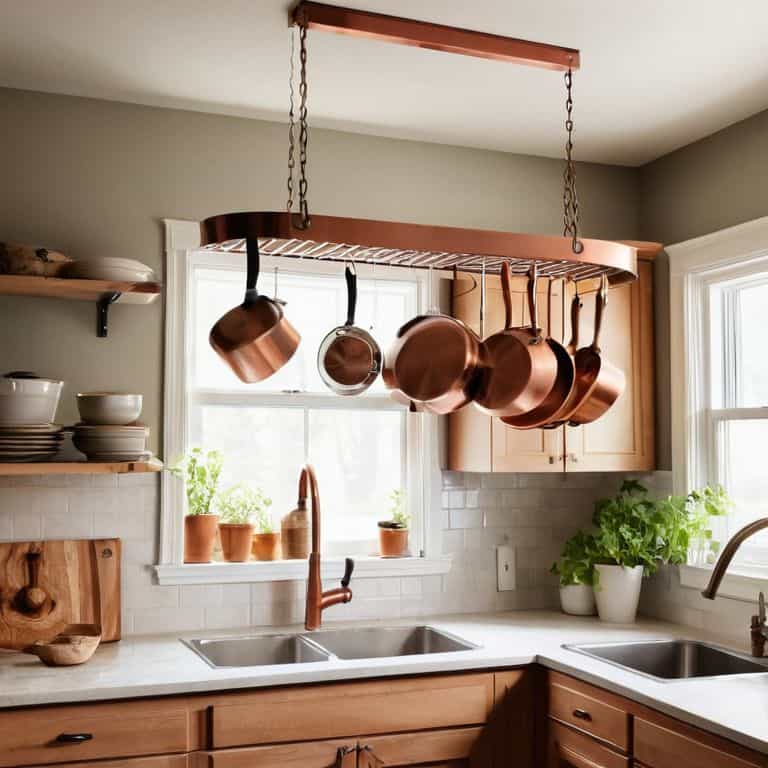
Hanging a pot rack from the ceiling can be a bit more involved, but with the right pot rack hardware options, it’s definitely doable. I’ve found that using high-quality screws and anchors makes all the difference in ensuring a secure installation. Additionally, considering the kitchen pot rack organization ideas that work best for your space can help you make the most of your pot rack. For example, you can group similar items together or reserve a section for your most frequently used cookware.
To take your pot rack installation to the next level, don’t forget to follow some basic pot rack safety precautions. This includes making sure the rack is securely fastened to the wall or ceiling, and that all pots and pans are properly balanced to prevent them from tipping over. By following these simple tips and considering your diy pot rack installation tips, you can create a beautiful and functional pot rack that adds both style and functionality to your kitchen.
Ceiling Hanging Hardware Options
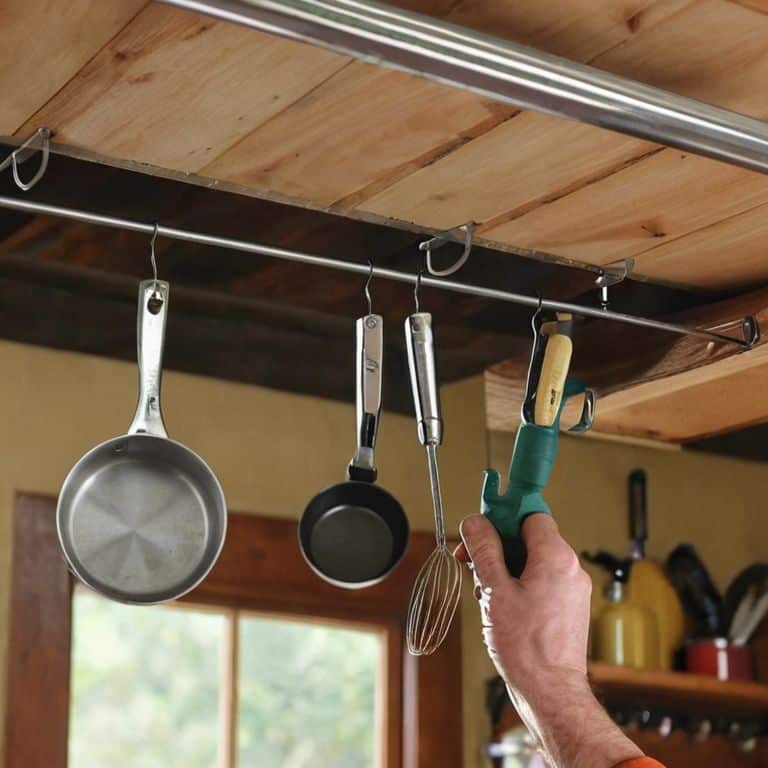
When it comes to hanging a pot rack from the ceiling, the right hardware can make all the difference. I swear by using sturdy ceiling hooks or swivel hooks that can support the weight of my pots and pans. Another great option is to use a ceiling-mounted pot rack hanger, which usually comes with its own hardware and can be adjusted to fit your specific needs. These options not only provide stability but also allow for easy installation and adjustment.
For my own tiny kitchen, I opted for a combination of ceiling hooks and a sliding pot rack system. This setup has been a game-changer, allowing me to hang my pots and pans at the perfect height while keeping them organized and within reach. By choosing the right ceiling hanging hardware, you can ensure a safe and functional pot rack that complements your kitchen’s style.
Pot Rack Weight Distribution Tips
Now that we’ve got our pot rack up, let’s talk about weight distribution. I’ve learned the hard way that it’s not just about hanging it securely, but also about balancing the weight of those pots and pans. To avoid any accidents, make sure to distribute the weight evenly across the rack. Place your heavier items, like cast-iron skillets, near the center and balance them out with lighter pots and pans towards the ends. This will keep your pot rack stable and prevent it from tipping over. By doing so, you’ll be able to enjoy your newly organized kitchen without worrying about a cluttered mess or, worse, a fallen pot rack.
Safely Hanging Your Pot Rack: 5 Essential Tips
- Choose the right hardware: Select screws or anchors that can support the weight of your pot rack and all the pots and pans you plan to hang from it
- Consider the ceiling type: Different types of ceilings, such as drywall, plaster, or concrete, require specific types of anchors to ensure a secure hold
- Measure twice, hang once: Double-check your measurements to ensure the pot rack is level and evenly spaced, and mark the spot where you’ll drill the screws
- Distribute the weight: Follow the weight distribution tips I provided earlier to avoid putting too much strain on a single point, and make sure the rack is balanced
- Test the weight limit: Before loading up your pot rack with all your cookware, test it with a few heavy pots and pans to make sure it can support the weight and won’t come crashing down
3 Key Takeaways for a Safe and Stylish Pot Rack
Choose the right hanging hardware for your ceiling type to ensure a secure and stable pot rack installation
Distribute the weight of your pots and pans evenly across the rack to maintain balance and prevent accidents
Consider the height and positioning of your pot rack to maximize storage and accessibility in your tiny kitchen, while keeping it out of the way of foot traffic and cooking splatters
Safety First
Hanging a pot rack isn’t just about finding a stud, it’s about creating a harmony between form and function – where every kitchen tool has its perfect place, and every meal is a masterpiece waiting to happen, all while keeping your space safe and clutter-free.
Maya Torres
Hanging a Pot Rack with Confidence
As we’ve explored the world of pot rack installation, it’s clear that safety should always be our top priority. From understanding the weight distribution of our pots and pans to choosing the right ceiling hanging hardware, every step counts in ensuring our kitchen remains a haven, not a hazard. By following the simple, yet effective steps outlined in this guide, you’ll be well on your way to creating a beautifully functional kitchen that serves as the heart of your home. Remember, the key to a successful pot rack installation lies in the details – taking the time to plan, prepare, and execute your project with precision.
So, the next time you’re tempted to view your tiny kitchen as a limitation, recall the empowering feeling of creating something with your own hands. With a drill as your trusty sidekick and a willingness to think outside the box, you can transform even the most mundane spaces into something truly extraordinary. As you stand back to admire your handiwork, pot rack proudly in place, remember that it’s not just about the destination – it’s about the journey, the learning, and the growth that comes with taking on a new DIY challenge.
Frequently Asked Questions
What if I have a drop ceiling or a ceiling with limited clearance, can I still hang a pot rack?
Don’t worry, I’ve got you covered. For drop ceilings or low-clearance ceilings, consider a wall-mounted pot rack or a fold-down rack that won’t obstruct the ceiling. You can also look into magnetic or adhesive hooks that don’t require drilling into the ceiling. Get creative and think vertically – your pots and pans will thank you!
How do I determine the maximum weight capacity of my ceiling to ensure the pot rack doesn't come crashing down?
To determine the maximum weight capacity of your ceiling, check your apartment’s blueprint or consult with your landlord. If that’s not possible, a general rule of thumb is to assume a ceiling joist can hold about 40 pounds per square foot. Consider the weight of your pots, the rack itself, and any additional decor to ensure you’re under that limit.
Are there any specific types of pots and pans that are not suitable for hanging on a pot rack, and if so, how can I adapt my pot rack to accommodate them?
Honestly, I’ve found that super heavy cast-iron pots or fragile non-stick pans aren’t ideal for hanging. To adapt, I add soft-close hooks or a sliding pot organizer to cradle them gently, making sure everything has its perfect spot on my pot rack.