I still remember the day I decided to tackle my tiny kitchen’s biggest problem: lack of counter space. I was determined to find a solution that wouldn’t break the bank or require a full-scale renovation. That’s when I stumbled upon the perfect project: how to make a kitchen island from an old dresser. It sounded crazy, but I was willing to try anything. As I delved deeper into the world of DIY, I realized that most tutorials made it seem like you needed a fancy workshop or a degree in carpentry to pull off such a feat. But I’m here to tell you that’s just not true.
In this article, I’ll share my personal experience and no-nonsense advice on how to transform an old dresser into a functional kitchen island that will become the heart of your home. You’ll learn how to breathe new life into a thrifted find and turn it into a beautiful, functional piece of furniture that will make cooking and entertaining a breeze. From measuring and mapping to sanding and styling, I’ll walk you through every step of the process, so you can create your own unique kitchen island without breaking the bank or sacrificing style.
Table of Contents
Guide Overview: What You'll Need
Total Time: 4 hours 30 minutes
Estimated Cost: $100 – $200
Difficulty Level: Intermediate
Tools Required
- Utility Knife (with extra blades)
- Drill (with screwdriver and drill bits)
- Saw (circular or handheld)
- Sander (optional)
- Measuring Tape
- Level
- Clamp (bar clamp or C-clamp)
- Paintbrush (or roller extension pole)
Supplies & Materials
- 2-in x 4-in lumber for supports and shelves
- 3/4-in plywood for countertop
- Wood glue
- 2 1/4-in wood screws
- 1 1/4-in wood screws
- Wood filler
- Sandpaper various grits
- Paint or stain optional
- Polyurethane optional
- Decorative hardware optional
Step-by-Step Instructions
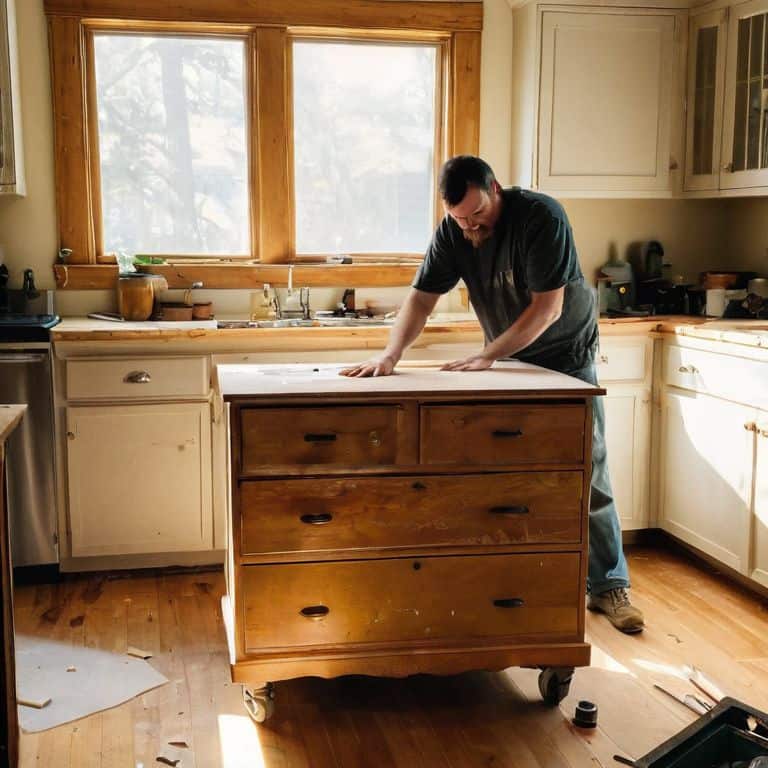
- 1. First, let’s start by assessing the dresser you’ve chosen for this project. Look for any damage, worn-out drawers, or parts that might need replacement. Since we’re turning it into a kitchen island, it’s essential to ensure it’s sturdy and can withstand daily use. I like to think of this step as getting to know my material, understanding its strengths and weaknesses before we begin the transformation.
- 2. Next, clean and disassemble the dresser. Remove all the hardware, including knobs, handles, and any other decorative elements. This will give you a clean slate to work with and help you visualize the final product. Don’t worry too much about the condition of the drawers at this stage; we’ll be reinventing their purpose later on.
- 3. Now, it’s time to measure and plan. Measure the space where your kitchen island will go, taking into account any obstacles like pipes, windows, or doorways. Decide on the height and layout of your island, considering the work triangle – the path between your sink, stove, and refrigerator. You want your island to be functional and not obstruct the flow of your kitchen.
- 4. With your plan in place, modify the dresser to fit your needs. This might involve cutting the top to size, removing or reconfiguring drawers, or adding a new surface for additional counter space. I love this part of the process, as it’s where your vision starts to take shape. Remember, the goal is to create a beautifully functional piece that enhances your kitchen.
- 5. The next step is to add the necessary hardware. This could include installing new knobs or handles, adding casters for mobility, or attaching a countertop. If you’re feeling adventurous, you could even add a built-in cutting board or a wine rack to make your island more versatile. The key is to think about how you want to use your island and equip it accordingly.
- 6. Now that your island is taking shape, it’s time to add some finishing touches. Sand and paint or stain the wood to match your kitchen aesthetic. Add any decorative elements you like, such as molding or trim, to give your island a polished look. This is also a good time to think about lighting – under-cabinet lights or a pendant light above the island can make a huge difference in ambiance and functionality.
- 7. Finally, assemble and install your kitchen island. Place it in your kitchen, ensuring it’s level and secure. Add any final decorative elements, and step back to admire your handiwork. This is the most rewarding part of the process – seeing your vision come to life and knowing you’ve created something truly unique and functional for your kitchen.
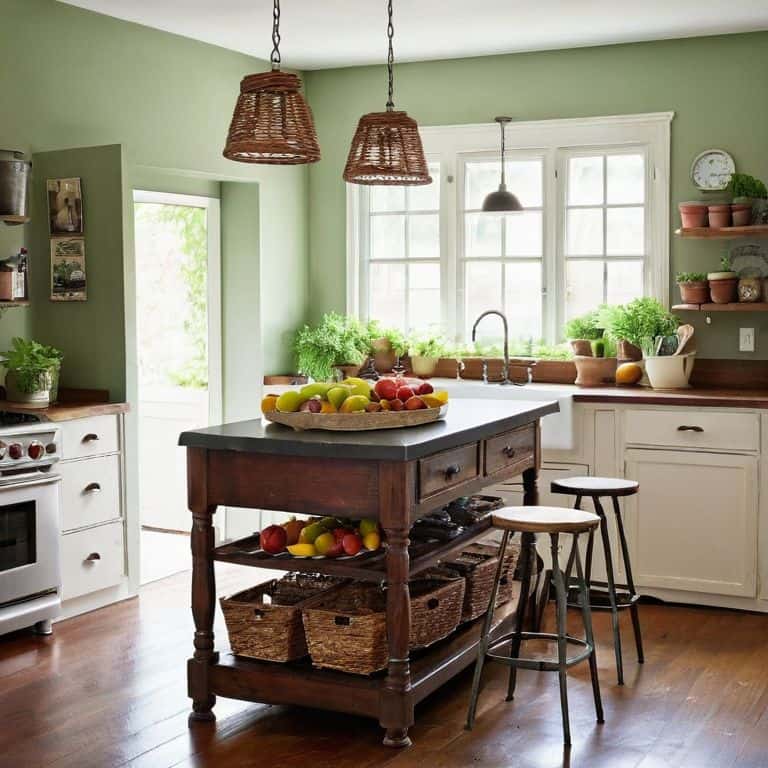
Dresser to Kitchen Island
As I worked on my own small kitchen storage solutions, I realized that giving new life to an old dresser was more than just a cosmetic makeover. It was about creating a functional hub that could _streamline my cooking process_. By repurposing old furniture for kitchen use, I was able to add valuable counter space and storage without breaking the bank. This project is all about finding creative ways to solve common kitchen conundrums.
When it comes to upcycled kitchen decor ideas, the possibilities are endless. For my kitchen island, I chose a _distressed finish_ to add some visual interest and personality to the space. You can also experiment with different kitchen island lighting ideas to create a warm and inviting atmosphere. Consider adding some under-cabinet lighting or a pendant light to highlight your new kitchen island.
To take your dresser makeover to the next level, think about the types of diy kitchen island plans that would work best for your space. Do you need more storage for cookbooks or kitchen gadgets? Perhaps you’d like to incorporate a built-in wine rack or a trash can holder. By considering your specific needs and preferences, you can create a one-of-a-kind kitchen island that _maximizes functionality_ and style.
Diy Kitchen Island Plans on Budget
Now that we’ve transformed our thrifted dresser into a functional kitchen island, let’s talk about the budget-friendly aspect of this project. I’m all about proving that you don’t need to break the bank to create a beautiful and functional space. By repurposing an old dresser, we’ve already saved a significant amount of money. To keep costs low, consider shopping for materials at local thrift stores or Habitat for Humanity ReStores. You can also get creative with the materials you already have on hand, like using scrap wood for the shelves or countertop.
As a DIY enthusiast on a budget, I’ve learned to think outside the box and get resourceful with my materials. With a little creativity, you can create a stunning kitchen island that not only serves its purpose but also adds a touch of personality to your kitchen. Remember, it’s all about finding those clever solutions that are both beautiful and functional – and doing it all without overspending.
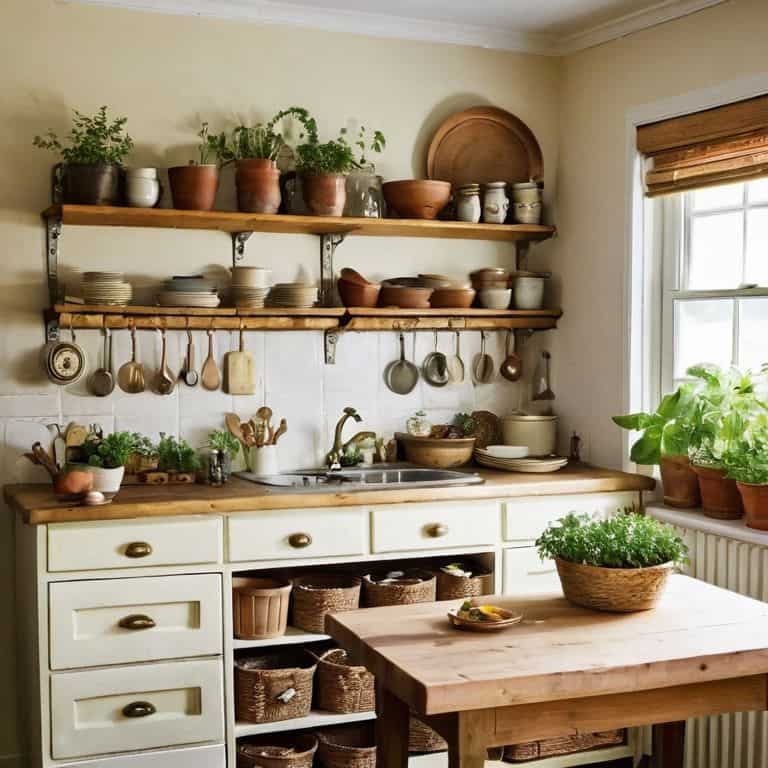
Repurposing Old Furniture for Kitchen
Repurposing old furniture is a game-changer for small kitchens like mine. I’ve found that thrifted pieces, with a little creativity, can become functional and beautiful additions to our cooking spaces. My dresser-turned-kitchen-island is a prime example – it’s amazing how a fresh coat of paint and some clever hardware can transform a cluttered eyesore into a culinary hub. By giving new life to old furniture, we can add character and personality to our kitchens without breaking the bank or sacrificing precious square footage.
5 Smart Hacks to Turn an Old Dresser into a Dream Kitchen Island
- Measure Twice, Cut Once: Before you start hacking away at that old dresser, make sure you’ve measured your kitchen space and the dresser itself to ensure your new island will fit perfectly
- Choose the Right Top: Consider adding a durable, easy-to-clean surface like butcher block, granite, or even a reclaimed wood top to give your island a high-end look without the hefty price tag
- Add Some Serious Storage: Think beyond the dresser drawers – add baskets, hooks, or even a built-in spice rack to maximize your island’s storage potential and keep your kitchen clutter-free
- Get Creative with Casters: Add some industrial-chic casters to your island to make it mobile and functional – perfect for small kitchens where every inch counts
- Light It Up: Install some under-cabinet lighting or add a show-stopping pendant light above your new island to create a warm, inviting ambiance and make your kitchen feel more spacious
Key Takeaways for a Thrifty Kitchen Island
Transforming an old dresser into a kitchen island is a cost-effective and eco-friendly way to add counter space and storage to your tiny kitchen, proving that small-space living doesn’t have to mean sacrificing style or functionality
With a few simple tools and some creativity, you can breathe new life into outdated furniture and create a one-of-a-kind kitchen feature that reflects your personal taste and complements your home’s unique character
By embracing the DIY spirit and repurposing materials like old dressers, you can create a beautiful, functional kitchen island that not only saves you money but also helps reduce waste and supports a more sustainable lifestyle
Turning Trash into Treasure
The beauty of upcycling an old dresser into a kitchen island lies not just in its functionality, but in the story it tells – of creativity, of resourcefulness, and of turning what was once discarded into the heart of your home.
Maya Torres
Bringing It All Together: Your New Kitchen Island
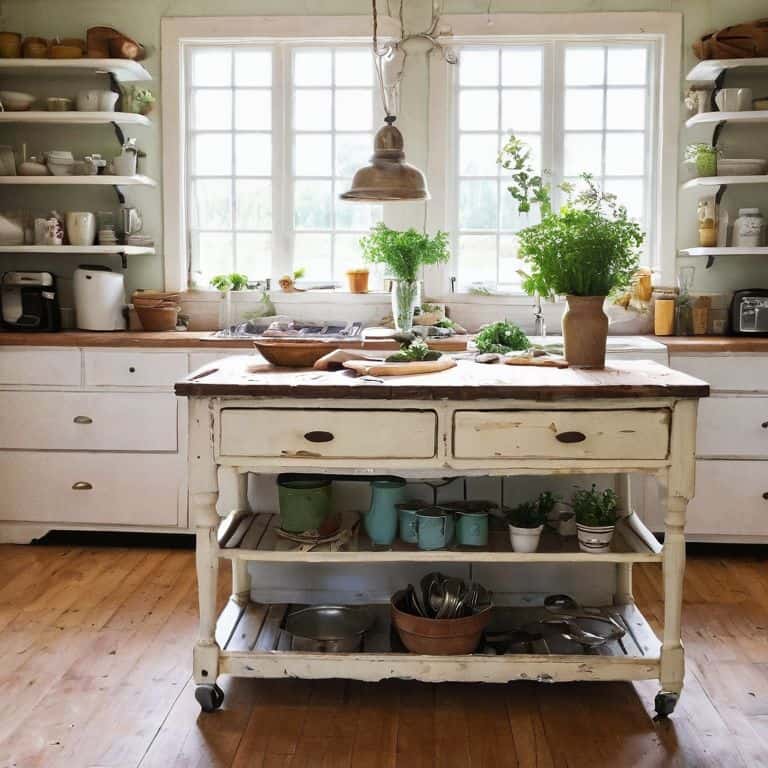
With your old dresser transformed into a killer kitchen island, you’ve not only added more counter space and storage to your tiny kitchen, but you’ve also breathed new life into a piece of furniture that would have otherwise ended up in a landfill. By following these simple, budget-friendly steps, you’ve proven that with a little creativity and some elbow grease, you can create a beautifully functional kitchen that meets your unique needs and reflects your personal style. Whether you’re a seasoned DIY enthusiast or a beginner looking for a fun and rewarding project, upcycling an old dresser into a kitchen island is a great way to exercise your creativity and add some personality to your cooking space.
As you stand back to admire your handiwork, remember that the true beauty of DIY projects like this lies not just in the end result, but in the journey itself. The process of creating something with your own two hands can be incredibly empowering, and it’s a feeling that will stay with you long after your kitchen island is complete. So don’t be afraid to get creative, experiment with new ideas, and push the boundaries of what’s possible in your tiny kitchen – with a little imagination and a lot of heart, you can turn even the smallest of spaces into a culinary haven that nourishes both body and soul.
Frequently Asked Questions
What are the best types of dressers to use for a kitchen island project?
I’m obsessed with scouring thrift stores for the perfect dresser to upcycle! For a kitchen island, I recommend looking for sturdy, vintage pieces with plenty of storage, like mid-century modern or antique dressers with deep drawers and a lower shelf for extra counter space.
How do I ensure the dresser is sturdy and level enough to support heavy kitchen appliances?
To ensure my thrifted dresser-turned-kitchen-island is sturdy, I add reinforced brackets and check it’s level with a trusty tool. For extra stability, I also attach it to the wall or floor, so it can handle heavy appliances without a wobble.
What kind of finishes or paints are best for protecting the dresser from kitchen spills and splatters?
For a kitchen island, I swear by durable, water-resistant finishes like polyurethane or epoxy paint. They’re total game-changers for protecting your dresser from spills and splatters. Plus, they come in a range of sheens and colors to match your kitchen vibe. Trust me, it’s worth the extra step to ensure your upcycled island stays beautiful and functional!