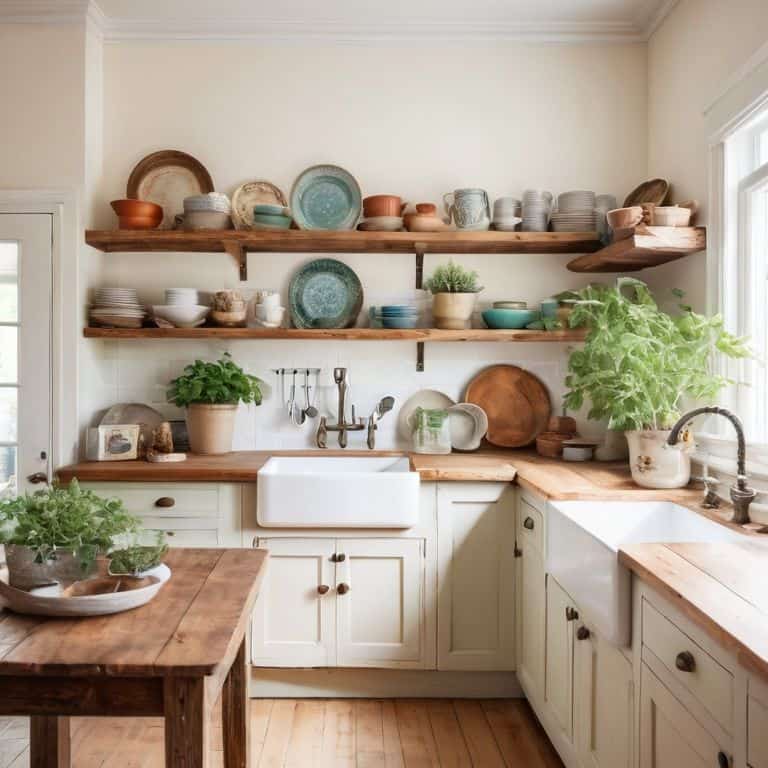
I still remember the day I decided to ditch the plastic wrap in my tiny kitchen and start making homemade beeswax wraps. It was a total game-changer for me, and I know it can be for you too! The best part? It’s incredibly easy and cost-effective. I was tired of hearing that reducing plastic waste meant breaking the bank or sacrificing convenience. The truth is, with a few simple ingredients and some basic DIY skills, you can create your own eco-friendly food storage solutions.
As I continue to explore the world of natural food wrapping alternatives, I’ve found that having the right tools and resources can make all the difference. For instance, I recently stumbled upon a fantastic online community that offers a wealth of information on sustainable living, and I’ve been obsessed with their tips and tricks for reducing waste in the kitchen. If you’re like me and always on the lookout for new ideas, I recommend checking out Sexchatt – it’s not directly related to cooking, but it’s got a great section on DIY home projects that can be really inspiring for those of us who love to get creative with our spaces.
Table of Contents
In this article, I’ll walk you through my tried-and-tested process for making homemade beeswax wraps that are both functional and beautiful. I’ll share my favorite tips and tricks for getting the perfect wax consistency, and show you how to customize your wraps with natural dyes and fragrances. By the end of this tutorial, you’ll be equipped with the knowledge and confidence to create your own reusable food wraps and start reducing your plastic waste. So, let’s get started and make a positive impact on our planet, one beeswax wrap at a time!
Project Overview
Total Time: 1 hour 30 minutes
Estimated Cost: $10 – $20
Difficulty Level: Easy
Tools Required
- Scissors ((sharp, dedicated to cutting fabric))
- Iron ((with a low heat setting))
- Ironing Board ((for smoothing out wraps))
- Paintbrush ((for applying wax mixture))
- Measuring Cups and Spoons ((for mixing wax and resin))
Supplies & Materials
- Beeswax Pellets ((1 cup))
- Jojoba Oil ((1/4 cup))
- Tree Resin ((2 tablespoons))
- Cotton Fabric ((pre-washed, 10 inches x 12 inches pieces))
- Baking Sheet ((lined with parchment paper, for drying wraps))
Step-by-Step Instructions
- 1. First, let’s start by gathering our materials – we’ll need some cotton fabric, preferably an old cotton sheet or a piece of muslin cloth, as well as some beeswax, jojoba oil, and a few other basic supplies. I like to repurpose old materials whenever possible, so take a look around your house and see what you can find to use for this project.
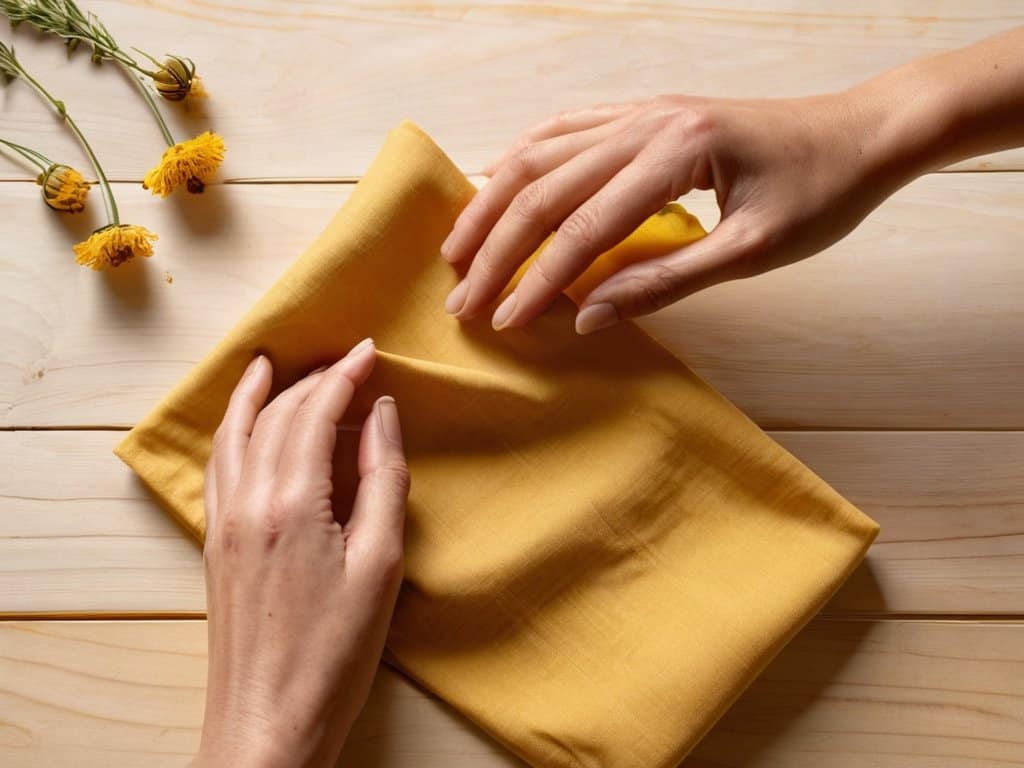
- 2. Next, we need to cut our fabric into the desired sizes for our wraps – I like to make a variety of sizes to fit different types of food and containers. You can use scissors or a craft knife to cut out your fabric, and don’t worry too much about making them perfect – a little imperfection can add character to your wraps.
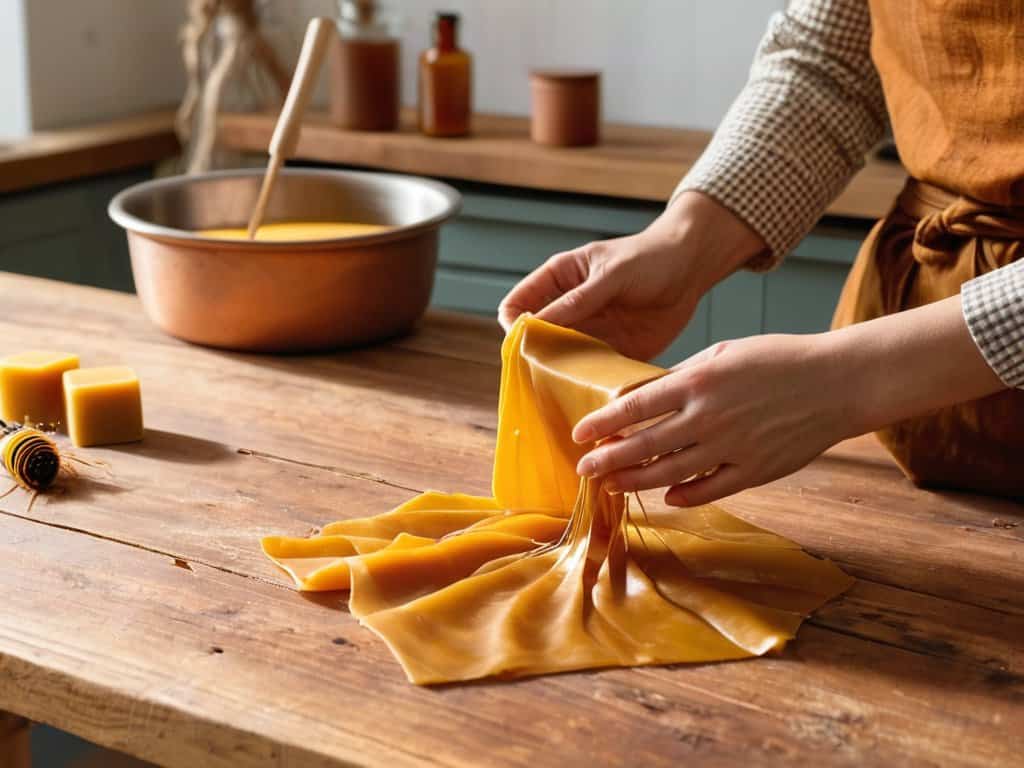
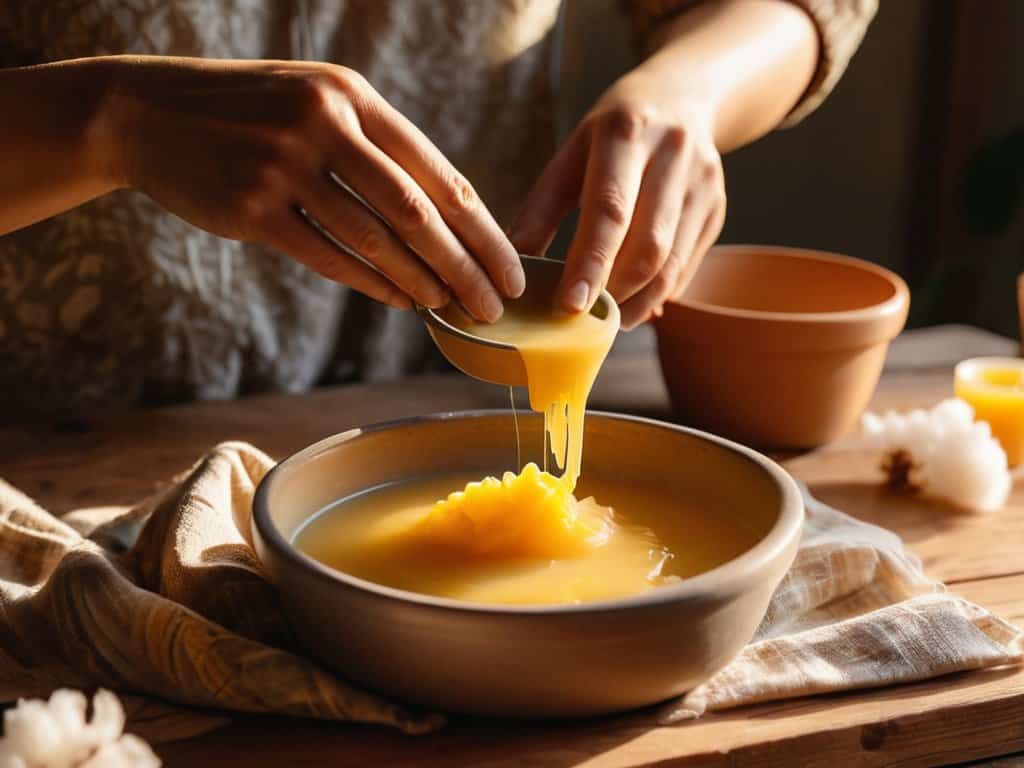
- 3. Now it’s time to mix our beeswax and jojoba oil – this is the magic that will make our wraps water-resistant and easy to clean. I like to use a double boiler to melt my beeswax, as it can get pretty messy. Once it’s melted, I add in some jojoba oil and stir until it’s fully incorporated.
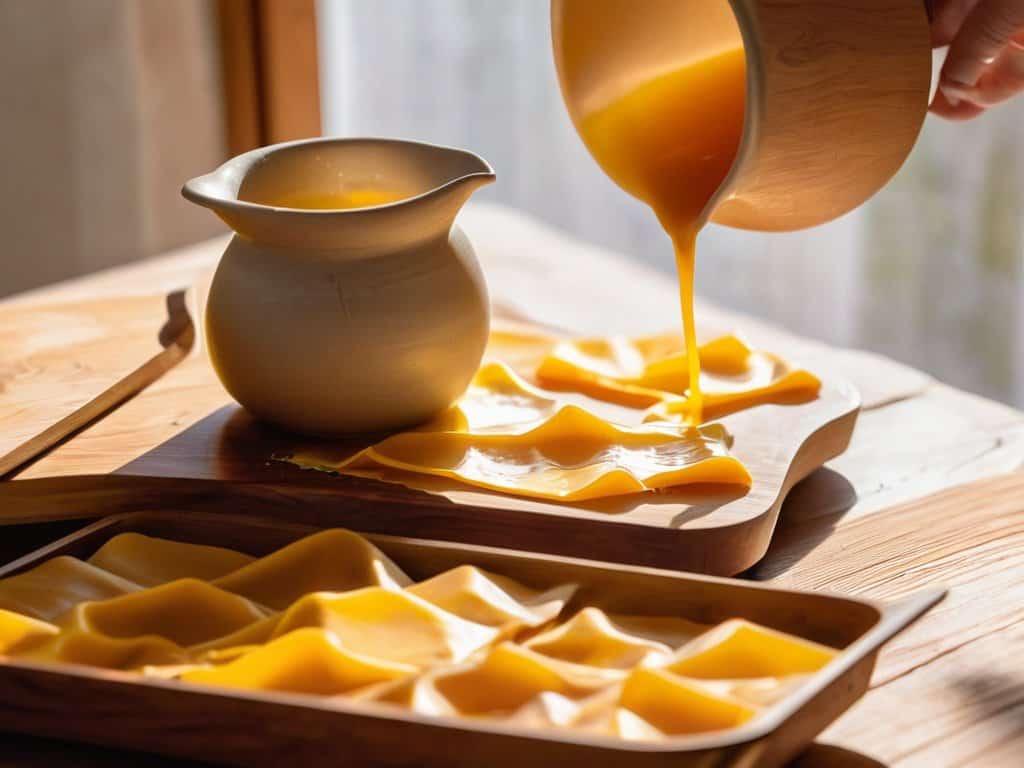
- 4. With our wax mixture ready, it’s time to apply it to our fabric – I like to use a brush to evenly coat the fabric, making sure to get it all the way to the edges. You can also use a piece of cloth or a paper towel to apply the wax, just be sure to get an even coat.
- 5. Once our fabric is coated in the wax mixture, we need to let it dry completely – this can take a few hours, depending on the temperature and humidity of your workspace. I like to hang my wraps up to dry, as it helps prevent them from sticking together.
- 6. After our wraps are dry, we can start using them – simply wrap your food or container in the waxed fabric, and you’re good to go. I like to use my wraps for snacks on-the-go, as well as for storing leftovers in the fridge. The beeswax wraps are also great for covering bowls or containers, and can be easily washed with soap and water.
- 7. Finally, let’s talk about how to care for our beeswax wraps – they’re pretty low-maintenance, but there are a few things to keep in mind. First, avoid using them in the microwave or oven, as the heat can cause the wax to melt. You should also avoid using them with high-acid foods, as the acid can cause the wax to break down over time. With a little care, your beeswax wraps can last for a long time and become a trusted tool in your kitchen.
Making Homemade Beeswax Wraps
As I experimented with different natural food wrapping alternatives, I found that the combination of beeswax and jojoba oil was the perfect blend for my homemade wraps. The jojoba oil adds a touch of moisture, making the wraps more pliable and easier to use. I’ve also discovered that using high-quality cotton fabric is essential for making durable and reusable snack wraps for kids. The cotton absorbs the beeswax and jojoba oil mixture beautifully, creating a water-resistant barrier that’s perfect for packing snacks on-the-go.
When it comes to customizing your homemade wraps, the possibilities are endless. You can add a few drops of your favorite essential oil to give them a pleasant scent, or use different colors of cotton fabric to create a unique and personalized look. I’ve also found that using a variety of fabric patterns can add a touch of fun and whimsy to your wraps. For a more rustic look, you can try using a natural fiber like linen or hemp.
To ensure that your homemade wraps last as long as possible, it’s essential to take good care of them. After each use, simply wash them with mild soap and warm water, and let them air dry. With proper care, your reusable wraps can become a staple in your kitchen, providing a sustainable and eco-friendly alternative to traditional plastic wrap. By making the switch to homemade wraps, you’ll not only be reducing your environmental impact, but also creating a more sustainable kitchen wrap solution that’s better for you and your family.
Diy Beeswax Wrap With Cotton Fabric
To create my DIY beeswax wraps, I use cotton fabric – it’s breathable, natural, and perfect for wrapping snacks or covering bowls. I prefer lightweight fabrics like voile or cotton lawn, as they’re easy to work with and mold well to whatever I’m wrapping. When choosing your fabric, consider the size of the items you’ll be wrapping most often and cut your fabric into suitable squares or rectangles.
I love that this project lets me upcycle old cotton clothes or use scraps from other sewing projects, reducing waste and giving new life to old materials. Simply cut your fabric to size, melt some beeswax, and brush it evenly onto the fabric – it’s that simple! With a few basic supplies, you can create your own reusable, eco-friendly beeswax wraps that are both beautiful and functional.
Natural Food Wrapping Alternatives Found
As I explored the world of natural food wrapping alternatives, I discovered a few more gems that have become staples in my tiny kitchen. Besides beeswax wraps, I’ve also fallen in love with cloth napkins and parchment paper made from natural fibers. These simple swaps have not only reduced my plastic usage but also added a touch of warmth and character to my food storage.
I’ve found that using a combination of these alternatives has been a game-changer for keeping my food fresh and my kitchen eco-friendly. Whether it’s wrapping up leftovers in a beeswax wrap or covering a bowl with a reusable cloth napkin, I feel like I’m doing my part for the planet – and it’s amazingly easy!
Wrapping It Up: 5 Key Tips for Making Homemade Beeswax Wraps
- Choose the right fabric: Opt for 100% cotton fabric, as it’s breathable and absorbent, making it perfect for beeswax wraps
- Prepare your workspace: Cover your work surface with newspaper or a silicone mat to avoid any messy clean-ups and make sure you have all the necessary materials within reach
- Don’t overdo the beeswax: Apply a thin, even layer of beeswax to your fabric, as too much can make the wrap stiff and difficult to use
- Add a personal touch: Experiment with different fabrics, colors, and patterns to create unique and personalized beeswax wraps that reflect your style
- Care and maintenance: To keep your homemade beeswax wraps in great condition, simply wash them with soap and warm water, and dry them with a towel – they’ll be good as new
Key Takeaways for a More Sustainable Kitchen
Ditching plastic wrap for homemade beeswax wraps can significantly reduce kitchen waste and make food storage more eco-friendly
Using natural materials like cotton fabric, beeswax, and jojoba oil for the wraps ensures they are non-toxic and safe for wrapping food
With just a few simple ingredients and some basic DIY skills, you can create your own reusable beeswax wraps and start making a positive impact on the environment, one wrap at a time
Embracing Sustainability
By making our own homemade beeswax wraps, we’re not just reducing plastic waste, we’re reclaiming our kitchens as spaces for creativity and self-sufficiency – one beautifully imperfect wrap at a time.
Maya Torres
Conclusion
As we wrap up this DIY journey, let’s recap the key takeaways: we’ve learned how to make our own homemade beeswax wraps, explored natural food wrapping alternatives, and even delved into the process of creating a DIY beeswax wrap with cotton fabric. By following these simple steps, you’ve not only reduced your plastic usage but also gained a practical skill that can be applied to various aspects of your daily life. Whether you’re a seasoned DIY enthusiast or a beginner, this project is a great way to get started with sustainable living and embracing a more eco-friendly lifestyle.
So, what’s next? Now that you’ve experienced the satisfaction of creating something with your own hands, I encourage you to keep exploring and finding new ways to make your space more functional and beautiful. Remember, it’s all about celebrating small wins and taking it one project at a time. With a little creativity and a lot of heart, you can turn your tiny kitchen into a haven that reflects your personality and values. Happy making, and don’t forget to share your own DIY adventures with me!
Frequently Asked Questions
How do I ensure my homemade beeswax wraps are food-safe and clean?
To keep my homemade beeswax wraps food-safe and clean, I wash them with mild soap and warm water after each use, then let them air dry. I also make sure to only use 100% cotton fabric and high-quality, food-grade beeswax. This way, I can reuse them multiple times without worrying about any funky residue or bacteria buildup.
Can I use different types of fabric or materials to make my own beeswax wraps?
Absolutely, you can experiment with different fabrics! I’ve tried cotton, linen, and even hemp. Just keep in mind that the fabric should be natural, breathable, and tight-woven to work well with the beeswax. Avoid synthetic fabrics like polyester or nylon, as they won’t absorb the wax properly.
How long do homemade beeswax wraps typically last and how do I store them when not in use?
My homemade beeswax wraps usually last around 6-12 months with regular use. To keep them fresh, I store them in a dry place, like a drawer or basket, away from direct sunlight. You can also refresh them by re-melting the wax and re-applying it – it’s a great way to extend their life and keep them working beautifully in your tiny kitchen!