I still remember the day I decided to turn my tiny apartment wall into a lush oasis – I was on a mission to learn how to create a vertical garden that would thrive in even the smallest of spaces. It wasn’t easy, but the end result was well worth the trial and error. As someone who’s passionate about making the most of urban living, I’ve found that having a green space, no matter how small, can be a total game-changer. Not only does it purify the air and improve the aesthetic of my apartment, but it also serves as a reminder that even in the most concrete jungles, there’s always room for a little bit of nature.
In this article, I’ll be sharing my top secrets for crafting a lush vertical garden in even the coziest of corners. You’ll learn how to choose the right plants, design a space-efficient layout, and maintain your garden with minimal fuss. My goal is to provide you with practical advice that’s free from hype and jargon, so you can start enjoying the benefits of your very own vertical garden. Whether you’re a seasoned green thumb or a beginner looking to get started, I’m excited to share my knowledge with you and help you turn your walls into wonderlands.
Table of Contents
- Guide Overview: What You'll Need
- Step-by-Step Instructions
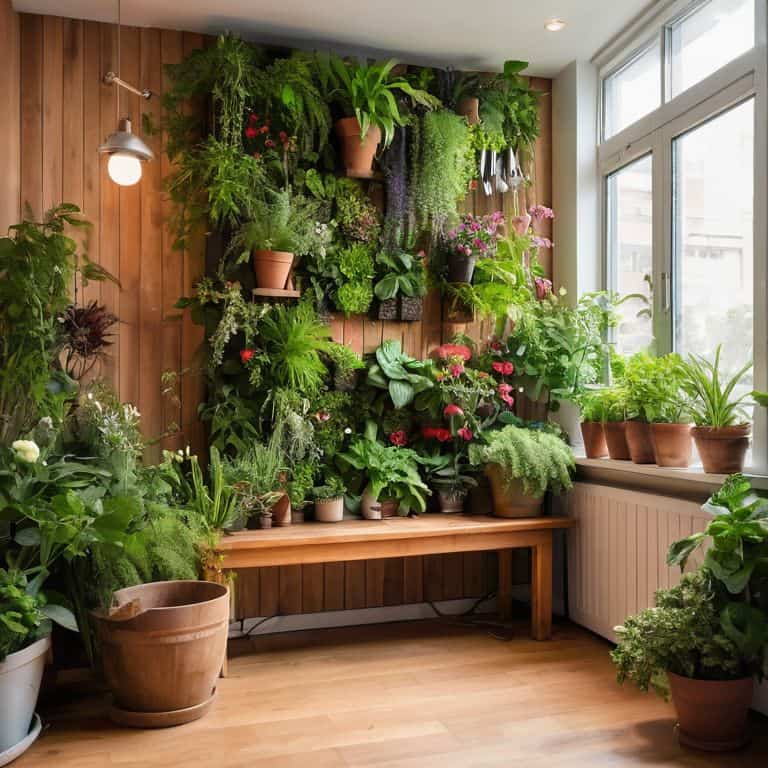
- How to Create a Vertical Garden
- Bringing Your Walls to Life: 5 Essential Tips for a Thriving Vertical Garden
- Bringing Your Vertical Garden to Life: 3 Key Takeaways
- Cultivating Life in Small Spaces
- Bringing Your Vertical Garden to Life
- Frequently Asked Questions
Guide Overview: What You'll Need
Total Time: 2 hours 30 minutes
Estimated Cost: $50 – $100
Difficulty Level: Intermediate
Tools Required
- Drill (with screwdriver and drill bits)
- Hammer
- Trowel (for applying soil and plants)
- Measuring Tape (for measuring wood and spacing)
- Level (for ensuring the structure is straight)
- Pencil and Marker (for marking wood and planning layout)
- Saw (for cutting 2-in x 6-in lumber)
- Wire Cutters (for trimming irrigation system tubes)
Supplies & Materials
- 2-in x 6-in lumber (for frame and shelves)
- Wood Screws (1 inch and 2 inches long)
- Soil (specifically designed for vertical gardens)
- Plants (choose varieties suitable for vertical gardens)
- Irrigation System (including tubes, fittings, and a water pump)
- Waterproof Membrane (to prevent water damage behind the garden)
- Mounting Hardware (such as brackets and screws for securing to a wall)
- Geotextile Fabric (to separate soil from the waterproof membrane)
Step-by-Step Instructions
- 1. First, assess your space and determine the best location for your vertical garden. Consider the amount of natural light your wall receives, as well as the proximity to a water source. I’ve found that a spot near a sunny window or a door that leads to a balcony or patio is ideal.
- 2. Next, gather your materials, including a wooden or plastic frame, a growing medium such as soil or a soilless mix, and your chosen plants. I’m a big fan of using recycled materials whenever possible, so consider repurposing an old pallet or picture frame to create your garden’s structure.
- 3. Now it’s time to prepare your wall for the vertical garden. If you’re renting your space, you’ll want to choose a method that won’t damage the walls, such as using adhesive strips or a removable wall hook. If you own your home, you can consider installing a more permanent system, such as a trellis or a wooden bracket.
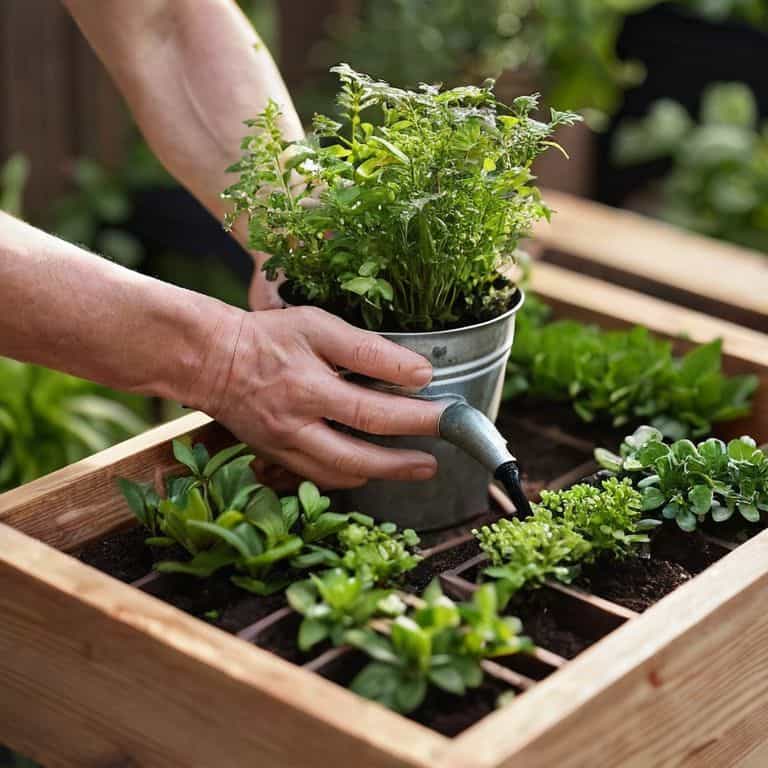
- 4. With your materials and wall preparation in place, it’s time to start building your vertical garden. Begin by attaching the frame to the wall, making sure it’s level and secure. Then, fill the frame with your growing medium and start adding your plants. I like to start with a few low-maintenance plants such as succulents or herbs, and then add more variety as I get a feel for the garden’s conditions.
- 5. Once your plants are in place, it’s time to add any finishing touches, such as a watering system or a decorative trim. I’m a big fan of using drip irrigation to make watering my plants easy and efficient. This system allows me to deliver water directly to the roots of each plant, reducing waste and minimizing the risk of overwatering.
- 6. Now that your vertical garden is up and running, it’s time to think about maintenance. Make sure to water your plants regularly, and consider setting up a fertilization schedule to keep your plants healthy and thriving. I also like to keep a journal or log to track my progress and note any challenges or successes along the way.
- 7. Finally, don’t be afraid to experiment and adapt as you go. Vertical gardening is all about trial and error, and it’s okay if things don’t go exactly as planned. Be prepared to make adjustments to your system, and don’t be afraid to try new things and take risks. With a little patience and practice, you’ll be enjoying the benefits of your very own vertical garden in no time.
How to Create a Vertical Garden

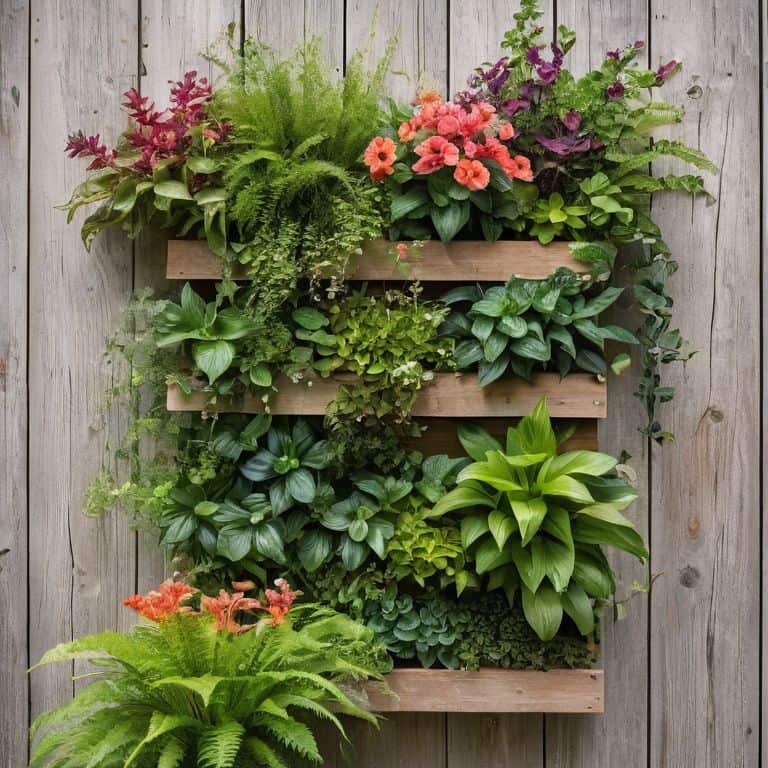
As I delved into the world of vertical gardening, I discovered that space saving garden ideas can be both functional and aesthetically pleasing. One of my favorite tips is to utilize indoor wall mounted planters to add some greenery to even the smallest of spaces. Not only do they free up floor space, but they also create a unique focal point in the room.
When it comes to choosing the right plants for your vertical garden, consider opting for climbing varieties that can thrive in small space gardening conditions. I’ve had great success with ivy and succulents, which can be trained to grow up a diy trellis or other support system. This not only adds visual interest to your garden, but also helps to maximize space.
To take your vertical garden to the next level, look for hanging garden design inspiration online or in gardening books. You can find a wide range of vertical garden systems that cater to different budgets and skill levels. Some popular options include modular planters and living walls, which can be customized to fit your specific needs and space constraints. By exploring these options and getting creative with your design, you can create a thriving and beautiful vertical garden that brings joy and freshness to your home.
Diy Vertical Garden Systems Inspiration
I’ve seen some amazing DIY vertical garden systems in my neighborhood walks, and I’m excited to share some inspiration with you. From repurposed wooden pallets to cleverly designed trellis systems, the possibilities are endless. I’ve even experimented with using an old ladder as a makeshift trellis for my own climbing plants – it’s been a great conversation starter when I host dinner parties!
For a more polished look, consider using a modular planter system or a living wall kit. These can be easily customized to fit your space and style, and they’re perfect for beginners. I’ve also come across some incredible examples of DIY vertical gardens made from recycled materials like plastic bottles or cardboard tubes – a great way to get creative and reduce waste.
Space Saving Garden Ideas for Beginners
As a beginner, it’s essential to start small and be mindful of the space you have available. I’ve found that using wall-mounted planters or trellises can be a great way to add some greenery to your space without taking up too much floor room. Another idea is to utilize the often-wasted space above your doors or windows by installing a few hanging planters. These simple additions can bring a touch of nature indoors and make your space feel more vibrant. Plus, they’re easy to maintain and can be adapted to fit your personal style.
Bringing Your Walls to Life: 5 Essential Tips for a Thriving Vertical Garden
- My Top Pick: Choose the Right Plants – I’ve found that selecting plants that are native to your region or have similar growing conditions can make all the difference in their health and longevity
- Get Creative with Your Planters – From repurposed wooden crates to sleek, modern trellises, the options are endless, and I love experimenting with new and innovative ways to display my plants
- Don’t Forget the Lighting – As someone who’s lived in small apartments, I know how crucial proper lighting can be, and for your vertical garden, it’s no different – make sure to select plants that thrive in the amount of light your space receives
- Water Wisely – Overwatering is one of the most common mistakes when it comes to vertical gardens, so I’ve learned to water my plants sparingly, making sure the soil is moist but not soaked
- Maintain and Enjoy – The best part of having a vertical garden is watching it flourish, and to keep it looking its best, I make it a point to regularly prune, fertilize, and simply appreciate the beauty it brings to my space
Bringing Your Vertical Garden to Life: 3 Key Takeaways
I’ve learned that with a little creativity, even the smallest of spaces can be transformed into a lush oasis, and it all starts with choosing the right plants and materials for your vertical garden
By embracing DIY vertical garden systems and space-saving garden ideas, you can turn any wall into a thriving garden, regardless of your skill level or the size of your apartment
Ultimately, creating a vertical garden is about more than just growing plants – it’s about cultivating a sense of community and connection to the natural world, right in the heart of the city
Cultivating Life in Small Spaces
A vertical garden isn’t just a decoration, it’s a declaration that even in the smallest of spaces, life can flourish, and that’s a powerful reminder that our surroundings don’t define us, our imagination does.
Noah Burton
Bringing Your Vertical Garden to Life
As we’ve explored the world of vertical gardens together, I hope you’ve seen how easy it is to turn any wall into a lush oasis. From the initial planning stages to the final touches, creating a vertical garden is all about embracing sustainable living and making the most of the space you have. We’ve covered the basics of space-saving garden ideas, delved into DIY vertical garden systems, and I’ve shared my personal tips for making it all work in even the coziest of apartments. The key takeaway is that with a little creativity, you can enjoy the benefits of gardening no matter how small your space may be.
So, as you embark on your own vertical gardening journey, remember that it’s not just about the plants or the space-saving techniques – it’s about creating a lifestyle that values community and connection. Whether you’re hosting dinner parties surrounded by your green walls or simply enjoying a quiet morning among your plants, your vertical garden has the power to transform not just your home, but your life. Happy planting, and I look forward to hearing about your own vertical garden adventures!
Frequently Asked Questions
What are the best plants to use for a vertical garden in a small apartment with limited natural light?
For low-light spots, I swear by Chinese Evergreen, Pothos, or Dracaena – they’re perfect for adding some greenery to my tiny apartment. I’ve also had great luck with air plants and succulents, which are super low-maintenance and can thrive in limited natural light.
How do I ensure proper watering and drainage for my vertical garden to prevent mold and root rot?
To keep my vertical garden thriving, I make sure to water sparingly, as overwatering can lead to mold and root rot. I also incorporate a drainage system, using materials like felt or mesh to prevent waterlogging, and add a layer of small rocks or pebbles at the bottom for extra drainage – it’s all about finding that perfect balance!
Can I use a trellis or a wall-mounted planter to create a vertical garden, or are there other materials I should consider?
Absolutely, a trellis or wall-mounted planter is a great starting point for your vertical garden. I’ve also had success with repurposed pallets, wooden lattices, and even geometric metal screens – the key is to experiment and find what works best for your space and style.