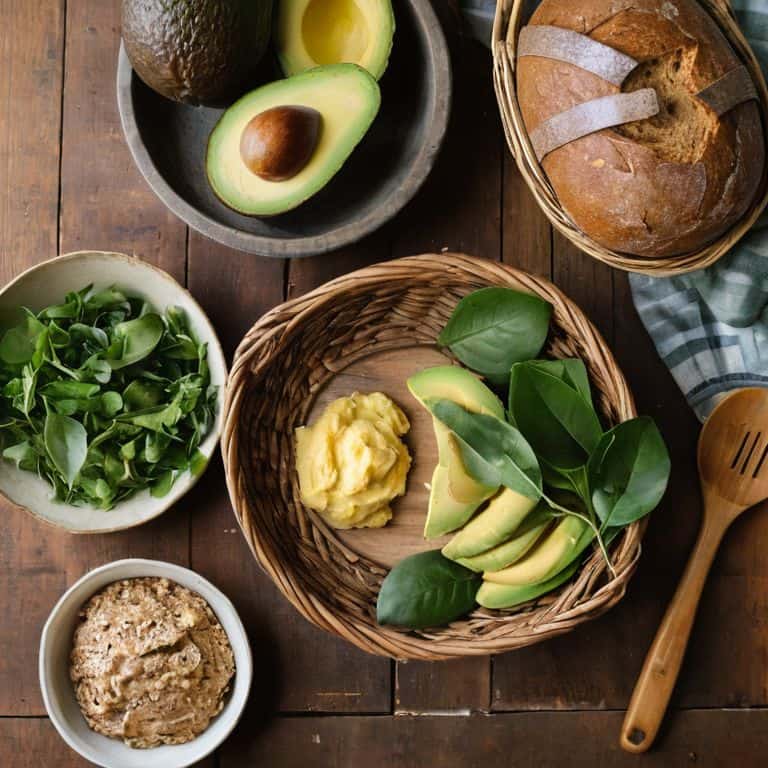
I still remember the day I discovered the joy of making my own hummus – it was like a revelation in my tiny kitchen. I had always thought that a guide to making your own hummus would be complicated and time-consuming, but it turned out to be ridiculously easy. With just a few simple ingredients and some leftover chickpeas, I could create a delicious and healthy snack that would otherwise go to waste. This experience sparked my passion for resourceful cooking and reducing food waste, and I’ve been hooked on making my own hummus ever since.
In this article, I’ll share my honest and no-nonsense approach to making hummus from scratch. You’ll learn how to turn last week’s leftovers into a creamy, dreamy dip that’s not only delicious but also budget-friendly. I’ll walk you through the simple steps of making your own hummus, from soaking the chickpeas to blending the final product. With my tips and tricks, you’ll be able to create a tasty and healthy snack that’s perfect for any occasion, all while reducing your food waste and saving money. So, let’s get started on this culinary journey and discover the joy of making our own hummus together!
Table of Contents
- Guide Overview: What You'll Need
- Step-by-Step Instructions
- A Guide to Making Your Own Hummus
- Blending Chickpeas for Smooth Hummus With Lemon Juice Twist
- Scooping Up Sustainability With Roasted Garlic Hummus Recipe
- 5 Savvy Tips for a Deliciously Sustainable Hummus Experience
- Nourishing Your Way: 3 Key Takeaways for a Healthier Hummus Habit
- Savoring the Flavor of Sustainability
- Embracing the Joy of Homemade Hummus
- Frequently Asked Questions
Guide Overview: What You'll Need
Total Time: 30 minutes
Estimated Cost: $10 – $20
Difficulty Level: Easy
Tools Required
- Blender (or food processor)
- Measuring Cups
- Measuring Spoons
- Spoon (for stirring)
- Cutting Board (for preparing garlic)
- Knife (for mincing garlic)
Supplies & Materials
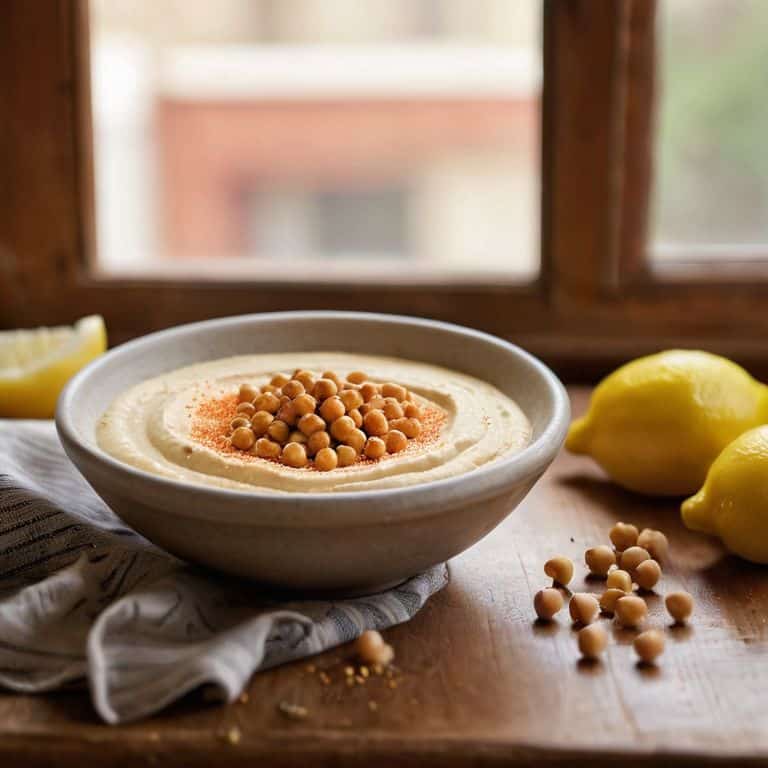
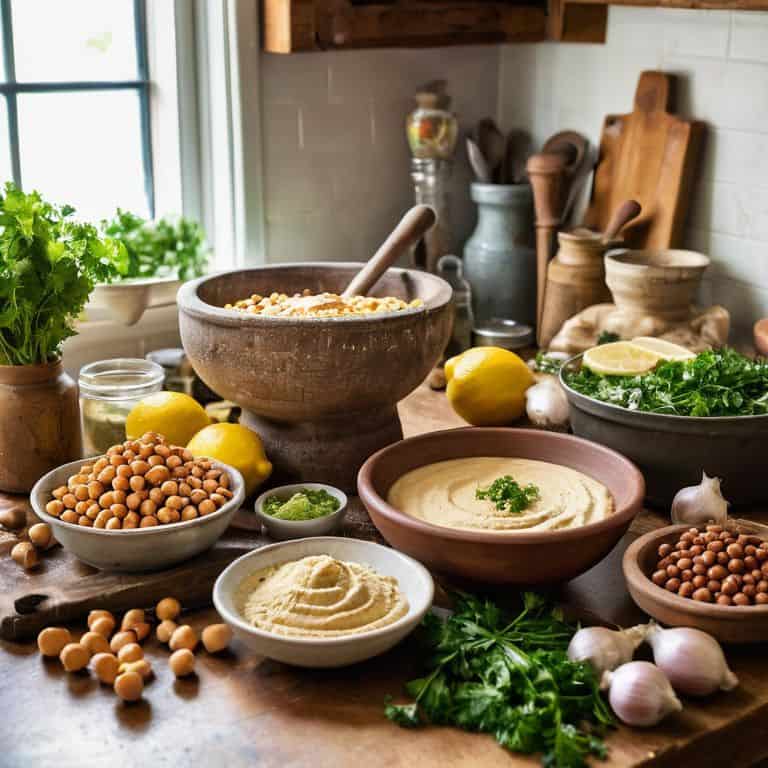
- Chickpeas (1 1/2 cups, drained and rinsed)
- Lemon Juice (1/4 cup, freshly squeezed)
- Tahini (1/4 cup)
- Garlic (2 cloves, minced)
- Salt (to taste)
- Olive Oil (1/4 cup)
- Water (1/4 cup, or as needed)
- Paprika (optional, for garnish)
- Parsley (optional, for garnish)
Step-by-Step Instructions
- 1. First, let’s start by gathering all the necessary ingredients, which are surprisingly simple: a cup of those leftover chickpeas I was telling you about, 2 cloves of garlic, 1/4 cup of lemon juice, 1/4 cup of tahini, and a pinch of salt. I just love that we can use every part of the lemon, including the zest, to add a bit of brightness to our hummus.
- 2. Next, drain and rinse those chickpeas, and give them a good pat dry with a paper towel to remove any excess moisture. This step is crucial because it helps the hummus blend smoothly, and we don’t want any soggy texture ruining our snack.
- 3. Now, let’s get our garlic ready. I like to mince it using my trusty chef’s knife, but you can also use a garlic press if you have one. The key is to release that amazing flavor and aroma without overpowering the other ingredients. Remember, a little garlic goes a long way, so don’t be afraid to taste as you go.
- 4. In a blender or food processor (I use my old reliable blender that’s been with me through countless hummus batches), combine the chickpeas, garlic, lemon juice, and tahini. Blend on high speed for about 2 minutes, or until you get a smooth and creamy consistency. You might need to stop the blender and scrape down the sides a few times to make sure everything is well mixed.
- 5. With the blender still running, slowly pour in 1/4 cup of olive oil. This is where the magic happens, and your hummus starts to come together in a rich and velvety texture. Keep blending for another minute or until you reach your desired consistency.
- 6. Season your hummus with a pinch of salt and any additional flavor boosters you like, such as paprika or cumin. I also love adding a squeeze of fresh lemon juice for a bit of brightness. Give it a good stir and taste to adjust the seasoning as needed.
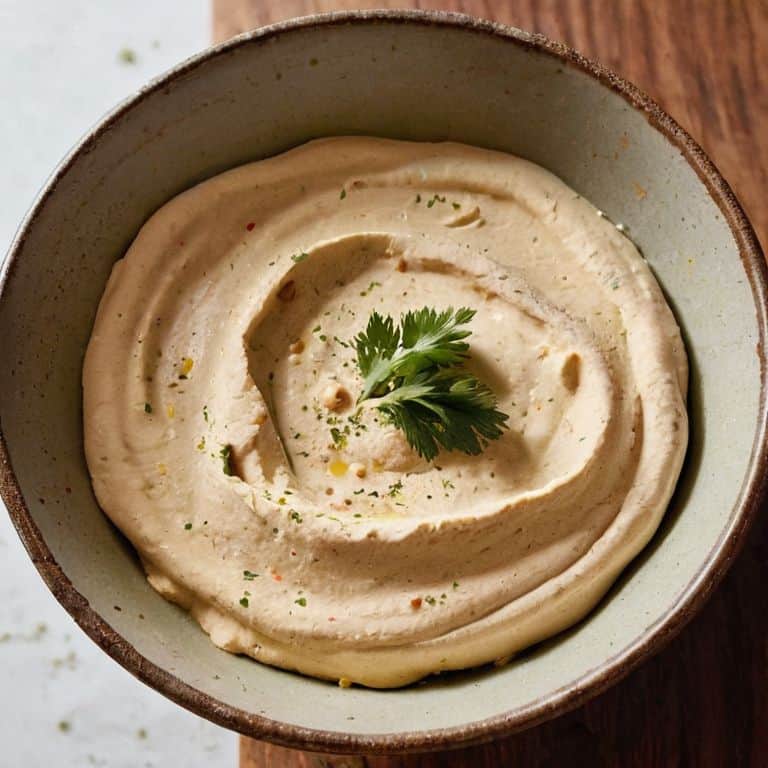
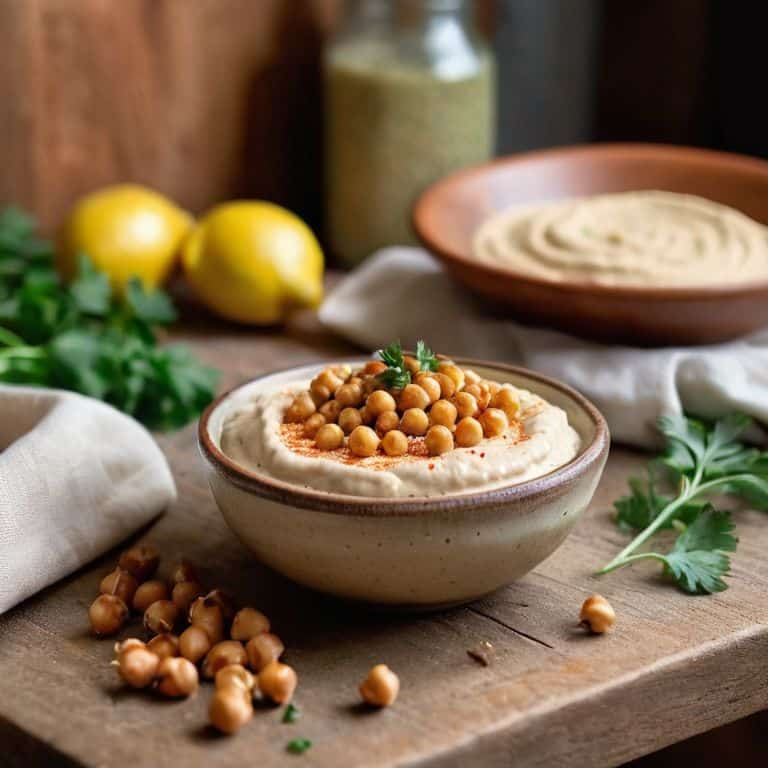
- 7. Finally, transfer your delicious homemade hummus to a serving bowl, and garnish with a sprinkle of paprika, some chopped parsley, or a few pita chips. I like to serve mine with a side of crudités or whole grain crackers for a satisfying snack that’s both healthy and delicious. You can also store it in an airtight container in the fridge for up to a week, making it the perfect make-ahead snack for busy days.
A Guide to Making Your Own Hummus
As I experiment with different flavors in my tiny kitchen, I’ve discovered that a classic middle eastern dip like hummus can be elevated with simple twists. One of my favorites is adding roasted garlic to the traditional recipe, which gives it a deep, rich flavor. I also love using hummus with lemon juice as a base and then adding my own spin with spices or herbs.
When it comes to achieving smooth hummus, I’ve found that blending chickpeas is an art that requires a little patience. It’s all about taking your time and scraping down the sides of the blender to ensure everything gets fully incorporated. I’ve also been exploring healthy alternatives to traditional tahini, like using sesame oil or sunflower seed butter to add creaminess without the extra cost.
For those just starting out, I recommend checking out some easy hummus recipes for beginners to get a feel for the basics. From there, you can start experimenting with your own flavors and ingredients. Remember, the key to making great hummus is to taste as you go and adjust the seasoning to your liking. With a little practice, you’ll be whipping up delicious, creamy dips in no time, and it’s a great way to reduce food waste by using up leftover chickpeas and vegetables.
Blending Chickpeas for Smooth Hummus With Lemon Juice Twist
Now that we’ve got our roasted garlic hummus recipe down, let’s talk about the magic that happens when you blend chickpeas with a squeeze of lemon juice. I just love how a burst of citrus can elevate the entire dish! For smooth hummus, it’s all about finding the right balance. I like to add a tablespoon or two of freshly squeezed lemon juice to my blender, along with those chickpeas, and watch as it transforms into a creamy delight.
By incorporating lemon juice, you’re not only adding flavor, but also helping to break down those chickpeas for an ultra-smooth texture. It’s a simple trick, but one that makes all the difference in creating a delicious and healthy dip that’s perfect for snacking or entertaining. Plus, using up that lemon is just another way to reduce waste in the kitchen – a win-win in my book!
Scooping Up Sustainability With Roasted Garlic Hummus Recipe
Now that we’ve covered the basics, let’s take our hummus game to the next level with a roasted garlic twist. I just love how roasted garlic adds a depth of flavor that’s hard to resist. To make it, simply slice the top off a whole head of garlic, drizzle with olive oil, and roast at 400°F (200°C) for about 30-40 minutes, or until tender. Then, squeeze the garlic out of its skin and blend it with chickpeas, lemon juice, and tahini for a creamy, dreamy dip.
This roasted garlic hummus is perfect for using up leftover garlic that might otherwise go to waste. Plus, it’s a great way to add some extra nutrition to your snack routine. I like to serve it with carrot sticks or cucumber slices for a healthy and satisfying crunch. Give it a try and see how you like it!
5 Savvy Tips for a Deliciously Sustainable Hummus Experience
- Ditch the Draining: Use the liquid from canned chickpeas, also known as aquafaba, to add moisture and creaminess to your hummus
- Don’t Waste a Single Bite: Incorporate roasted vegetable scraps, like carrot or sweet potato tops, into your hummus for added depth of flavor
- Spice It Up with What You Have: Experiment with different spices and herbs you already have in your pantry to give your hummus a unique twist, from smoky paprika to zesty parsley
- Get Your Blend On: Invest in a good blender or food processor, and don’t be afraid to blend those chickpeas until they’re silky smooth – it’s all about the texture, baby!
- Jar It Up: Store your homemade hummus in a mason jar and get creative with toppings like edible flowers, chopped nuts, or a sprinkle of sumac for a beautiful and nutritious snack
Nourishing Your Way: 3 Key Takeaways for a Healthier Hummus Habit
Embracing a root-to-stem approach in your kitchen can significantly reduce food waste and save you money, all while creating delicious and nutrient-dense meals like our roasted garlic hummus
By incorporating simple, budget-friendly ingredients like chickpeas, lemon juice, and garlic into your recipes, you can elevate your meals from mundane to mouth-watering, and make healthy eating a sustainable part of your lifestyle
Experimenting with different flavors and ingredients, such as adding a squeeze of fresh lemon juice or a sprinkle of paprika, can keep your hummus game strong and prevent meal fatigue, ensuring that you stay on track with your healthy eating goals
Savoring the Flavor of Sustainability
By embracing the simplicity of making our own hummus, we not only reduce waste and save money, but we also nurture our bodies and the planet, one deliciously creamy dip at a time.
Jenna Matthews
Embracing the Joy of Homemade Hummus
As we’ve explored in this guide to making your own hummus, the process is not only incredibly easy, but it’s also a great way to reduce food waste and get creative with ingredients you might otherwise throw away. From the simple step-by-step instructions to the fun twists like roasted garlic and lemon juice, we’ve seen how hummus can be a delicious and nutritious addition to any meal. By making your own hummus, you’re taking control of the ingredients and the amount of waste you produce, which is a great step towards a more sustainable lifestyle.
So, the next time you’re at the grocery store, consider picking up a few extra cans of chickpeas and giving homemade hummus a try. Remember, every small change adds up, and making your own hummus is a great way to start making a positive impact on your health and the environment. With a little practice, you’ll be whipping up batches like a pro and enjoying the many benefits of this tasty, nutritious dip.
Frequently Asked Questions
What are some creative ways to use up leftover hummus?
I just love finding new ways to use up leftover hummus! Try using it as a veggie dip, a sandwich spread, or as a creamy base for salad dressings. You can also thin it out with a bit of water to make a tasty sauce for pasta or roasted vegetables. Get creative and reduce that food waste!
Can I customize the recipe with different spices or herbs to give it a unique flavor?
Absolutely, I love experimenting with different spices and herbs to give my hummus a unique twist. Try adding a pinch of cumin for a warm, earthy flavor or a sprinkle of paprika for a smoky kick. You can also mix in some fresh parsley or dill for a bright, refreshing taste. The possibilities are endless, and it’s a great way to use up any leftover herbs you have on hand!
How long does homemade hummus typically last in the fridge and what's the best way to store it?
Honestly, homemade hummus typically lasts 5-7 days in the fridge. I store mine in a mason jar with a tight-fitting lid, making sure to press out any air before sealing. This trick helps prevent spoilage and keeps it fresh for a longer period. Give it a try!