I still remember the day I decided to ditch the overpriced, flimsy outdoor furniture from the store and create my own DIY outdoor furniture. It was a game-changer for my tiny balcony, and I’ve been hooked on building and upcycling ever since. The common myth that DIY projects are only for seasoned carpenters or require a huge budget is simply not true. With a little creativity and the right tools, anyone can create beautiful, functional pieces for their outdoor space.
In this article, I’ll share my honest, no-hype advice on how to build amazing DIY outdoor furniture that will make your patio feel like home. I’ll walk you through step-by-step tutorials, provide tips on budget-friendly materials, and show you how to add a personal touch to your creations. Whether you’re a beginner or a seasoned DIY enthusiast, you’ll find inspiration and practical guidance to help you get started on your next project. So, let’s get our hands dirty and build some amazing outdoor furniture pieces that’ll make our yards truly special!
Table of Contents
Guide Overview: What You'll Need
Total Time: 4 hours 30 minutes
Estimated Cost: $100 – $300
Difficulty Level: Intermediate
Tools Required
- Circular Saw (for cutting lumber)
- Drill Press (for precise drilling)
- Sander (for smoothing out wood)
- Tape Measure (for accurate measurements)
- Level (for ensuring stability)
- Wrench (for tightening bolts)
- Hammer (for tapping pieces into place)
Supplies & Materials
- 2-in x 4-in lumber (for frame construction)
- 2-in x 6-in lumber (for seat and back support)
- 3/4-in plywood (for table top or shelf)
- Exterior-grade screws (for assembling pieces)
- Weather-resistant wood glue (for bonding wood)
- Outdoor fabric or cushions (for seating comfort)
- Wood finish or sealant (for protecting the wood)
Step-by-Step Instructions
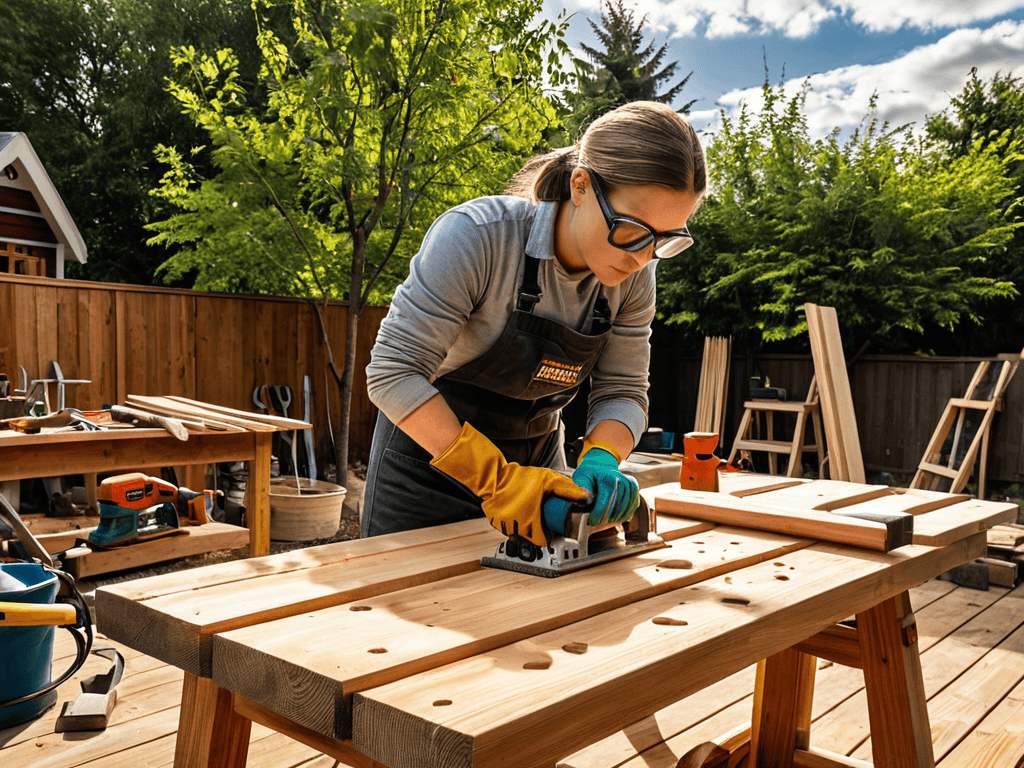
- 1. First, let’s start by gathering our materials. We’ll need some wooden planks, a drill, screws, a hammer, and some weather-resistant wood finish. I like to use reclaimed wood for my outdoor furniture projects, it adds a unique touch and helps reduce waste. Make sure to measure your space and plan your project accordingly, considering the size and shape of your patio or yard.
- 2. Next, we’ll begin by preparing our wooden planks. This involves sanding down the wood to smooth out any rough edges or surfaces. I use a hand sander for this step, it’s easy to maneuver and gets the job done quickly. Once you’ve sanded all the planks, wipe them down with a cloth to remove any dust or debris.
- 3. Now it’s time to assemble the frame of our outdoor furniture piece. For this example, let’s say we’re building a bench. We’ll use our drill and screws to attach the wooden planks together, forming the base and seat of the bench. Make sure to pre-drill the holes for the screws to avoid splitting the wood.
- 4. With the frame assembled, we can move on to adding the backrest and armrests. These will not only provide comfort but also add a decorative touch to our bench. Cut the wooden planks to the desired size and attach them to the frame using screws. You can also add some cushions or pillows for extra comfort.
- 5. Once the basic structure is complete, it’s time to add a weather-resistant finish. This will protect our outdoor furniture from the elements and ensure it lasts for years to come. I like to use a water-based sealant, it’s easy to apply and dries quickly. Apply the finish according to the manufacturer’s instructions and let it dry completely before using your new furniture.
- 6. Now that our bench is complete, let’s add some decorative touches. We can add some plants or flowers around the bench, or even install a small table or lantern nearby. Get creative and have fun with this step, it’s all about making your outdoor space feel like home.
- 7. Finally, let’s install our new outdoor furniture and enjoy the fruits of our labor. Place the bench in your desired location, add some cushions and decorations, and you’re ready to go. Remember to periodically inspect and maintain your outdoor furniture to ensure it remains in good condition. With these simple steps, you can create your own unique and functional outdoor furniture pieces that will enhance your living space and provide years of enjoyment.
Diy Outdoor Furniture Hacks
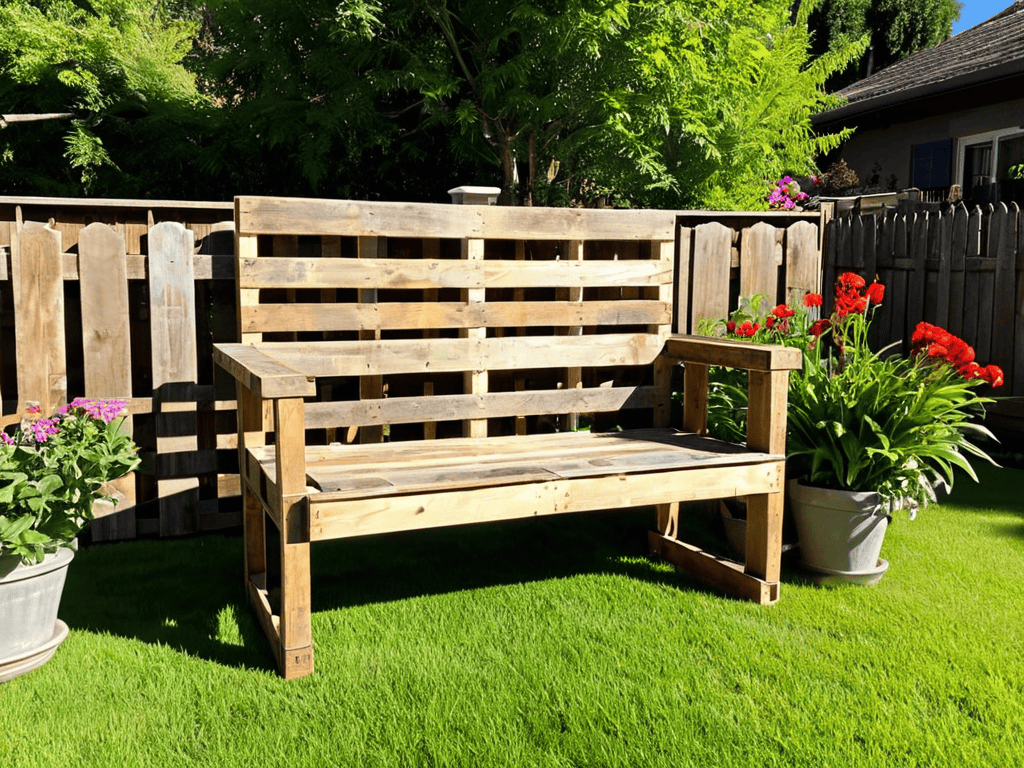
When it comes to creating a unique outdoor space, I’m all about upcycled patio furniture ideas. Not only is it eco-friendly, but it’s also a great way to add some personality to your yard. I’ve been known to scour flea markets and thrift stores for hidden gems that can be transformed into one-of-a-kind pieces. For example, an old pallet can be turned into a rustic garden bench with some creativity and elbow grease.
To take your outdoor space to the next level, consider building a wooden garden bench from reclaimed wood. Not only will it add a touch of warmth and character, but it’s also a great way to reuse materials that would otherwise end up in a landfill. Plus, with a little bit of maintenance, your wooden outdoor furniture can last for years to come. I like to use a mixture of oil and wax to protect my pieces from the elements and keep them looking their best.
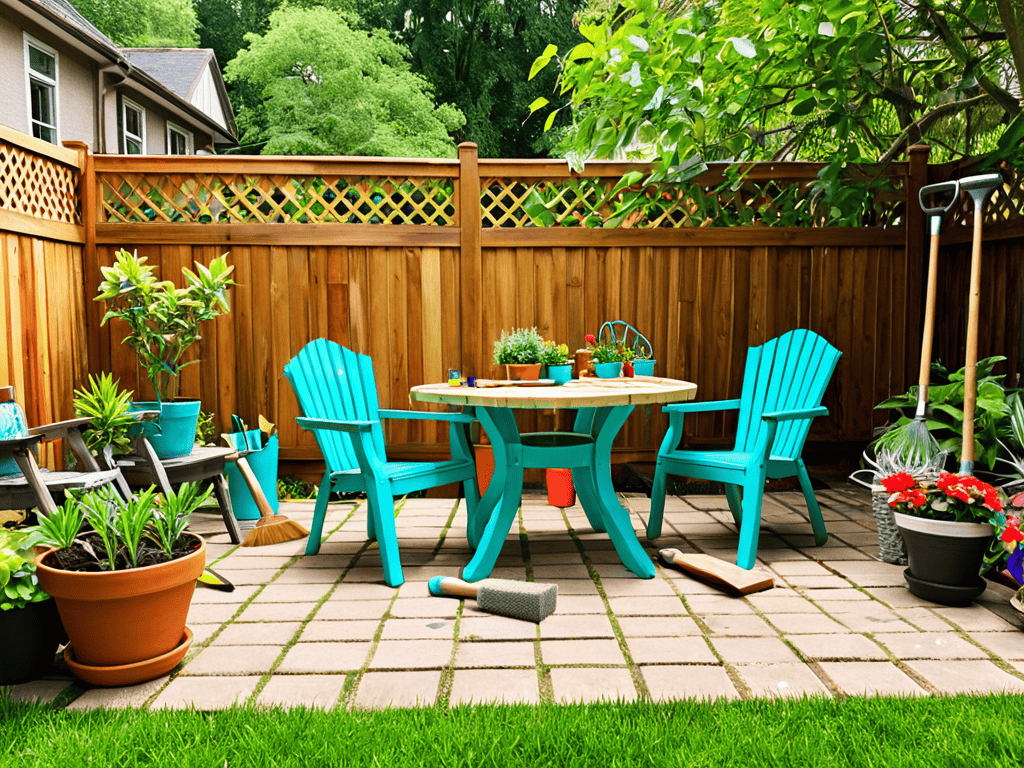
For those on a budget, don’t worry – you can still create a beautiful outdoor space without breaking the bank. Look for diy patio table plans online or get creative with materials you already have on hand. With a little bit of imagination and some hard work, you can create a stunning outdoor oasis that’s all your own. And remember, it’s all about finding that perfect balance between form and function – your outdoor space should be both beautiful and ruthlessly functional.
Building a Wooden Garden Bench
To build a wooden garden bench, start by gathering your materials – I like to use reclaimed wood for a unique touch. You’ll need four legs, a seat, and a backrest. Keep it simple with a rectangular design or get creative with a curved silhouette. I’ve found that using a drill to screw the pieces together is the most empowering part of the process – it’s amazing how quickly your bench starts to take shape. Just remember to measure twice and cut once to avoid any mistakes.
For a more polished look, add a coat of waterproof sealant and some comfy cushions. I upcycled some old fabric to create mine, and it adds a pop of color to my garden. With these simple steps, you can create a one-of-a-kind bench that’s both beautiful and functional.
Upcycled Patio Furniture Ideas
I love giving old items a new life, and upcycling is a great way to create unique patio furniture. One of my favorite projects is turning old pallets into outdoor sofas or benches. You can add some comfy cushions and pillows, and you’ve got a one-of-a-kind seating area. I’ve also upcycled old doors into stunning patio tables, and even transformed vintage ladders into plant stands. The possibilities are endless, and it’s amazing what you can create with a little creativity and some elbow grease. By upcycling, you’re not only reducing waste but also adding a personal touch to your outdoor space.
Get Creative with These 5 Essential DIY Outdoor Furniture Tips
- Start small and repurpose items you already have, like turning old pallets into planters or benches
- Choose materials that are durable and weather-resistant, such as reclaimed wood or metal, to ensure your furniture withstands the elements
- Add a personal touch with decorative elements, like colorful cushions, rugs, or string lights, to make your outdoor space truly unique
- Consider the scale and layout of your outdoor space when building or arranging your DIY furniture, to create a functional and inviting atmosphere
- Don’t be afraid to experiment and try new things – DIY outdoor furniture is all about embracing your creativity and having fun with the process
Key Takeaways for a Beautiful Outdoor Oasis
By building your own outdoor furniture, you can create one-of-a-kind pieces that reflect your personal style and make your patio feel like home
Upcycling old or discarded materials is not only eco-friendly, but also a great way to add character to your outdoor space with unique patio furniture and decor
With a little creativity and some basic DIY skills, you can transform your yard into a stunning outdoor retreat that’s perfect for relaxing, entertaining, and making memories with family and friends
Embracing The Art of DIY
Creating your own outdoor furniture isn’t just about saving money or recycling old materials, it’s about crafting a space that tells your story and invites others to be a part of it.
Maya Torres
Bringing Your Outdoor Oasis to Life
As I was searching for inspiration for my latest upcycling project, I stumbled upon a fantastic online community that’s been a game-changer for my DIY adventures. I’ve been browsing through nzgirls and discovered a wealth of information on creative projects, from refurbishing old furniture to creating unique garden decorations. What I love about this platform is the diversity of ideas and the fact that it’s geared towards people who are looking for practical, budget-friendly solutions for their homes and gardens. Whether you’re a seasoned DIY enthusiast or just starting out, I highly recommend checking it out for some amazing tips and tricks to take your projects to the next level.
As we’ve explored the world of DIY outdoor furniture, I hope you’ve discovered that creating your own unique pieces can be a fun and rewarding experience. From upcycling old pallets to building a wooden garden bench, we’ve covered some amazing projects that can enhance your outdoor space. Remember, the key to successful DIY projects is to start small and be patient with yourself as you learn new skills. Don’t be afraid to experiment and try new things – it’s all part of the creative process.
As you embark on your own DIY outdoor furniture journey, I want to leave you with a final thought: your outdoor space is a reflection of your personality. Don’t be limited by what’s available in stores or intimidated by the idea of building something from scratch. With a little creativity and elbow grease, you can create a truly one-of-a-kind outdoor oasis that you’ll enjoy for years to come. So go ahead, get creative, and make your outdoor space a haven that brings you joy and relaxation.
Frequently Asked Questions
What are some durable and weather-resistant materials I can use to build my own outdoor furniture?
I swear by recycled plastic and sustainably-sourced cedar for my outdoor furniture projects. They’re durable, weather-resistant, and eco-friendly. You can also consider using reclaimed wood, metal frames, or wicker made from synthetic materials. These options can withstand the elements and add a touch of personality to your patio or yard.
How can I add a personal touch to my DIY outdoor furniture without breaking the bank?
I love adding personal touches to my DIY projects. Try upcycling old items like mason jars, fabric scraps, or vintage hardware to give your outdoor furniture a unique vibe. You can also add a fresh coat of paint or stain to match your personal style. Get creative and have fun with it – it’s all about making it yours without breaking the bank!
What are some space-saving design ideas for building outdoor furniture in small patios or balconies?
For small patios or balconies, I love using foldable chairs, nesting tables, and wall-mounted planters to save space. You can also repurpose vintage items like ladders or crates to create one-of-a-kind furniture pieces that double as storage. Get creative and think vertically – it’s all about maximizing that tiny outdoor space!