I still remember the day I realized that my tiny kitchen wasn’t a curse, but a challenge waiting to be solved. I was struggling to find space for my favorite cookbooks and kitchen gadgets, and that’s when I stumbled upon a guide to building simple floating shelves. It was like a lightbulb went off in my head – I could create my own storage solutions without breaking the bank or renting a power tool. The best part? It’s easier than you think, and I’m excited to share my experience with you.
In this article, I’ll walk you through the process of building your own simple floating shelves, from start to finish. You’ll get honest, no-hype advice on what materials to use, how to measure your space, and the best techniques for a sturdy and stylish finish. By the end of this guide, you’ll be equipped with the knowledge and confidence to tackle your own DIY project and create a more functional and beautiful kitchen space. So, let’s get started and turn your tiny kitchen into a haven of efficiency and style!
Table of Contents
Guide Overview: What You'll Need
Total Time: 2 hours 30 minutes
Estimated Cost: $50 – $100
Difficulty Level: Intermediate
Tools Required
- Drill (with screwdriver and drill bits)
- Level (to ensure straight installation)
- Measuring Tape (for accurate measurements)
- Pencil (for marking wall and shelf positions)
- Saw (for cutting lumber to size)
- Sandpaper (for smoothing out cut edges)
- Stud Finder (to locate wall studs)
- Wall Anchors (for securing shelves to drywall)
Supplies & Materials
- 2-in x 4-in lumber (for shelf supports)
- 3/4-in plywood (for shelf boards)
- Wood Screws (1 1/2 inches long)
- Wall Paint (optional, for matching shelf color to wall)
- Decorative Trim (optional, for finishing edges)
Step-by-Step Instructions
- 1. First, let’s start with the materials we’ll need for this project. I like to call it _gathering our treasure_, and it’s essential to have everything before we begin. For our simple floating shelves, we’ll need some wooden boards for the shelves themselves, wall anchors, screws, a drill (my favorite empowering tool), a level, and a measuring tape. Make sure you choose wooden boards that fit your kitchen’s style and are the right size for the space where you want to install the shelves.
- 2. Next, we need to plan our attack. Decide where you want your floating shelves to go, considering the height and the distance between them. Keep in mind that the space should be functional and visually appealing. I usually sketch out a quick design and take some measurements to ensure everything will fit perfectly and look great in my tiny kitchen.
- 3. Now, it’s time to cut our wooden boards to the desired length. If you’re not comfortable using a saw, don’t worry! You can always ask for help at the hardware store where you buy your materials. They can cut the boards for you. Remember to wear protective gloves and safety glasses when cutting wood to ensure your safety.
- 4. With our boards cut and ready, let’s prepare them for installation. Sand the cut edges to smooth them out and remove any splinters. This step is crucial for achieving a professional finish and ensuring the shelves are safe to use.
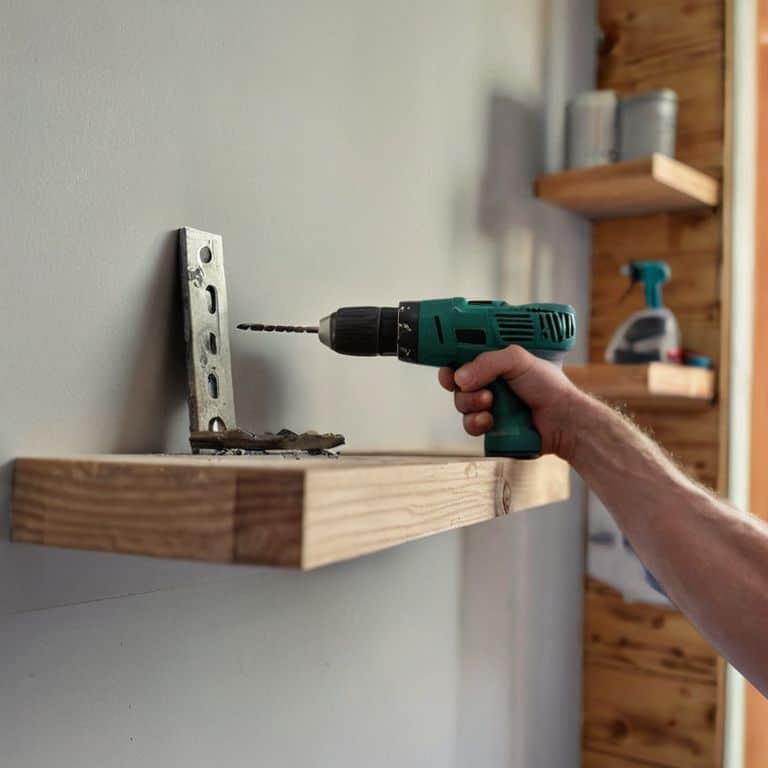
- 5. We’re getting close! Now, it’s time to drill the holes for the wall anchors. Use your level to ensure the holes are straight, and then drill slowly and carefully into the wall. I always double-check my measurements at this stage to avoid any mistakes. Once the holes are drilled, insert the wall anchors and screw them into place.
- 6. Next, we’ll attach the shelves to the wall anchors. Place the shelf over the anchor and screw it into place. Make sure it’s level and securely fastened. This is where the magic happens, and your floating shelves start to take shape.
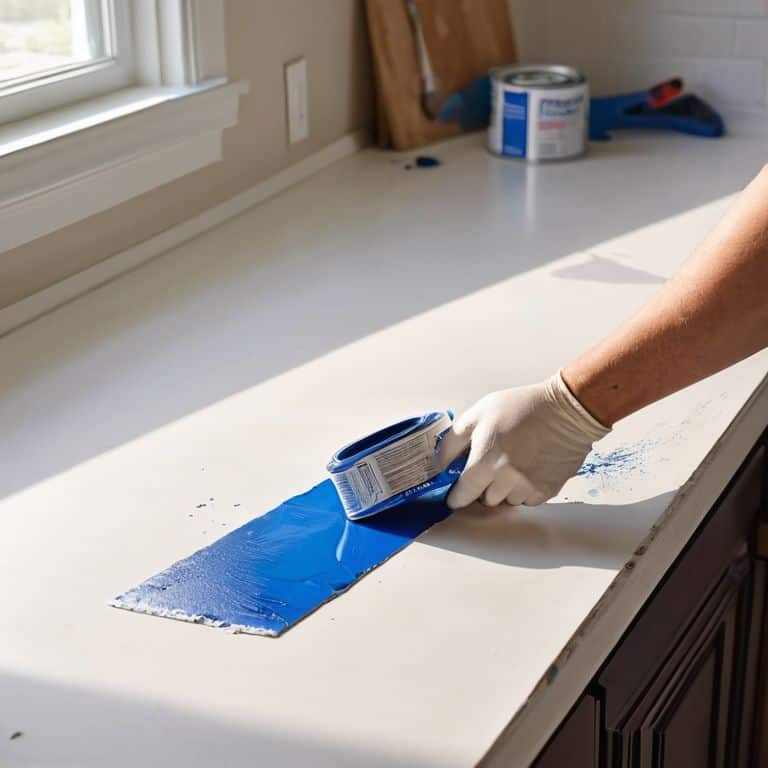
- 7. Finally, let’s add the finishing touches. You can stain or paint your shelves to match your kitchen’s decor, or leave them as is for a more rustic look. I personally love the look of natural wood, but it’s up to you to decide what fits your style best. Once you’ve added your finish, let it dry completely before placing any items on your new shelves.
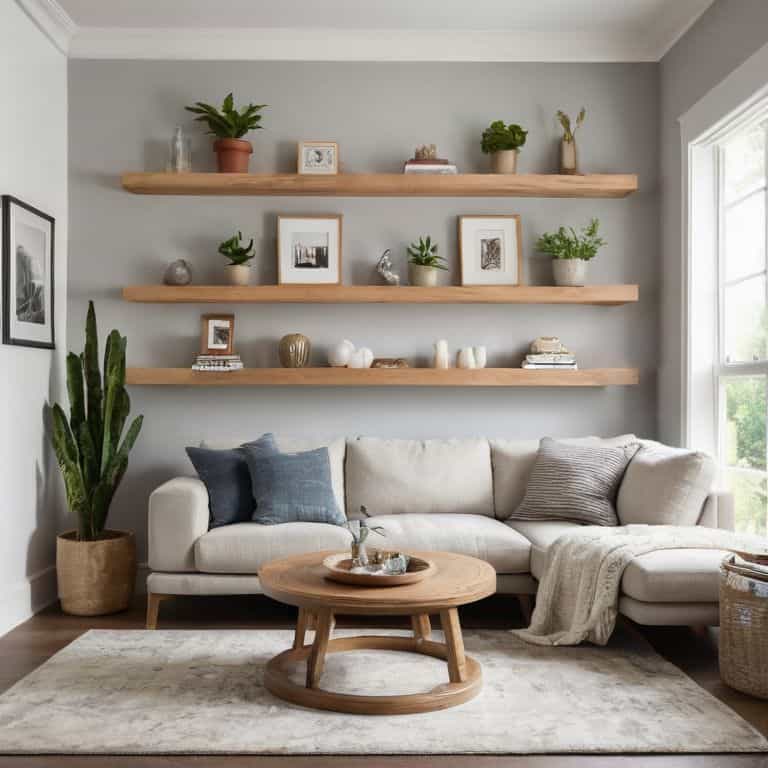
Simple Floating Shelves Guide

As I always say, the key to a successful DIY project is in the details. When it comes to diy wall shelves with hidden brackets, it’s all about creating a seamless look that adds to the overall aesthetic of your tiny kitchen. To achieve this, make sure to choose a bracket that fits snugly into the shelf’s groove, and don’t be afraid to get creative with the materials you use. For example, you can use reclaimed wood or glass to add a touch of elegance to your shelves.
One of the most common mistakes people make when installing floating shelves is not taking the time to properly measure the space. This can lead to shelves that are either too tight or too loose, which can be a real eyesore. To avoid this, take the time to measure twice, drill once, and consider using customizable floating shelf materials and sizes to fit your unique space. This will ensure that your shelves fit perfectly and provide ample storage for your kitchen essentials.
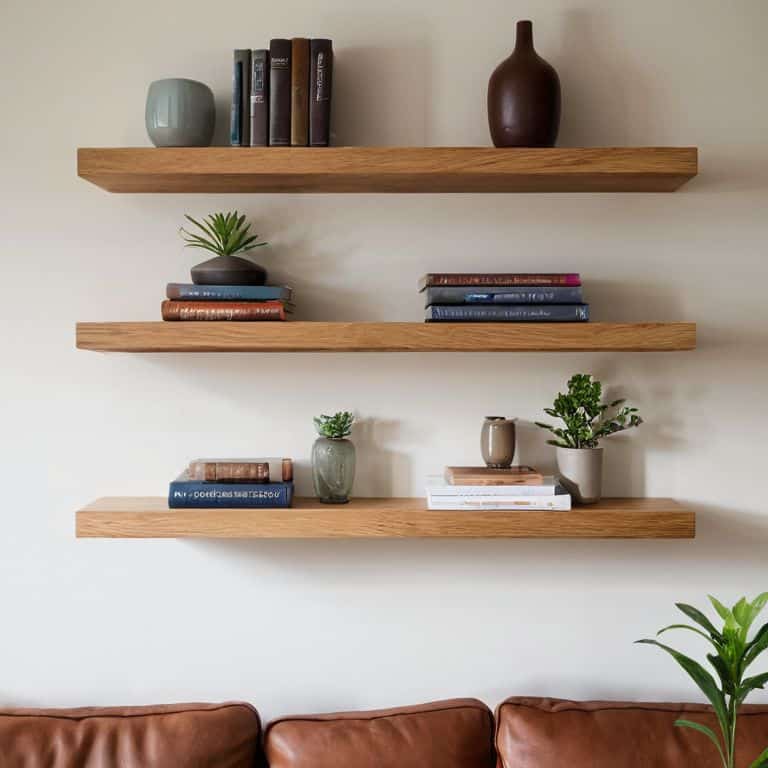
For a truly polished look, don’t forget to add some decorative touches to your floating shelves. You can use them to display your favorite cookbooks, vintage kitchen gadgets, or even a few potted plants. The key is to keep it simple and uncluttered, so don’t overdo it. By following these tips and using your creativity, you can create a beautiful and functional storage solution that will make your tiny kitchen feel more spacious and stylish.
Diy Wall Shelves With Hidden Brackets
Now that we’ve covered the basics of simple floating shelves, let’s take it up a notch with a sleek and modern twist: DIY wall shelves with hidden brackets. I just love how these shelves appear to be floating, adding a touch of magic to any room. The secret lies in using hidden brackets that support the shelf from beneath, creating a clean and minimalist look.
To achieve this look, you’ll need to attach the hidden brackets to the wall, making sure they’re level and secure. Then, simply place the shelf on top, and voilà! Your very own floating shelf with a touch of sophistication. I’ve used this technique in my own tiny kitchen, and it’s been a total game-changer for storing spices, oils, and other essentials. Give it a try, and get ready to fall in love with your newfound storage space!
Easy Floating Shelf Designs for Beginners
As a beginner, it’s essential to start with designs that are both stylish and easy to execute. I recommend opting for a minimalist approach, using materials like reclaimed wood or sleek glass. These materials not only add a touch of sophistication to your kitchen but are also relatively simple to work with. For a rustic look, consider using wooden planks with a natural finish, while glass shelves can add a modern and airy feel to your space.
When it comes to the design, keep it simple with clean lines and minimal ornamentation. This will not only make the project more manageable but also ensure that your shelves blend seamlessly into your kitchen’s aesthetic. Remember, the goal is to create a functional and beautiful space that reflects your personal style, so don’t be afraid to experiment and have fun with the process!
5 Essential Tips for a Flawless Floating Shelf Installation
- Measure Twice, Drill Once: Double-check your wall measurements to ensure your shelves fit perfectly and are evenly spaced
- Choose the Right Materials: Select high-quality, sturdy materials that fit your kitchen’s style, from sleek metal to rustic wood
- Hidden Brackets are Your Friend: Use concealed brackets to create a seamless, floating effect that adds to your kitchen’s sleek aesthetic
- Keep it Level: Use a level tool to guarantee your shelves are perfectly horizontal, preventing uneven surfaces and wonky displays
- Add a Personal Touch: Customize your shelves with decorative trim, paint, or stain to match your kitchen’s unique vibe and personality
3 Key Takeaways for a Stunning Tiny Kitchen
By building simple floating shelves, you can add storage and style to your tiny kitchen without breaking the bank or sacrificing precious floor space
With the right tools and a little creativity, even a beginner can create beautiful, functional floating shelves that make their kitchen feel more spacious and personalized
Whether you’re a renter or a homeowner, DIY floating shelves offer a versatile and renter-friendly solution for optimizing your kitchen’s layout and making the most of every inch
Empowering Your Space
Building simple floating shelves isn’t just about adding storage, it’s about reclaiming your kitchen’s potential and making every inch count – with a little creativity, even the smallest spaces can feel expansive and free.
Maya Torres
Wrapping Up Your Floating Shelf Project
As we’ve seen throughout this guide, building simple floating shelves is a surprisingly accessible DIY project, even for those with minimal experience. By following the steps outlined in this guide, you’ve learned how to create your own hidden bracket system, giving your kitchen a sleek, modern look without sacrificing storage space. Whether you opted for a minimalist design or something more elaborate, the sense of accomplishment that comes with creating something with your own hands is undeniable. Plus, the fact that these shelves are incredibly budget-friendly makes them an even more attractive solution for small kitchen owners.
So, as you stand back to admire your handiwork, remember that this project is about more than just adding some extra storage to your kitchen – it’s about empowering yourself to take control of your space and make it truly your own. Don’t be afraid to experiment with new materials, designs, and ideas; after all, the beauty of DIY lies in its endless possibilities. With your newfound confidence and skills, who knows what other creative projects you’ll tackle next? The world of DIY is full of surprises, and I’m excited to see what you come up with.
Frequently Asked Questions
What kind of materials are best for building simple floating shelves in a small kitchen?
For simple floating shelves, I swear by reclaimed wood, plywood, or MDF – they’re budget-friendly and easy to work with. You can also upcycle old furniture or crates for a unique look. Just remember, the key is to keep it light and airy to avoid overwhelming your tiny kitchen!
How do I determine the right size and spacing for my floating shelves to maximize storage and visual appeal?
For me, it’s all about balance – I like to leave about 6-8 inches between shelves, and choose shelf depths that are roughly 1/3 to 1/2 the width of the wall. This creates a visually appealing rhythm and makes the most of my tiny kitchen’s storage potential.
Are there any special considerations or precautions I should take when installing hidden brackets for my DIY wall shelves?
When installing hidden brackets, make sure to locate the wall studs to avoid any costly mistakes. Use a stud finder to mark the spot, and always double-check the weight limit of your brackets to ensure they can handle the load. Trust me, it’s better to be safe than sorry – I learned that the hard way on my first DIY project!