I still remember the day I realized that my tiny kitchen wasn’t the problem – it was the way I was using it. I was determined to learn how to create zones in your pantry that would make cooking and grabbing snacks a breeze. As a systems engineer, I applied the same principles of workflow and efficiency that I used in manufacturing plants to my own kitchen. And let me tell you, it was a game-changer. I no longer believed the common myth that a small pantry meant limited storage – instead, I saw it as an opportunity to get creative and optimize my space.
In this article, I’ll share my personal story and no-nonsense knowledge on how to create zones in your pantry that will make your life easier. You’ll learn how to carve out high-performance zones that make cooking and grabbing snacks a total breeze. I’ll provide you with practical, step-by-step advice on how to design a zone system that works for you, not against you. By the end of this guide, you’ll be equipped with the knowledge to transform your pantry into a well-oiled machine that saves you time and reduces stress. So, let’s get started on this journey to pantry perfection!
Table of Contents
Guide Overview: What You'll Need
Total Time: 2 hours 30 minutes
Estimated Cost: $50 – $100
Difficulty Level: Intermediate
Tools Required
- Tape Measure (for accurate shelf measurements)
- Level (to ensure straight shelves)
- Drill (with screwdriver and drill bits)
- Hammer (for tapping shelves into place)
- Utility Knife (with extra blades)
Supplies & Materials
- Shelving Units (adjustable to fit your pantry)
- Wood Shelves (cut to size, 1/2 inch or 3/4 inch thick)
- Basket Containers (for storing food and kitchen items)
- Labels and Label Maker (for organizing zones)
- 2-in x 4-in Lumber (for shelf supports, cut to size)
- Screws (1 inch or 2 inches long, depending on shelf thickness)
Step-by-Step Instructions
- 1. First, let’s purge and declutter your pantry to get a sense of what you’re working with – take everything out and sort items into categories like baking supplies, snacks, and cooking essentials; this will help you understand what zones you need to create.
- 2. Next, measure your pantry space carefully, taking note of any _obstacles_ like shelves, doors, or narrow aisles; use these measurements to sketch out a basic floor plan of your pantry, including the location of any fixed features.
- 3. Now, think about your _cooking workflow_ and how you move through your kitchen – consider the items you use most frequently and where they should be located for maximum efficiency; for example, if you bake often, you may want to create a baking zone near the front of the pantry for easy access.
- 4. With your zones in mind, start assigning _storage solutions_ to each area – this might include baskets, bins, or shelves; consider using _adjustable shelving_ to accommodate items of different sizes and make the most of your vertical space.
- 5. To create a snack zone, designate a specific shelf or bin for easy-to-grab items like nuts, dried fruits, or energy bars; use small _containers_ or bags to keep these items organized and prevent them from spilling or getting lost.
- 6. For a cooking essentials zone, consider using a _turntable_ or lazy Susan to store frequently used items like oils, spices, or condiments; this will make it easy to access what you need without having to dig through a cluttered shelf.
- 7. Finally, implement a maintenance routine to keep your pantry zones functioning smoothly – set aside time each week to tidy up, check expiration dates, and restock items as needed; this will help prevent clutter from building up and ensure your zones remain _efficient_ and effective.
Pantry Zone Creation Mastery
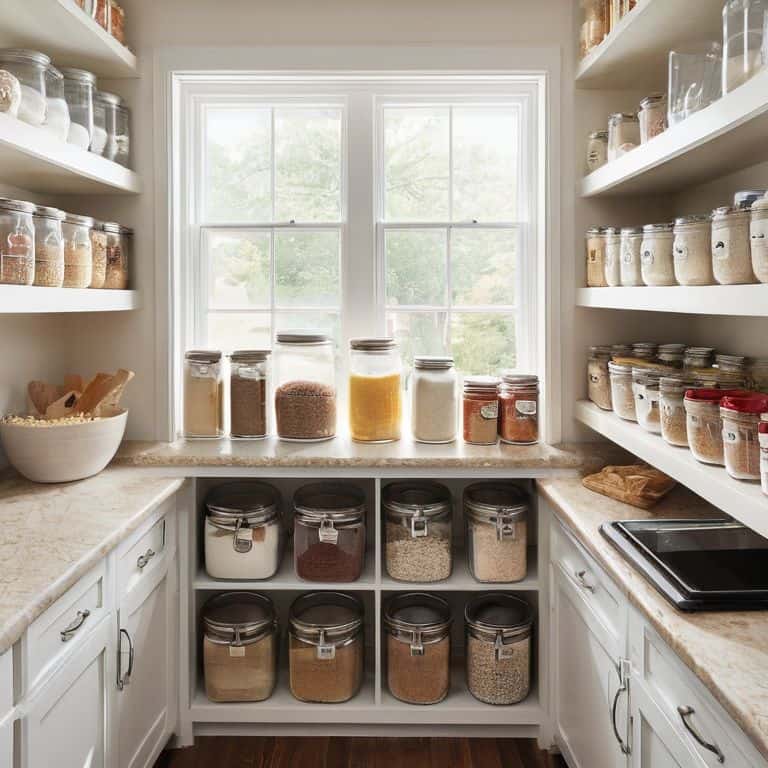
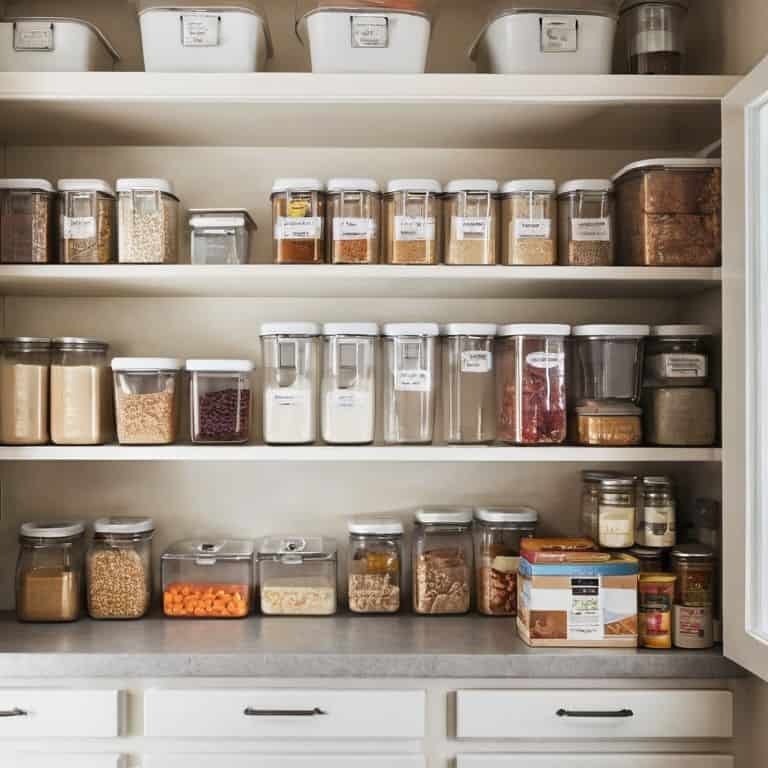
To take your pantry zone creation to the next level, it’s essential to focus on maximizing pantry storage space. This means considering the often-wasted areas, such as the back of the door or the top shelf, which can be perfect for storing less frequently used items. By utilizing these spaces, you can free up more accessible areas for your everyday essentials.
When designing your efficient pantry layout, think about the workflow you want to achieve. Consider the items you use most frequently and place them in easy-to-reach zones. This will help you maintain a clutter-free pantry and make cooking and meal prep a breeze. Labeling and categorizing your pantry items is also crucial, as it allows you to quickly find what you need and prevents unnecessary clutter from building up.
By implementing a zone-based pantry organization system, you can create a customized space that works perfectly for your needs. This might involve using customizable pantry shelving ideas, such as adjustable shelves or baskets, to create a flexible and adaptable storage system. Remember, the key to a well-organized pantry is to create a space where every item has its own designated home, making it easy to find what you need and keep your pantry running smoothly.
Efficient Layouts for Clutter Free Spaces
To achieve a clutter-free space, it’s essential to consider the layout of your pantry zones. I like to think of it as a “workflow optimization” challenge. By arranging your zones in a logical order, you can minimize unnecessary movement and make the most of your space. For example, placing your most frequently used items in easy-to-reach zones can save you time and effort in the long run.
By implementing an efficient layout, you’ll be able to maintain your pantry’s organization with minimal effort. I recommend creating a “landing strip” near the entrance of your pantry, where you can place everyday items like snacks or spices. This simple trick can help keep your pantry clutter-free and make cooking a breeze.
Maximizing Storage With Zone Based Design
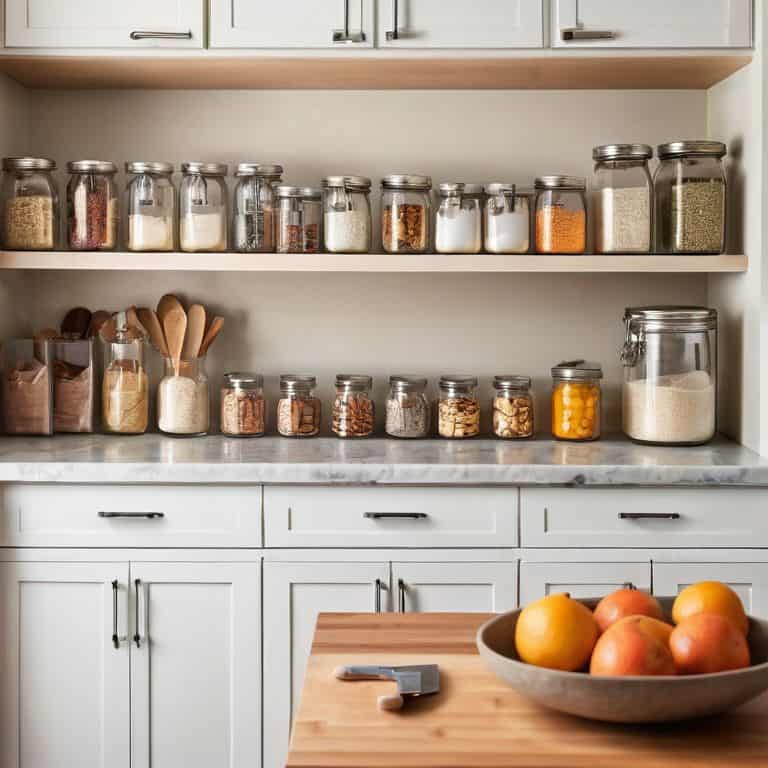
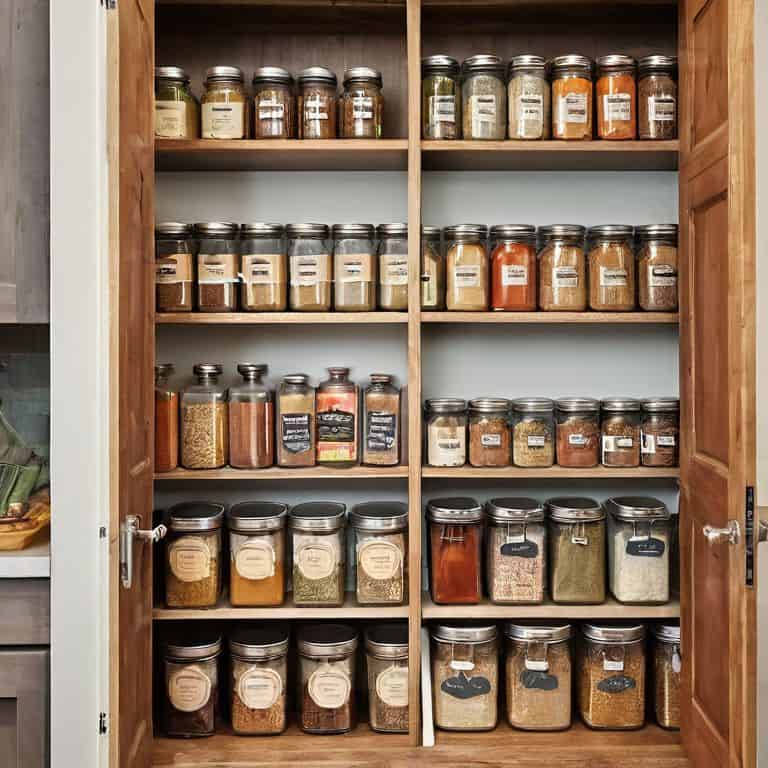
To take your pantry zone creation to the next level, consider the vertical space. By installing shelves or stackable containers, you can double or even triple your storage capacity. I like to think of it as creating a “pantry skyline” – with each shelf serving a specific purpose, such as grains, canned goods, or snacks. This not only keeps your pantry organized but also makes it easier to find what you need when you need it.
By maximizing your storage with zone-based design, you’ll be amazed at how much more efficient your pantry becomes. I’ve seen it in my own kitchen – with a little creativity and some clever design, even the smallest pantry can become a high-performance zone. Remember, every item should have a designated home, and every movement should have a purpose. With this mindset, you’ll be cooking up a storm in no time.
Pantry Zone Hacks: 5 Game-Changing Tips
- Designate a ‘Grab-and-Go’ zone near the front of your pantry for easy access to snacks and essentials
- Implement a ‘Category-Based’ zoning system, grouping similar items like grains, canned goods, and baking supplies together
- Utilize vertical space by installing shelves or storage units that maximize your pantry’s ceiling height
- Create a ‘Pantry Station’ with a built-in countertop or cart for food preparation and packaging
- Establish a ‘First-In-First-Out’ zone to ensure older items are consumed before they expire, reducing food waste and saving you money
Key Takeaways for a High-Performance Pantry
Pantry zones are not just about storage, but about creating a workflow that saves you time and reduces stress in the kitchen
By applying zone-based design principles, you can maximize storage, reduce clutter, and make your pantry a joy to use
Implementing efficient layouts and zone-based systems can transform your pantry into a highly functional space that enhances your overall cooking experience
Pantry Wisdom
A well-zoned pantry is not just about storing food, it’s about creating a workflow that sets you up for culinary success – every jar, can, and spice has a purpose and a place, making cooking a seamless dance of creation.
Leo Vance
Bringing It All Together: A High-Performance Pantry
As we’ve worked through the process of creating zones in your pantry, I hope you’ve seen how simple yet powerful this approach can be. By maximizing storage and implementing efficient layouts, you’ve taken the first steps towards turning your pantry into a _high-performance_ zone. Remember, the key to maintaining this system is to ensure that every item has a designated place and that you stick to your zone-based design. This will not only make cooking easier but also reduce stress and save you time in the long run.
Now that you’ve optimized your pantry, I encourage you to apply these principles to other areas of your kitchen. Imagine the sense of accomplishment and _freedom_ you’ll feel when your entire kitchen is working in harmony. As you continue on your journey to a more efficient kitchen, keep in mind that every movement matters. By embracing this mindset, you’ll be well on your way to creating a kitchen that is not just functional, but truly exceptional. So go ahead, take the next step, and watch your kitchen transform into a space that inspires creativity and joy.
Frequently Asked Questions
How do I determine the ideal number of zones for my pantry based on its size and the types of food I store?
To determine the ideal number of zones, I recommend measuring your pantry’s dimensions and categorizing the foods you store. A good rule of thumb is to allocate zones based on frequency of use and item size. For example, a small pantry might have 2-3 zones: baking supplies, snacks, and canned goods.
What are some creative ways to use vertical space in my pantry to maximize storage within each zone?
To maximize storage within each zone, consider installing wall-mounted shelves, hooks, or a pegboard. You can also use stackable containers or baskets to make the most of your pantry’s vertical space. I like to use 3D-printed custom brackets to hang my spices and oils, keeping them organized and within reach.
Can I apply the same zone creation principles to other small spaces in my home, like a kitchen cabinet or a closet?
Absolutely, the zone creation principles can be applied to other small spaces like kitchen cabinets or closets. I call it ‘scaling the system.’ By identifying specific zones for items like cleaning supplies, spices, or clothes, you can optimize any tight space, making it more efficient and easier to navigate.