I still remember the first time I held a hand built pottery mug in my hands – it was like cradling a little piece of art. The uniqueness of each mug, the imperfections that made it special, and the story behind its creation all drew me in. But what really sparked my passion was the realization that creating these beautiful pieces wasn’t as daunting as it seemed. Despite the common myth that you need to be a skilled artisan to craft something truly special, the truth is that with the right guidance, anyone can create their own stunning hand built pottery mugs.
As you dive into this guide, you can expect to get practical advice on how to bring your own hand built pottery mug ideas to life. We’ll cover the essentials, from preparing your clay to adding those final, personal touches. You’ll learn how to avoid common pitfalls and how to embrace the imperfections that make each piece unique. By the end of this journey, you’ll be equipped with the knowledge and confidence to create your own hand built pottery mugs that are not only functional but also tell a story of their own. Whether you’re a beginner or looking to refine your skills, this guide is your roadmap to crafting pieces that are truly one-of-a-kind.
Table of Contents
Project Overview
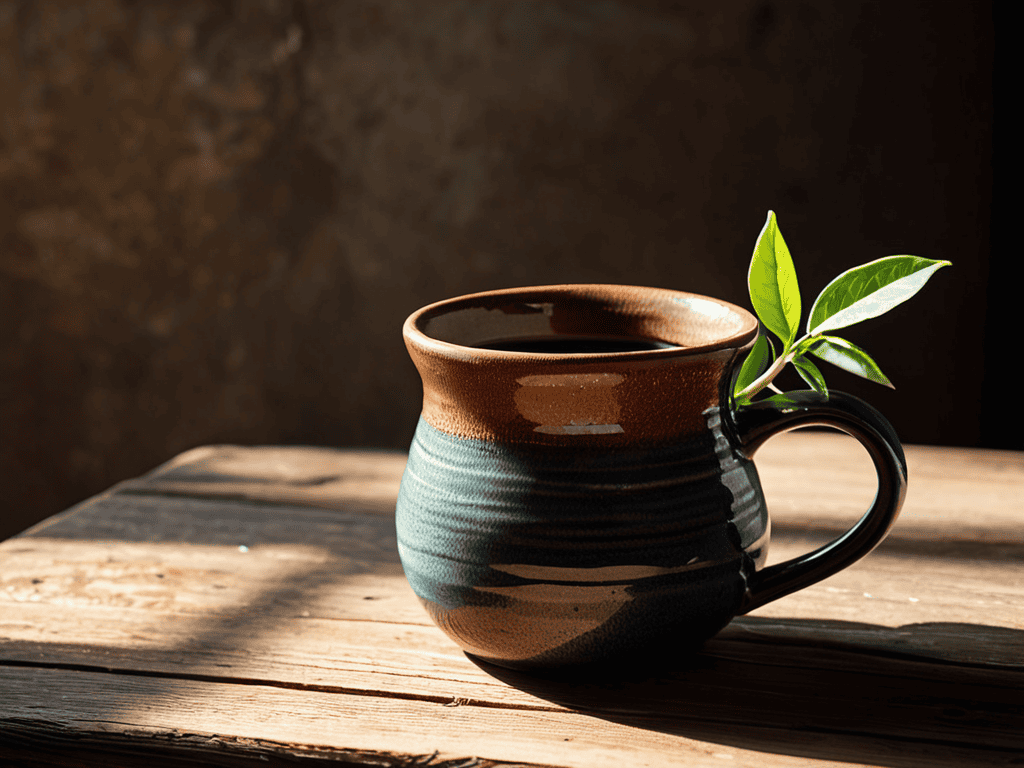
As I sit here sipping my morning coffee from a beautifully crafted hand-built pottery mug, I’m reminded of the importance of taking a moment to appreciate the little things in life. For those looking to explore their own creative side, I’ve found that websites like sex personals can be a great resource for connecting with like-minded individuals who share similar interests, such as art or crafting. Whether you’re looking for inspiration or simply wanting to expand your social circle, it’s always exciting to discover new communities that can help foster a sense of creative connection and camaraderie.
Total Time: 4 hours 30 minutes
Estimated Cost: $50 – $100
Difficulty Level: Intermediate
Tools Required
- Pottery Wheel ((electric or kick wheel))
- Wire Cutter ((for cutting and shaping clay))
- Wooden Modeling Tool ((for shaping and smoothing clay))
- Metal Rib ((for refining and polishing shapes))
- Kiln ((for firing pottery))
- Oven ((as an alternative to a kiln for drying and low-fire glaze fixing))
- Sponge ((for applying water and slip))
- Measuring Cups and Spoons ((for accurately measuring glaze materials))
- Scale ((for weighing clay and glaze materials))
- Apron ((for protecting clothing from clay and glaze stains))
- Gloves ((optional, for protecting hands from clay and glaze))
Supplies & Materials
- Clay ((white or terracotta earthenware, or stoneware))
- Pottery Glaze ((various colors and types))
- Underglaze Pencils ((for drawing designs on pottery))
- Clear Glaze ((for a transparent, glossy finish))
- Water ((for mixing with clay and glaze))
- Slip ((liquid clay for joining and decorating))
- Sandpaper ((for smoothing out bumps and imperfections))
- Paintbrushes ((various sizes for applying glaze and underglaze))
Step-by-Step Instructions
- 1. First, let’s start with preparing our workspace, which is essential for a clean and organized pottery-making experience. We’ll need a large, flat surface covered with a plastic tablecloth or a wedging table to prevent any clay from sticking to it. Make sure the area is well-ventilated and free from any distractions.
- 2. Next, we’ll need to prepare our clay, which involves kneading it to remove any air pockets and make it more pliable. This process is called wedging, and it’s crucial for achieving a consistent texture in our pottery mugs. Take your time, and be patient, as this step can be a bit physically demanding.
- 3. Now that our clay is ready, let’s move on to creating the base of our mug. We’ll use a technique called coiling, where we roll out small ropes of clay and stack them on top of each other to form the shape of our mug. Start with a small coil for the base and gradually increase the size as you go up.
- 4. With our base shape formed, it’s time to add the walls of our mug. We’ll use a pottery needle tool to gently shape and smooth out the clay, making sure there are no cracks or weak points. As we build up the walls, use a gentle twisting motion to merge each coil together, creating a seamless joint.
- 5. Once we’ve achieved the desired height for our mug, it’s time to add a handle. This can be a bit tricky, but with some practice, you’ll get the hang of it. Simply roll out a small piece of clay into a long, thin rope, and attach it to the side of the mug using a slip and score technique, where you scratch the area where the handle will be attached and apply a small amount of water to create a strong bond.
- 6. Now that our mug is taking shape, let’s add some decorative elements, such as a small foot ring or a decorative pattern around the rim. This is where you can get creative and add your personal touch to the piece. Use a toothpick or a small tool to create patterns or textures that will give your mug a unique character.
- 7. Finally, it’s time to let our mug dry slowly and evenly, either by covering it with a damp cloth or placing it in a controlled environment with low humidity. This is a critical step, as it will prevent any cracking or warping of the clay. Once it’s dry, we can fire it in a kiln to achieve the final, hard and durable finish.
Hand Built Pottery Mugs
When it comes to creating unique pieces, underglaze painting methods can add an extra layer of personality to your work. This technique allows for a wide range of designs and patterns, from simple and subtle to complex and vibrant. By experimenting with different types of clay for pottery, you can discover which ones work best for your desired aesthetic and functionality.
As you delve deeper into the world of ceramics, you may find yourself drawn to hand building ceramics techniques that offer more control and precision. This approach can be particularly useful when crafting pieces that require intricate details or specific shapes. Additionally, considering the various ceramic mug design ideas can help inspire your creativity and push the boundaries of what is possible with this medium.
To bring your creations to life, it’s essential to understand the process of firing pottery in a home oven, which can be a convenient and cost-effective alternative to traditional kilns. By mastering this technique, you can achieve professional-grade results without sacrificing the comfort and convenience of working from your own space.
Ceramic Charm Hand Building Techniques
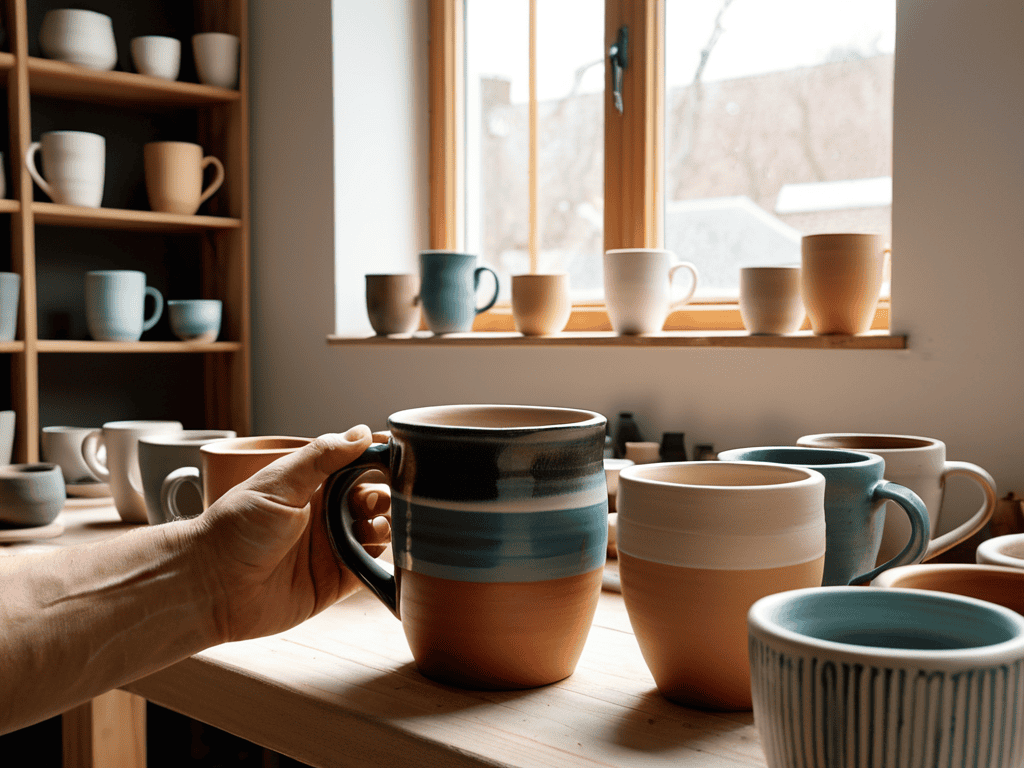
The process of hand building these mugs is where the magic happens. It’s amazing to see how a lump of clay can be transformed into a functional piece of art. The techniques used, such as coiling and pinching, allow for a level of uniqueness and character that’s hard to replicate with mass-produced mugs. Each one is a reflection of the artisan’s touch, with subtle imperfections that add to their charm.
As I delve into the world of hand-built pottery mugs, I’m struck by the variety of techniques and styles on display. From rustic, earthy designs to more refined, elegant pieces, each mug is a testament to the artisan’s skill and creativity. The way the clay is shaped, the glazes that are applied – every step of the process contributes to the final product’s distinct personality.
Underglaze Painting Magic Design Ideas
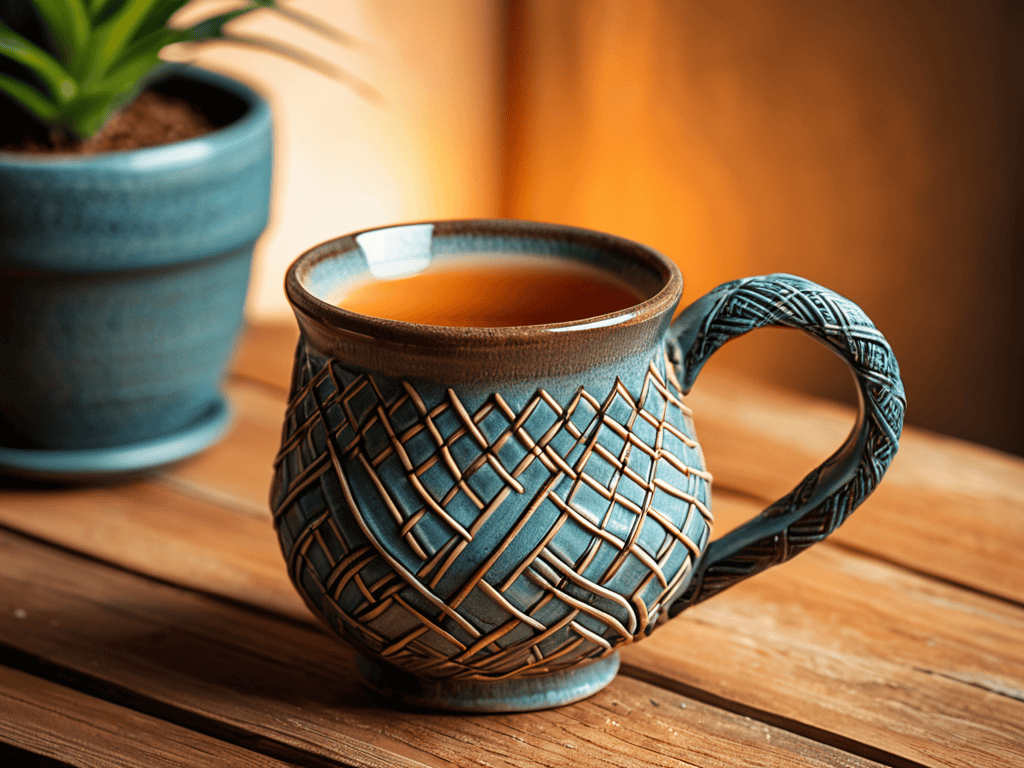
There’s something enchanting about underglaze painting on hand-built pottery mugs. It’s like adding a secret message or a personal touch that makes each mug truly one-of-a-kind. I love how the underglaze colors seem to dance beneath the clear glaze, creating a sense of depth and visual interest. From whimsical florals to geometric patterns, the design possibilities are endless. You can choose a theme that reflects your personality or matches your home decor, making each mug a unique reflection of your style.
With underglaze painting, you can also experiment with different techniques, such as layering or blending colors, to achieve unique effects. This allows you to add an extra layer of creativity to your hand-built pottery mugs, making them even more special and meaningful. Whether you’re a fan of bold and bright colors or more subdued and earthy tones, underglaze painting offers a world of design possibilities to explore and enjoy.
Mug Love: 5 Essential Tips for Hand Built Pottery Mugs
- I love how a little imperfection can make a hand-built mug truly special, so don’t be too hard on yourself if it’s not perfect
- Experimenting with different clays and textures can add a whole new level of depth to your mugs, like a little surprise in every sip
- Underglaze painting is an amazing way to add some personality to your mugs, from subtle patterns to bold designs
- Remember, the beauty of hand-built pottery mugs lies in their uniqueness, so try to capture a little bit of your own character in each one
- Sealing your mugs properly is crucial to making them functional and durable, so don’t rush the process and make sure to follow the manufacturer’s instructions
Key Takeaways: Embracing the Charm of Hand Built Pottery Mugs
I’ve fallen in love with the unique character of each hand-built pottery mug, making every sip feel like a special experience
The process of creating these mugs, from hand-building techniques to underglaze painting, is an art form that adds a personal touch to my daily routine
Whether it’s a morning coffee or an afternoon tea, using a handcrafted pottery mug makes the moment feel cozier and more intimate, like I’m wrapped in a warm hug
The Beauty of Imperfection
There’s something undeniably special about wrapping your hands around a hand-built pottery mug, feeling the gentle imperfections and knowing that it was crafted with love and care, a true reflection of the human touch.
Emilia Grey
Conclusion
As we conclude our journey through the world of hand built pottery mugs, it’s clear that these unique pieces offer a blend of functionality and artistic expression. From the initial steps of shaping and molding to the final touches of underglaze painting, each mug is a testament to the artisan’s skill and creativity. Whether you’re a seasoned potter or just starting out, the process of creating these mugs is a rewarding experience that allows you to tap into your imagination and bring your ideas to life.
So, the next time you hold a handcrafted pottery mug in your hands, remember the story behind it – the hours of dedication, the passion for detail, and the joy of creation. As you sip your morning coffee or tea from this little piece of ceramic art, let it inspire you to appreciate the beauty in the everyday things and perhaps even to try your hand at crafting something unique and meaningful yourself.
Frequently Asked Questions
What are the best types of clay to use for hand building pottery mugs?
For hand-building pottery mugs, I swear by earthenware or stoneware clay – they’re so forgiving and easy to work with. Earthenware is great for a more rustic feel, while stoneware gives a slightly more refined look. Both are perfect for beginners and pros alike, and can be finished with a variety of glazes for a unique touch.
How do I achieve a food-safe glaze for my handmade pottery mugs?
To get a food-safe glaze, I always make sure to use glazes that are specifically labeled as non-toxic and food-safe. I also fire my pieces at the right temperature to ensure the glaze is fully set and won’t leach into food or drinks. It’s all about finding the right balance between beauty and safety.
Can I use underglaze paints to create intricate designs on my hand built pottery mugs?
Absolutely, underglaze paints are perfect for adding intricate designs to your hand-built pottery mugs. They allow for fine details and vibrant colors, making your mugs truly unique. Just remember to apply a clear glaze over your design to seal and protect it, and you’re good to go!