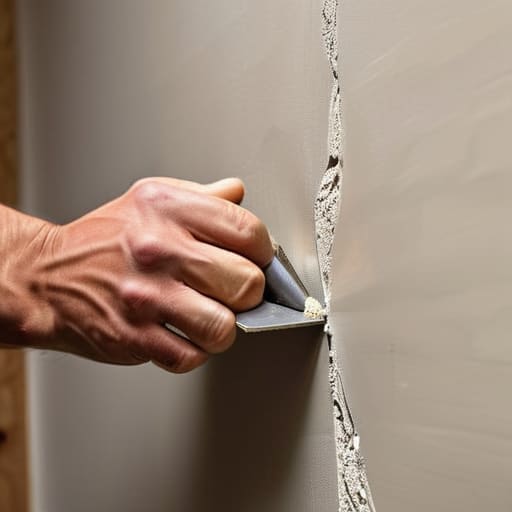
You don’t need to call a professional or face a massive repair bill just because you accidentally bumped your corner with a heavy grocery bag or a rogue vacuum cleaner. Most people think that fixing a dent or a hole requires a professional-grade workshop, but the truth is, mastering how to patch a wall properly is actually one of the most low-stress, high-reward skills you can add to your DIY toolkit. I learned this the hard way when I was moving my heavy bookshelf into my tiny apartment and left a gaping crater in the drywall right next to my coffee station; I felt so defeated, thinking my little kitchen was ruined forever.
Instead of letting that scuff drive you crazy, let’s grab a putty knife and tackle it together. In this guide, I’m stripping away all the confusing jargon and showing you my exact, no-nonsense process for getting a seamless, professional finish on a budget. I’ll walk you through everything from choosing the right spackle to the secret of sanding without making a giant mess in your living space. We aren’t just hiding a hole; we are making that wall look like the damage never even happened.
Guide Overview
Tools & Supplies
- Putty knife for applying compound
- Sanding block for smoothing surfaces
- Utility knife for cleaning edges
- Spackle knife for small holes
- Spackle or joint compound (1 small tub)
- Sandpaper (Fine grit, 1-2 sheets)
- Wall primer (1 small can)
- Matching paint (1 small can)
Step-by-Step Instructions
- 1. First things first, grab a utility knife and let’s get to work on cleaning up the edges. If the hole has any loose bits of drywall or jagged, peeling paper sticking out, you’ll want to carefully trim those away. If you leave them, your patch will never sit flush, and you’ll end up with a weird bump that’s impossible to hide once you start painting.
- 2. Now, it’s time to prep the “crater.” Take a piece of sandpaper—something around 120 grit works great—and lightly sand the area around the hole to remove any dust or old paint flakes. I like to sand a little bit beyond the immediate damage to create a smooth transition zone, which makes the whole blending process much easier later on.
- 3. If you’re dealing with a tiny little ding or a nail hole, you can skip the heavy machinery and go straight to the spackle. But if we’re talking about a real chunk missing from the wall, you’ll need to grab a self-adhesive mesh patch. Press it firmly over the hole so it’s tight against the surface; this acts as the “skeleton” that keeps your filler from just falling straight into the void.
- 4. Grab your putty knife (this is where you start feeling like a pro!) and scoop up some lightweight joint compound. Apply it in thin, decisive strokes across the patch. The goal here isn’t to make it perfect on the first pass—it’s actually better to apply multiple thin layers than one giant, gloopy mess that takes forever to dry and cracks easily.
- 5. Once that first layer is dry (give it some time, I know, waiting is the worst!), take your putty knife and lightly sand down any high ridges. Then, apply a second, even thinner layer that spreads out a bit further than the first one. We’re essentially “feathering” the edges so the patch gradually disappears into the rest of the wall.
- 6. After your final layer is bone-dry, it’s time for the satisfying part: the final sand. Use a fine-grit sanding sponge to smooth everything out until you can run your hand over the patch and barely feel a transition between the new compound and the old wall. If you can see it with your eyes, keep sanding!
- 7. Before we celebrate with a coffee, we have to prime. Don’t skip this! If you paint directly over the patch, the compound will soak up the moisture differently than the rest of the wall, leaving you with a dull, tell-tale spot. A quick coat of primer will seal everything in and ensure your topcoat of paint looks absolutely seamless.
Gathering Your Drywall Repair Kit Essentials
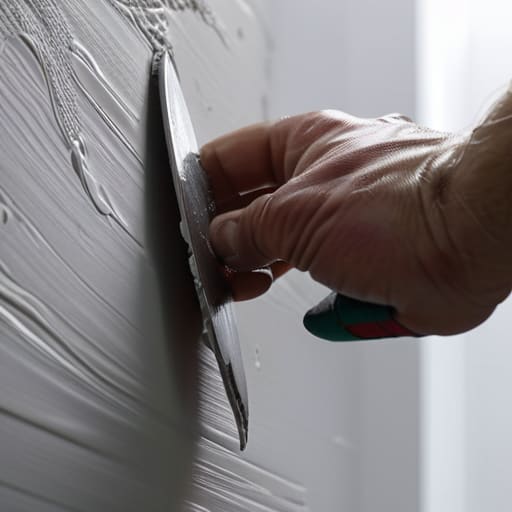
Now, I know what some of you are thinking—”Maya, I’ve never even held a putty knife, how am I supposed to know if I’m doing this right?” Trust me, I’ve been there, staring at a patch job that looked more like a mountain range than a flat wall. If you’re feeling a little nervous about the technical side of things, I always suggest checking out some extra tutorials to build your confidence before you dive in. Sometimes seeing a different technique in action is exactly what you need to truly nail the finish, so if you want to see for yourself how these little fixes can completely transform a room, it’s definitely worth a quick look.
Before we dive into the actual work, let’s talk supplies. I know, looking at a hardware store aisle can feel a little overwhelming, but you don’t need a professional contractor’s van to get this done. For most of my projects, I keep a small stash of drywall repair kit essentials tucked away in my utility closet so I’m ready the second a moving mishap or a rogue chair leg hits the wall. If you’re just patching small nail holes, a simple lightweight spackle and a small putty knife are your best friends.
However, if we’re dealing with something a bit more substantial—like a dent from a heavy pot hitting the wall—you’ll want to level up. Grab a tub of all-purpose joint compound and some drywall mesh tape application tools to ensure the patch stays put and doesn’t crack later. I always tell my friends: don’t skimp on the quality of your sanding sponge. Having a good grit sponge makes the process of how to sand drywall smooth so much more satisfying, and it’s the secret to making sure your repair is actually invisible once the paint goes on!
Fixing Holes in Plaster and Patching Small Nail Holes
Now, let’s talk about those tricky little surprises. If you live in an older apartment, you might realize you aren’t dealing with standard drywall, but actual plaster. Fixing holes in plaster can feel a bit intimidating because the material is more brittle and prone to cracking than modern gypsum, but don’t panic! Instead of using a standard heavy-duty patch, I recommend using a lightweight spackle or a specialized plaster repair compound. You’ll want to work in much thinner layers to prevent the patch from crumbling away from the wall.
On the flip side, if you’re just dealing with the aftermath of hanging those cute thrifted art prints, you’re likely patching small nail holes. This is my favorite kind of “micro-project” because it’s so satisfying. For these tiny divots, skip the heavy tools and just use a small putty knife or even your fingertip to press the compound into the hole. The secret to a professional finish here is patience; let it dry completely before you even think about how to sand drywall smooth. A quick, gentle swipe with a fine-grit sanding sponge is all it takes to make those marks disappear forever.
Pro-Tips from My Tiny Kitchen Toolkit: How to Get a Flawless Finish
- Sanding is your best friend, but don’t overdo it! I always tell people to sand in small, circular motions until the patch feels seamless under your fingertips. If you sand too aggressively, you’ll end up with a literal crater that’s way harder to fix than the original hole.
- Don’t be afraid of the “multiple thin layers” rule. It’s so tempting to just glob on a huge chunk of spackle to save time, but that’s a recipe for cracks and uneven drying. Think of it like frosting a cake—three thin, even layers will always look more professional than one thick, messy one.
- Always check your lighting before you start painting. I like to grab my phone flashlight and shine it sideways across the wall; this “raking light” makes every tiny bump or imperfection pop out so you can sand them down before they become permanent eyesores.
- If you’re working in a tight corner or near my precious kitchen backsplash, grab a damp cloth immediately. Drywall dust is relentless and finds its way into every nook and cranny, so keep a little “cleanup station” ready to wipe down your surfaces as you go.
- Match your texture, not just your color. If your walls have a slight orange peel or eggshell texture, a perfectly smooth patch will actually stand out like a sore thumb. Take a damp sponge or a textured roller to the wet compound to mimic the surrounding wall so the repair truly disappears.
You’ve Got This!
Honestly, once you’ve mastered the art of the perfect patch, you’ll realize that those little imperfections don’t have to be permanent eyesores. Whether you were tackling a pesky nail hole or a larger dent in the drywall, the secret really comes down to patience and sanding. Remember, it’s much better to apply a thin, even layer of compound and let it dry than to try and “fix” a massive crater in one go. Take your time with the smoothing process, ensure your texture matches the rest of your wall, and you’ll have a finish that looks absolutely seamless.
At the end of the day, I want you to look at those repaired spots and feel a sense of pride, not just because the wall looks great, but because you actually did it yourself. Living in a small space means we have to be a little more hands-on with our environment, but that’s where the magic happens. Don’t let a scuffed wall or a tiny dent make you feel like your apartment isn’t “finished.” You have the tools, you have the skills, and now you have the confidence to keep making this little kitchen feel exactly like home. Now, go grab that sandpaper and finish strong!