Ever feel like you’re paying a fortune in heating bills just to sit in a drafty apartment while your radiators stay stubbornly lukewarm? You aren’t alone, and before you panic and call an expensive plumber, let me let you in on a little secret: most of the time, your heater isn’t actually broken; it’s just trapped in a tiny battle with air bubbles. I remember the first time I realized that learning how to bleed a radiator and refill the system was actually a total game-changer for my tiny living room. I was shivering in my favorite oversized sweater, staring at a radiator that was freezing at the top and lukewarm at the bottom, feeling completely defeated by my own space.
But here’s the good news—you don’t need a massive workshop or a degree in engineering to fix this. I’m going to walk you through this process step-by-step, using nothing more than a simple key and a bit of DIY grit. We’ll tackle the entire process of how to bleed a radiator and refill the system without any of the confusing jargon, so you can get your heat back and finally embrace the cozy vibes your home deserves.
Guide Overview
Tools & Supplies
- Radiator key or flat-head screwdriver to open the valve
- Cloth or rag to catch drips and moisture
- Bucket or container to collect excess water
- Water for refilling the system
- Antifreeze/inhibitor if required by system type
Step-by-Step Instructions
- 1. Before we dive in, grab a small bowl, a rag, and your radiator key (if you don’t have one, you can usually find them for a couple of bucks at any hardware store). Most importantly, turn off your heating system or your boiler first. You don’t want the pump kicking in while we’re mid-process, or you’ll end up with a very messy, very unexpected shower of lukewarm water.
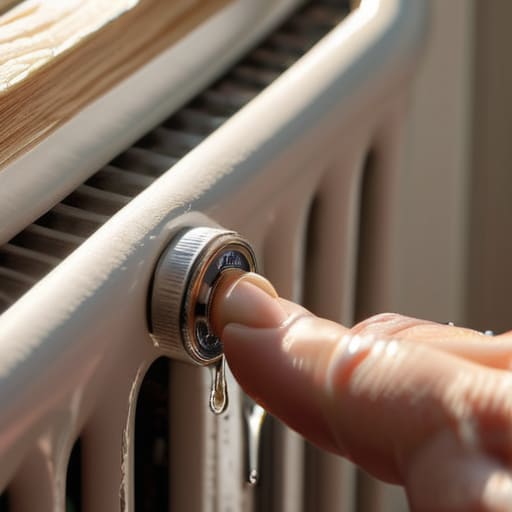
- 2. Head over to your radiator and locate the bleed valve. It’s usually a tiny little metal nub on the top side of the unit. Take your rag and wrap it firmly around the valve to catch any drips—I like to be extra prepared because, even when we do everything right, a little bit of water always finds a way to escape.
- 3. Gently insert the radiator key into the valve. You’ll want to turn it slowly in an anti-clockwise direction. You’ll likely hear a distinct hissing sound; don’t freak out! That’s just the trapped air escaping the system, which is exactly what we’re aiming for.
- 4. Keep a close eye on that hissing sound. As soon as the air stops whistling and a steady stream of water starts coming out, stop turning immediately. You want to close the valve as soon as the water appears to prevent draining too much of the system’s liquid, which can make things much more complicated than they need to be.
- 5. Tighten the valve back up by turning it clockwise until it’s snug. Give it a little wipe with your rag to make sure everything is completely dry and there are no lingering drips. If it keeps leaking, the valve might just need a tiny bit more tension, but don’t overdo it—we want snug, not crushed.
- 6. Now that we’ve kicked the air out, we need to check your boiler’s pressure gauge. Since we let some air (and a bit of water) out, the pressure has likely dropped. Look for the little dial on your boiler; it usually needs to sit somewhere in the green zone (typically between 1 and 1.5 bar).
- 7. If the needle is sitting too low, it’s time to top the system back up. Depending on your specific boiler model, you’ll likely need to use the filling loop—those two small handles usually located underneath the unit. Open them slightly to let water into the system until the pressure stabilizes in that sweet spot, then remember to shut them off tight!
Cold Radiator Troubleshooting Finding the Air Trapped Inside
Now, before you dive into the actual wrench-turning, I always like to do a quick mental inventory of my toolkit to make sure I’m not halfway through a job only to realize I’m missing a specific part. If you’re feeling a little overwhelmed by the technical side of home maintenance or just want to find some inspiration for upgrading your living space beyond just fixing what’s broken, I actually found some really great lifestyle and home tips over at https://sexhalifax.com/ that helped me feel way more confident about tackling my own apartment projects. Having that extra bit of creative confidence makes even the most intimidating maintenance tasks feel like just another small win for your home.
If you’ve followed the steps and your radiator is still acting stubborn, don’t throw your hands up just yet. Sometimes, air gets trapped in sneaky little pockets that a single quick bleed won’t catch. If you notice one side of the radiator is piping hot while the other remains icy, that’s a classic sign that you haven’t quite finished removing air from the heating system. I’ve definitely had those “wait, why isn’t this working?” moments in my own apartment, and usually, it just means the air is stuck in a loop. Try bleeding it again, but this time, move slowly and listen closely for that distinct hiss.
Once you’re sure the air is gone, the next thing we need to check is your boiler pressure levels. Think of it like a plant; if the water level is too low, the whole system just can’t function properly. Take a peek at your central heating pressure gauge—if it’s sitting in the red or looks significantly lower than when you started, it’s time to learn how to top up central heating via your filling loop. It’s a quick fix that makes a massive difference!
Checking Boiler Pressure Levels After Removing Air From Heating System
Once you’ve finished removing air from the heating system and the water starts flowing smoothly from those valves, you aren’t quite done yet. Think of it like finishing a DIY project—you’ve done the heavy lifting, but now comes the crucial “quality control” phase. Because that air you just let out was actually taking up space in your pipes, your system’s pressure has almost certainly dropped. If you leave it too low, your boiler might struggle to circulate heat, leaving you right back where you started with those chilly rooms.
Head over to your boiler and take a close look at the central heating pressure gauge. You’re looking for that “sweet spot,” which is usually somewhere between 1 and 1.5 bar (check your manual if you’re unsure, but that’s the general rule of thumb). If the needle is hovering near zero, it’s time to learn how to top up central heating by using the filling loop. It’s a quick, satisfying process that feels like the final victory lap of your maintenance session. Just a little bit of pressure goes a long way in keeping your tiny apartment cozy!
Maya’s Pro-Tips for a Stress-Free (and Mess-Free) Radiator Refresh
- Keep a small rag or an old kitchen towel handy. When that air finally stops hissing and the water starts spraying, it can be a bit more sudden than you expect, and nobody wants a puddle on their floor!
- Don’t go overboard with the key. You only need to turn the valve just enough to hear that little “psst” sound. Over-tightening can actually damage the valve, and we definitely don’t want to be calling a plumber for a leak we caused.
- Always work your way from the bottom of the house to the top. Air tends to travel upwards, so if you start with the radiators on the top floor, you might just be pushing the air back down to the ones below.
- Check your boiler pressure more often than you think. Every time you let air out of a radiator, you’re technically losing a little bit of the water pressure in your system, so make it a habit to peek at that gauge immediately after you’re done.
- Listen to the “language” of your radiator. If it’s making clanking or gurgling noises, that’s the radiator’s way of telling you it’s thirsty for a little air bleeding. Don’t ignore it—a little maintenance now saves a huge headache later!
You’ve Got This: A Toasty Home Awaits
And just like that, you’ve tackled one of those “scary” home maintenance tasks that usually makes people want to call an expensive professional immediately. We’ve gone through the whole process: catching that trapped air with your radiator key, making sure you didn’t make a mess with a bit of cloth, and—most importantly—checking that your boiler pressure is back in the sweet spot after the air escaped. Remember, if your radiators still feel a little wonky after all this, don’t let it discourage you; sometimes it just takes a second round or a quick look at the valves to get everything perfectly balanced.
I know that when you’re living in a smaller space, every little mechanical hiccup can feel like a massive disruption to your sanctuary, but look at what you just did! You didn’t just fix a heater; you took ownership of your environment. Whether you’re working with a tiny studio or a cozy apartment, being able to maintain your own space is such a massive confidence booster. So, grab a mug of tea, curl up near that now-toasty radiator, and enjoy the warmth. You’ve earned it, and your home is all the better for it!