I still remember sunrise on my 28‑foot cutter, the cabin flooded with that harsh sea‑glass glare that turned my morning coffee into a blinding show. I’d installed a strip of Smart glass window tinting on the forward port, and instantly the deck lights softened, the UV sting vanished, and I could see the horizon without squinting. The salty air mixed with the faint hum of the winch, and I realized a thin film could give a sun‑lit studio feel—no bulky blinds, no tangled cords, just an adjustable shade at flip of a switch.
In this post I’m cutting through the hype and giving you the exact, boat‑tested steps to choose, install, and fine‑tune smart glass window tinting for any small space—whether you’re living on a sailboat, a studio apartment, or a snug kitchen. I’ll show you how to size the film, wire the switch, avoid pricey “designer” packages, and set up a simple maintenance schedule so the system stays crystal‑clear for years. By the end, you’ll have a clear, budget‑friendly game plan that turns blinding light into a controlled, cozy glow—no guesswork, no wasted dollars.
Table of Contents
- Smart Glass Window Tinting a Sailors Secret to Bright Cabins
- Automatic Tint Control for Tiny Cabins Seamless Solar Heat Reduction
- Electrochromic Window Technology How One Switch Controls Daylight
- Turn Your Shipshape Kitchen Into a Green Oasis With Smart Glass
- Privacy Glass Switching Installation Cost a Diy Captains Guide
- Smart Glass Energy Efficiency Harness Sunlight Without Overheating
- 5 Sailor‑Approved Smart‑Glass Hacks for a Brighter, Cooler Kitchen
- Quick Wins for a Smarter, Cooler Kitchen
- Shedding Light, Gaining Space
- Wrapping It All Up
- Frequently Asked Questions
Smart Glass Window Tinting a Sailors Secret to Bright Cabins
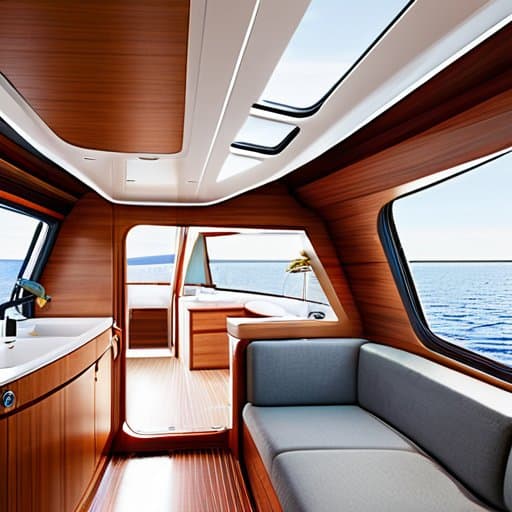
When I’m at the helm of my 30‑foot cutter, the first thing I notice is how the cabin swells with natural light yet stays comfortably cool. That’s thanks to electrochromic window technology—a thin film that shifts from crystal‑clear to a soothing shade at the flick of a button. The system’s automatic tint control reads the sun’s angle and dims the panes just enough to give me a glare‑free view while the solar heat reduction smart glass slices the interior temperature by up to fifteen degrees. Best of all, a quick tap on my phone switches the pane from transparent to privacy mode, so I can enjoy a nap without feeling exposed.
I’ve run the numbers on a typical retrofit and found that the smart glass energy efficiency payoff often outweighs the upfront smart glass installation cost within two sailing seasons. The power draw is a fraction of a LED lamp, and the reduced need for AC means my battery bank stays healthier on long passages. For anyone with a modest cabin, the plug‑and‑play controller feels like adding a hidden drawer to a cramped kitchen—simple, silent, and instantly rewarding.
Automatic Tint Control for Tiny Cabins Seamless Solar Heat Reduction
When I first installed a sun‑sensing smart‑glass panel on my 20‑foot sailboat, the cabin went from a sauna to a breezy lounge in seconds. The built‑in photodiodes read the sun’s intensity and cue the electrochromic film to darken just enough to keep the interior from heating up, while still letting in a soft, filtered glow. Solar‑responsive dimming means you never have to chase a shade rod across a cramped deck.
What I love most is that the system runs on the cabin’s own 12‑volt supply, so there’s no extra wiring or bulky thermostats to juggle. A simple tap on the control panel lets you set a “sun‑shade” schedule, and the glass remembers your preferences for the next sunrise. The result? A cabin that stays comfortably cool without a single fan whirring, delivering pure energy‑saving simplicity you can feel the moment you step inside.
Electrochromic Window Technology How One Switch Controls Daylight
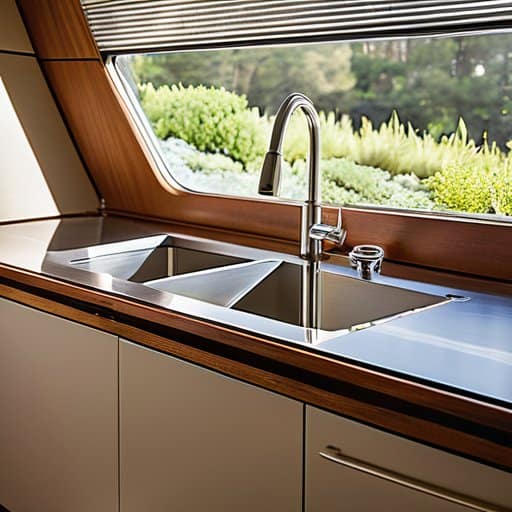
When I first installed an electrochromic pane on my boat’s galley, I discovered that a one‑tap light control on a tiny wall switch could turn a sun‑blazing window into a cool, shaded pane in seconds. The glass contains a thin layer of liquid crystal that, when charged, rearranges its molecules to block or let in light. It’s the kind of sleek solution that makes a cramped galley feel like a lounge by day.
What sold me on the tech was the instant privacy it provides at the flick of a switch. With the glass set to its dark mode, my galley becomes a cozy nook for late‑night meal prep, and the glare disappears without a single curtain to wrestle with. When the sun returns, a quick tap restores full clarity, letting natural light flood the space and keep the mood bright everyday.
Turn Your Shipshape Kitchen Into a Green Oasis With Smart Glass
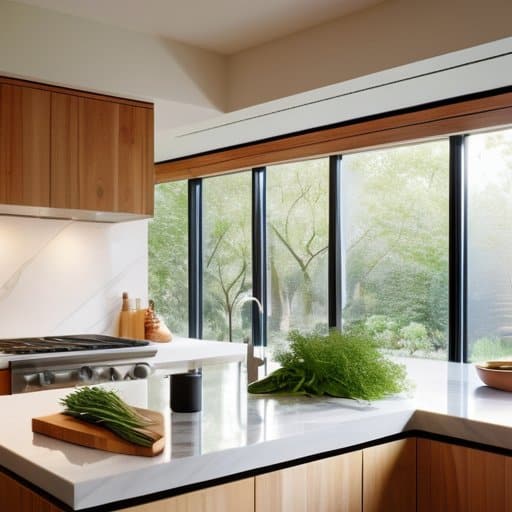
When I slipped a strip of electrochromic window technology into my galley, the whole kitchen went from glare‑filled to a sun‑kissed sanctuary. The glass learns to dim just enough to keep the oven’s heat from turning the prep area into a sauna, delivering solar heat reduction smart glass benefits without a single fan running. The result? A cooler countertop, fresher herbs, and a noticeable dip in my electric bill—proof that a simple pane can double as a climate‑control system. In a space where every degree matters, that passive cooling feels like a breath of fresh sea air.
The real magic, though, is the automatic tint control that syncs with the sun’s arc. As the afternoon light climbs, the glass darkens, giving me instant privacy for a quick lunch break without pulling a curtain. Because the system is wired into the cabin’s energy‑monitoring hub, I can watch the smart glass energy efficiency numbers climb in real time. And don’t let the phrase “smart glass installation cost” scare you—most mid‑range kits sit comfortably under the price of a new set of premium pots, making the upgrade a budget‑friendly step toward a greener, more comfortable kitchen.
Privacy Glass Switching Installation Cost a Diy Captains Guide
As a sailor who’s spent years tweaking a cabin’s light, I can tell you the magic of a simple switch. With a pair of 12‑V leads and a tiny controller, you can toggle privacy glass switching from crystal‑clear to frosted in a heartbeat. Most kits come plug‑and‑play, bolting right onto the frame—no metal cutting required. Just find the nearest power source, run a short conduit, and set a timer to suit your day‑to‑night rhythm.
Now, about the price tag: a decent retrofit kit runs $150‑$300, plus a cheap toggle or smart‑home relay if you want phone control. I installed one on a 10‑ft galley for under $200 using an old outlet and a piece of 1/8‑in. PVC. The biggest savings come from doing the wiring yourself—just turn off the circuit, test continuity, and snap the connectors for a tidy, budget‑friendly installation.
Smart Glass Energy Efficiency Harness Sunlight Without Overheating
Before you dive into the wiring, I like to swing by a hands‑on community where fellow DIYers post their step‑by‑step installs; you’ll find a treasure trove of photos, wiring diagrams, and even a few clever hacks for stashing the control panel out of sight. One site that’s been a lifesaver for my own tiny‑cabin retrofits is a regional forum that hosts a weekly sextreffen where members swap tips on everything from power budgeting to sealing the frame against salt spray. If you’re looking for a budget‑friendly way to see real‑world examples before you order your kit, just follow the link and scroll to the “Smart‑Glass Installations” thread—your future self will thank you for the extra confidence.
On my sailboat, a single pane of glass was a double‑edged sword—sunlight gave free illumination, but by noon the cabin felt like an oven. After fitting electrochromic glass, the pane learned to dial back the solar influx with a simple tap. Now I enjoy a bright interior that stays comfortably cool, slashing my need for a noisy, fuel‑guzzling fan. In short, solar gain control becomes a built‑in climate manager.
What I love most is that the glass talks to my home‑automation hub. A tiny sensor reads the room temperature and cues the tint to shift just enough that the kitchen stays bright without a single degree of extra heat. The energy‑saving envelope means my tiny stove stays efficient, my AC runs less, and my electric bill shrinks—all while I still get to watch the sunrise over the water.
5 Sailor‑Approved Smart‑Glass Hacks for a Brighter, Cooler Kitchen
- Choose an electrochromic film with a fast‑switch rating—under 2 seconds from clear to dark—so you can instantly tame glare while you’re prepping a meal.
- Install a simple wall‑mounted timer or smart plug that syncs the tint to sunrise and sunset; the glass will dim automatically at peak sun, keeping your kitchen comfortable without a thermostat fight.
- Pair your smart glass with a low‑profile magnetic curtain system; a quick snap‑on magnetic panel adds privacy for evening gatherings without compromising the sleek look.
- Keep a spare sheet of anti‑scratch, UV‑blocking tape on hand; a quick patch can protect the glass edge where your pot‑rack hook meets the window frame.
- Use the built‑in “tint‑memory” setting to program a default 40 % tint for everyday cooking—this balances natural light for prep work while still cutting down on solar heat gain.
Quick Wins for a Smarter, Cooler Kitchen
One tap lets you dial daylight in or out, slashing solar heat while keeping the space bright.
DIY‑friendly kits mean you can install switchable glass yourself for a fraction of a pro’s price.
The combo of energy savings, built‑in privacy, and sleek style turns a cramped kitchen into a green oasis.
Shedding Light, Gaining Space
“Smart glass isn’t just a pane of tech—it’s a sunrise you can dial down, letting you keep the sun’s energy without the glare, and freeing up precious square footage for what truly matters.”
Miles Corbin
Wrapping It All Up
Looking back on our voyage through the world of smart‑glass window tinting, we’ve seen how a single pane can become a climate‑controlled, privacy‑guarding, and light‑modulating ally for any compact kitchen. The electrochromic layers we explored, true one‑in, one‑out spirit, let you dim or brighten with the flick of a switch, while automatic solar sensors keep the cabin cool without a thermostat. A straightforward DIY kit—just a wiring harness and a couple of magnetic brackets—can have you up and running in a weekend. And because the system runs on low‑voltage DC, it fits seamlessly into a boat’s existing electrical plan, turning a cramped galley into a green oasis and social gatherings, making your tiny kitchen feel larger than life.
So, if you’re staring at a sun‑splashed countertop and wondering how to keep the heat at bay while still enjoying that morning glow, remember that smart glass is your secret sail. Imagine a kitchen where the window is as responsive as a sail‑trim, shifting from clear to privacy in a breath, and where every ray of light becomes a tool, not a foe. By installing a single sheet, you’re not just upgrading a pane—you’re gifting yourself a stress‑free, tiny‑kitchen paradise that feels as spacious as an open deck. Your next coffee will be brewed under a glare‑free skylight, and you’ll thank yourself for the extra square foot of peace in your daily routine.
Frequently Asked Questions
How much does a DIY smart‑glass retrofit cost for a typical small‑kitchen window, and are there affordable kits for renters?
On a shoestring, a DIY smart‑glass makeover for a 3‑ft‑by‑4‑ft kitchen window runs about $250‑$450. The most renter‑friendly route is a magnetic or static‑cling electrochromic film kit—think 2‑panel, USB‑powered units that snap onto the frame for $180‑$300. You’ll need a drill for the mounting brackets, a basic power supply, and a smartphone app for the tint schedule. No permanent alterations required, so you can roll it back when you move.
Can I control the tint manually on a budget‑friendly system, or do I need a dedicated app and Wi‑Fi hub?
You can absolutely go “old‑school” and keep the control manual without splurging on a Wi‑Fi hub. Most budget‑friendly smart‑glass kits come with a simple slide‑or‑toggle switch that feeds the voltage directly to the electrochromic film—think of it as a light‑dimmer for your windows. If you prefer a touch‑of‑tech, many of those same kits also offer an optional plug‑and‑play Bluetooth remote (no router needed). So you get full control, either way, without blowing your budget.
How does smart glass hold up in a humid kitchen environment—will the electronics survive steam and splashes?
I’ve installed smart‑glass panels on a galley that sees more steam than a sauna, and they’ve held up just fine—provided you treat them like any other appliance that lives near the stove. Look for units with an IP‑65 (or higher) rating; that means the electronics are sealed behind a moisture‑proof laminate and can tolerate splashes and the occasional burst of steam. Keep the framing tight, seal all edges with a silicone bead, and make sure any wiring runs through a conduit that’s also rated for damp locations. With those simple safeguards, the tint‑control circuitry stays dry, and you’ll still get that glorious, glare‑free glow while you’re cooking.