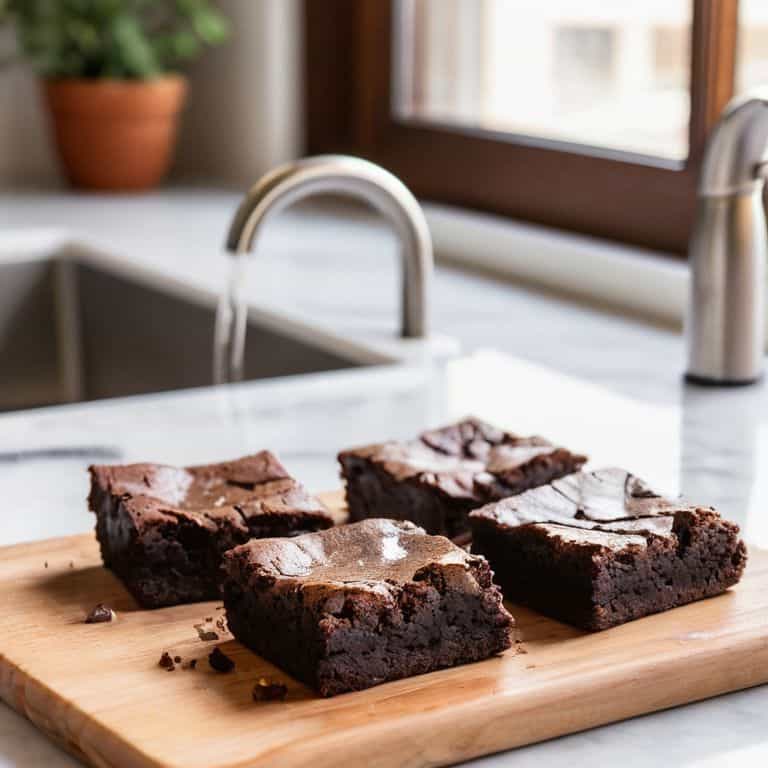
I still remember the first time I tried to make a small batch brownie recipe in my tiny NYC apartment kitchen. I was determined to prove to myself that I could bake something delicious, despite the limited space. But, like many of us, I’d been led to believe that making great brownies required a huge kitchen with all the bells and whistles. The truth is, it’s just not true. With the right techniques and a few clever hacks, you can create rich, fudgy brownies in even the smallest of spaces.
In this article, I’ll share my hard-won secrets for making the perfect small batch brownie recipe. I’ll walk you through my favorite techniques for maximizing flavor while minimizing cleanup and fuss. Whether you’re a fellow tiny kitchen dweller or just looking for a way to satisfy your sweet tooth without wasting ingredients, I’ve got you covered. My goal is to empower you to take control of your cooking space, no matter how small it may be, and to start baking the most decadent, indulgent brownies of your life. So, let’s get started and make some amazing brownies, together!
Table of Contents
- Recipe Instructions
- Small Batch Brownie Recipe
- Intensive Chocolate Flavors in Miniature Dishes
- Quick Baking for Beginners Rich Singles Serving Desserts
- Baking in Tight Spaces: 5 Essential Tips for Perfect Small Batch Brownies
- Key Takeaways for Tiny Kitchen Brownie Lovers
- Baking Wisdom
- Baking with Ease in Small Spaces
- Frequently Asked Questions
Recipe Details
Ingredients
- 1/2 cup all-purpose flour (sifted)
- 1/4 cup unsweetened cocoa powder
- 1/2 teaspoon salt
- 1/4 teaspoon baking powder
- 1/4 cup granulated sugar
- 1/4 cup unsalted butter (melted)
- 2 large eggs
- 1 teaspoon vanilla extract
- 1/2 cup semi-sweet chocolate chips
Tools & Supplies
- Large mixing bowl
- Whisk
- Rubber spatula
- 8-inch square baking pan
- Oven
Recipe Instructions
Step 1
First, let’s get started with the basics – preheating our oven to 350°F (180°C). Since we’re working with a small batch, we can use our trusty toaster oven, which not only saves energy but also helps with even cooking. While that’s heating up, let’s move on to preparing our ingredients.
Step 2
Next, we need to melt the chocolate, and I like to do this in a double boiler or in the microwave in 30-second increments, stirring between each interval until it’s smooth. For this recipe, we’ll be using a combination of dark and semi-sweet chocolate for that perfect balance of flavors. Make sure to set it aside once it’s melted.
Step 3
Now, let’s whisk together our dry ingredients, which include flour, salt, and sugar. Yes, you read that right – we’re adding a small amount of sugar directly to the flour mixture to help balance the bitterness of the dark chocolate. This step might seem simple, but it’s crucial for getting that perfect texture in our brownies.
Step 4
In a separate bowl, we’ll be mixing our wet ingredients – eggs, vanilla extract, and the melted chocolate we set aside earlier. The key here is to mix until just combined, ensuring we don’t overbeat the mixture, which can lead to tough brownies. We want to maintain that fudgy goodness we all love in a brownie.
Step 5
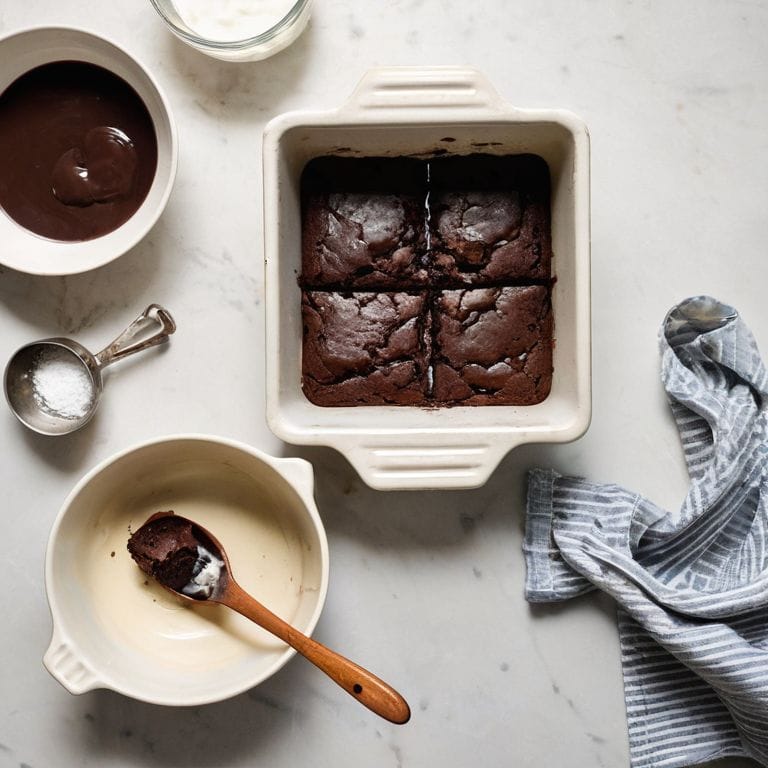
It’s time to combine our wet and dry ingredients. I like to do this in a gentle, folding motion to prevent any air from getting trapped, which can affect the final texture. Once everything is well combined, we’ll pour the batter into a small, greased baking dish. For small batches, I often use a dish that’s about 4 inches square – it’s the perfect size for two generous servings.
Step 6
Finally, we pop our brownie into the preheated oven and bake for about 15-20 minutes, or until a toothpick inserted comes out with a few moist crumbs attached. The baking time might vary depending on your oven, so keep an eye on it. Once it’s done, let it cool completely in the pan before slicing and serving. This final step of patience is crucial – it allows the brownie to set and makes it easier to slice and serve.
Small Batch Brownie Recipe
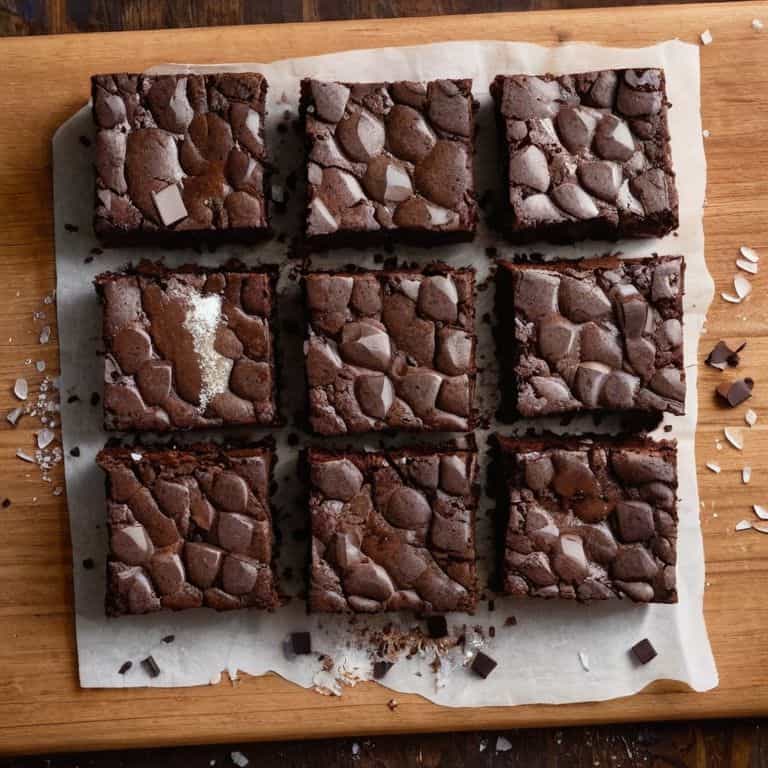
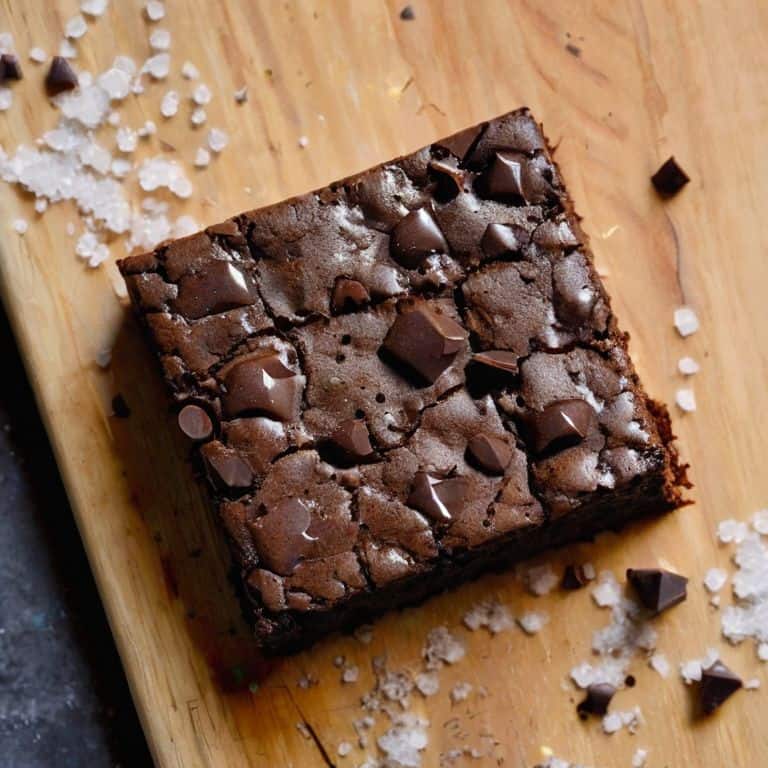
When it comes to achieving intensive chocolate flavors in my brownies, I’ve found that using high-quality cocoa powder makes all the difference. I like to experiment with different types of cocoa to see how it affects the overall taste and texture. For a more nuanced flavor, I opt for a darker cocoa powder, while a lighter powder gives a sweeter taste. To take my brownies to the next level, I also love adding a pinch of flaky sea salt to balance out the richness.
I’ve had a lot of fun playing around with singles serving desserts in my tiny kitchen, and these brownies are perfect for satisfying my sweet tooth without making a huge batch. Plus, they’re incredibly easy to customize – just add your favorite nuts, espresso powder, or dried fruit to give them an extra boost of flavor. For a fun twist, I like to use miniature baking dishes to make individual brownies that are perfect for a quick dessert or snack.
One of the things I love about making brownies from scratch is that it allows me to control the ingredients and create a truly rich dessert idea that’s tailored to my tastes. By using a combination of sugar, eggs, and high-quality chocolate, I can create a decadent treat that’s sure to impress. Whether I’m in the mood for something classic and simple or adventurous and new, I know that I can count on my trusty brownie recipe to deliver – and with these tips, you can too!
Intensive Chocolate Flavors in Miniature Dishes
I just love how small batch baking allows me to pack a punch of flavor into every bite. When it comes to brownies, intense chocolate flavor is a must. To achieve this in miniature dishes, I rely on high-quality dark chocolate and a touch of espresso powder to deepen the flavor. By using a higher ratio of chocolate to sugar, I can ensure that every bite is rich and indulgent, even in a smaller serving size.
This approach also lets me get creative with mix-ins and toppings, like chopped nuts or dried fruit, to add texture and visual appeal to these bite-sized treats. The result is a brownie that’s not only delicious but also visually stunning, perfect for satisfying my sweet tooth in my tiny kitchen.
Quick Baking for Beginners Rich Singles Serving Desserts
As a tiny kitchen dweller, I’ve learned to love the instant gratification of quick baking. For beginners, it’s especially great because you can whip up a rich, single-serving dessert in no time. I’m talking 10-15 minutes, tops! My favorite part? You don’t need to worry about leftovers or a huge mess. It’s the perfect way to satisfy your sweet tooth without committing to a full batch of treats.
I’ve found that using my toaster oven is a total game-changer for quick baking. It preheats in a flash and cooks everything evenly, which is perfect for singles serving desserts. Plus, it’s so easy to clean! Whether you’re in the mood for a fudgy brownie or a gooey cookie, quick baking is the way to go. And the best part? You can experiment with new flavors and ingredients without breaking the bank or wasting a ton of food.
Baking in Tight Spaces: 5 Essential Tips for Perfect Small Batch Brownies
- Use high-quality, dark cocoa powder to intensify the chocolate flavor without needing a large quantity of ingredients
- Select a small, heavy-gauge pan that distributes heat evenly, ensuring your brownies cook consistently throughout
- Employ the ‘melt-and-mix’ method for combining chocolate and butter, streamlining the process and reducing cleanup
- Opt for eggs and sugar in ratios that enhance moisture and richness, even in smaller batches, to achieve that perfect fudgy texture
- Don’t overmix the batter – stop as soon as the ingredients come together, preserving the delicate structure of your small batch brownies
Key Takeaways for Tiny Kitchen Brownie Lovers
I can achieve intense, rich chocolate flavors in small batch brownies using high-quality cocoa powder and clever mixing techniques
By scaling down traditional brownie recipes, I can enjoy a decadent dessert in a single serving, perfect for satisfying my sweet tooth without excess leftovers
With the right recipe and a few multi-functional gadgets, I can whip up fudgy, indulgent brownies in even the most compact of kitchens, proving that size really doesn’t matter when it comes to amazing food
Baking Wisdom
The beauty of a small batch brownie recipe lies not just in its convenience, but in its ability to amplify flavors and textures, proving that sometimes, the smallest dishes can hold the biggest delights.
Ava Quinn
Baking with Ease in Small Spaces
As we’ve explored the world of small batch brownie recipe, it’s clear that having a tiny kitchen doesn’t mean sacrificing flavor or satisfaction. By leveraging intensive chocolate flavors and clever baking techniques, we can create indulgent treats in even the most miniature of dishes. The key to success lies in embracing the challenge of small-space cooking and finding joy in the process of experimentation and discovery. Whether you’re a beginner or a seasoned baker, the small batch brownie recipe is a versatile and forgiving canvas for your creativity.
So, the next time you’re tempted to believe that a small kitchen is a limitation, remember that it’s actually an opportunity to get creative with constraints. Don’t be afraid to think outside the box, try new ingredients, and push the boundaries of what’s possible in your tiny kitchen. With a little practice and patience, you’ll be whipping up rich, fudgy brownies like a pro, and inspiring others to do the same. Happy baking, and let’s make the most of our small but mighty kitchens!
Frequently Asked Questions
Can I scale up this small batch brownie recipe if I need to make more for a party?
Absolutely, you can scale up this recipe for a party! Just keep in mind that baking time will increase with larger batches. I recommend checking for doneness every 5-7 minutes to ensure fudgy perfection. Simply multiply the ingredients and adjust the baking time as needed – easy peasy!
What type of chocolate is best to use for the most intense flavor in small batch brownies?
For the most intense flavor in small batch brownies, I swear by dark chocolate with at least 70% cocoa solids. The deeper, richer flavor is perfect for tiny treats, and trust me, it makes a huge difference – I’ve experimented with everything from milk chocolate to 90% cocoa, and 70% is my sweet spot!
How do I prevent small batch brownies from drying out or becoming too dense in a tiny kitchen with limited baking equipment?
To prevent small batch brownies from drying out, I swear by using a toaster oven, which helps maintain moisture. I also underbake them slightly, then let them cool in the pan – it’s a total game-changer for fudgy texture in tiny kitchen bakes!