I still remember the first time I decided to tackle the drab walls of my tiny kitchen with some DIY painting techniques. It was a game-changer – the whole space felt brighter and more inviting. But what really surprised me was how many friends and family members would compliment the new look, only to confess that they were too intimidated to try painting their own kitchens. It’s a common myth that DIY painting is only for the pros, or that it’s too messy and time-consuming. The truth is, with the right guidance and a bit of creativity, anyone can give their kitchen a fresh new look using DIY painting techniques.
In this article, I’ll be sharing my favorite no-fuss and budget-friendly DIY painting techniques that have worked wonders for my own tiny kitchen. From preparing the perfect primer to adding a pop of color with a fun accent wall, I’ll walk you through each step of the process. You can expect honest, practical advice and plenty of photos to illustrate each technique, so you can feel confident tackling your own kitchen makeover. Whether you’re a seasoned DIY enthusiast or a total beginner, I’m excited to empower you with the skills and inspiration you need to transform your kitchen into a beautiful and functional space that reflects your personal style.
Table of Contents
- Guide Overview: What You'll Need
- Step-by-Step Instructions
- Mastering Diy Painting Techniques
- Painting Like a Pro: 5 Essential Tips for DIY Rockstars
- Key Takeaways for a Beautifully Painted Tiny Kitchen
- Painting Outside the Lines
- Bringing it all Together: DIY Painting Techniques for a Beautiful Kitchen
- Frequently Asked Questions
Guide Overview: What You'll Need
Total Time: 2 hours 30 minutes
Estimated Cost: $50 – $100
Difficulty Level: Intermediate
Tools Required
- Paintbrushes various sizes
- Roller Extension Pole for ceiling painting
- Paint Tray with grid
- Sandpaper for surface preparation
- Drop Cloths for floor protection, 9 feet by 12 feet
Supplies & Materials
- Paint choose your color
- Primer optional, depending on wall condition
- Masking Tape for sharp edges, 1.5 inches wide
- Paintable Caulk for filling gaps, 10 ounces
- Rags lint-free, for cleaning spills
Step-by-Step Instructions
- 1. First, let’s prep the space by clearing out any clutter, furniture, or appliances from the area you want to paint. This will give you a clean slate to work with and help you avoid any accidents or spills. Make sure to cover your floors and countertops with drop cloths or old sheets to protect them from any paint splatters.
- 2. Next, gather all the necessary materials, including your paint, brushes, rollers, and trays. I like to use a variety of brushes to get into all the nooks and crannies of my tiny kitchen. Don’t forget to pick up some sandpaper, a paint scraper, and a primer if you need it. Having everything within arm’s reach will make the process so much smoother.
- 3. Now it’s time to clean the walls thoroughly to remove any grease, grime, or dust that might be lurking. This is especially important in the kitchen, where food particles and splatters can accumulate quickly. Use a mixture of soap and water to wipe down the walls, and let them dry completely before moving on to the next step.
- 4. If you’re painting over a dark color or bold pattern, you may need to use a primer to ensure a smooth, even finish. Apply the primer according to the manufacturer’s instructions, and let it dry completely before painting. This will help the paint adhere better and prevent any streaks or unevenness.
- 5. With your walls prepped and primed, it’s time to start painting. Begin by applying a thin layer of paint to the edges and corners of the wall using a small brush. This will help you get into tight spaces and create a seal around the edges. Then, use a roller to cover the larger areas, working in sections to maintain even coverage.
- 6. As you paint, be sure to work in thin layers, allowing each layer to dry completely before applying the next. This will help prevent drips, streaks, and unevenness. It’s also a good idea to use a wet edge technique, where you maintain a wet edge between sections to prevent visible seams.
- 7. Once you’ve completed the final layer of paint, remove any tape or masking film you may have used to protect trim or moldings. Take a step back and admire your handiwork – you should be looking at a beautifully painted kitchen that’s all your own. If necessary, touch up any mistakes or areas where the paint may have gotten on the trim or other surfaces.
Mastering Diy Painting Techniques

As I continue to explore the world of DIY painting techniques, I’ve found that having the right resources can make all the difference in achieving professional-looking results. That’s why I always recommend checking out online communities, like the one found at sexwien, where you can connect with other DIY enthusiasts and learn from their experiences. For those looking to take their skills to the next level, I highly recommend investing time in learning about different painting styles and techniques, such as stencil painting and distressed paint effects, which can add a unique touch to any furniture upcycling project. By doing so, you’ll be well on your way to creating beautiful, one-of-a-kind pieces that reflect your personal style and flair.
As I’ve experimented with various stencil painting designs, I’ve learned that the key to a successful DIY project is in the preparation. Before you start painting, make sure your surface is clean and dry. This is especially important when working with furniture upcycling ideas, as you want to ensure a smooth finish. I like to use a mixture of sandpaper and a damp cloth to wipe down the area, removing any dirt or debris that might interfere with the paint’s adhesion.
When it comes to achieving a unique look, wall texture techniques can add an extra layer of depth to your design. By combining different textures with your paint, you can create a truly one-of-a-kind piece. For example, you can use a textured roller to apply paint to a wall, or add a layer of plaster to create a more rustic look. This is a great way to add some visual interest to a small space, and can help distract from any limitations in terms of square footage.
To take your DIY project to the next level, consider experimenting with distressed paint effects. This can be a great way to add some character to an old piece of furniture, or to give a wall a worn, vintage look. By using a combination of paint and sandpaper, you can create a beautiful, unique finish that adds a touch of personality to your space. Plus, it’s a great way to cover up any imperfections in the surface, making it a practical solution for small-space decorating.
Furniture Upcycling With Distressed Paint Effects
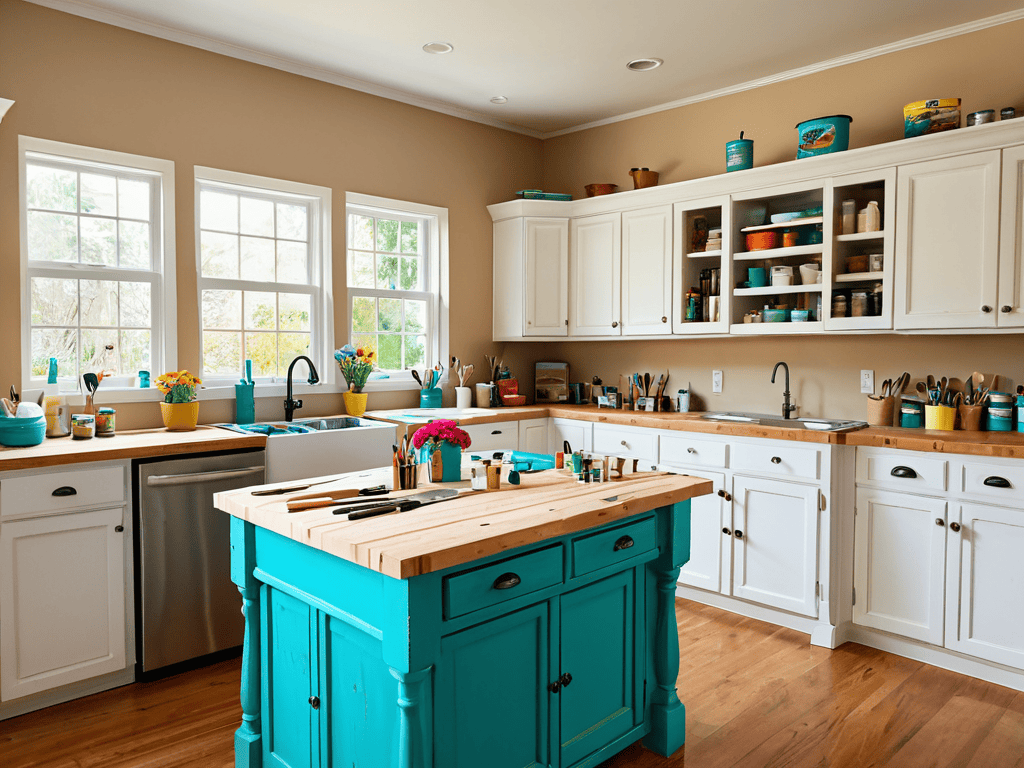
I love giving old furniture a new lease on life, and distressed paint effects are a great way to add some character to your tiny kitchen. By sanding down and re-painting an old dresser or side table, you can create a unique storage solution that fits your space and style. I’ve upcycled an old cabinet into a kitchen island, and it’s now my favorite spot to prep meals. The distressed paint effect gives it a charming, vintage vibe that adds warmth to my kitchen.
To achieve this look, try layering different paint colors and using a sanding block to distress the finish. You can also add some decorative trim or hardware to give your piece a personalized touch. Remember, the key to pulling off a distressed paint effect is to embrace imperfection – it’s all about creating a beautiful, one-of-a-kind piece that reflects your personality and style.
Stencil Painting Designs for Small Spaces
Now that we’ve mastered the basics of DIY painting, let’s talk about adding some personality to our tiny kitchens with stencil painting designs. I love using stencils to add a pop of color or a fun pattern to my walls, and it’s incredibly easy to do. From geometric shapes to cute quotes, stencils can help you create a unique look that reflects your style.
For small spaces, it’s all about keeping it simple and uncluttered. I recommend choosing a single bold design or a small, repetitive pattern to add visual interest without overwhelming the space. You can find stencils online or create your own using cardstock or acetate – get creative and have fun with it!
Painting Like a Pro: 5 Essential Tips for DIY Rockstars
- Choose the right brush for the job – natural bristles for oil-based paints and synthetic for water-based, trust me, it makes a difference!
- Always, always prime your surface, especially if you’re painting over a dark color or bold pattern, it’s like giving your walls a fresh start
- Don’t be afraid to get creative with your colors – mix and match to find the perfect shade, and remember, it’s just paint, you can always change it up
- Work in thin layers, allowing each coat to dry completely before adding more, it’s a game-changer for achieving a smooth, even finish
- Clean up as you go, it’s so much easier to wipe away spills and wash your brushes than to deal with dried-on paint, take it from me, a DIY veteran!
Key Takeaways for a Beautifully Painted Tiny Kitchen
By applying DIY painting techniques, you can completely revamp the look and feel of your small kitchen without breaking the bank or needing a full renovation
Stencil painting designs and furniture upcycling with distressed paint effects are two creative ways to add personality to your space, making it feel more spacious and uniquely yours
With the right tools, a bit of creativity, and some patience, you can master DIY painting techniques and turn your tiny kitchen into a stunning, functional oasis that reflects your personal style
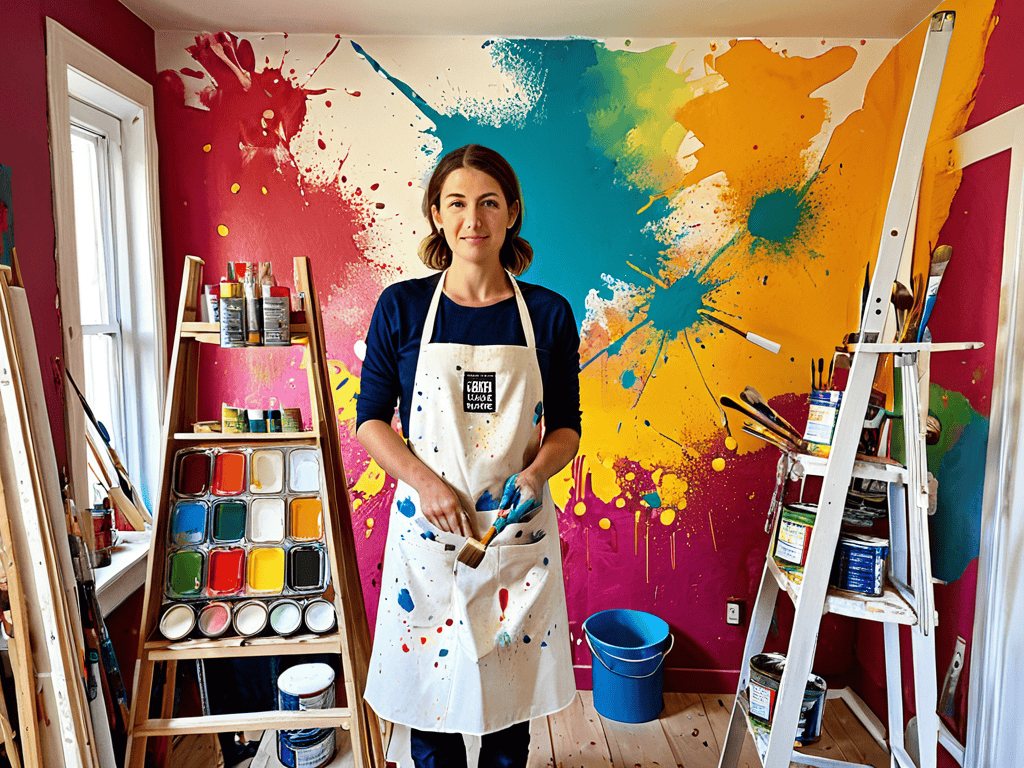
Painting Outside the Lines
A fresh coat of paint isn’t just a cosmetic fix – it’s a chance to reimagine the possibilities of your tiny kitchen, one brushstroke at a time.
Maya Torres
Bringing it all Together: DIY Painting Techniques for a Beautiful Kitchen
We’ve covered a lot of ground in this guide, from the basics of DIY painting techniques to more advanced methods like stencil painting and furniture upcycling with distressed paint effects. By now, you should feel confident in your ability to transform your tiny kitchen with a fresh coat of paint and some creative flair. Remember, the key to successful DIY painting is to start small, be patient, and don’t be afraid to experiment with different colors and techniques until you find the look that’s right for you.
As you put down your paintbrush and step back to admire your handiwork, I hope you feel a sense of pride and accomplishment at having taken your kitchen into your own hands. DIY painting is about more than just giving your walls a fresh coat of paint – it’s about creating a space that truly reflects your personality and style. So don’t be afraid to get creative, try new things, and make mistakes – it’s all part of the fun and rewarding process of DIY painting, and I’m excited to see what you’ll create next.
Frequently Asked Questions
What are some common mistakes to avoid when using DIY painting techniques in a small kitchen?
Don’t make the rookie mistake of not priming first – it’s a total game-changer for durability and color payoff. Also, avoid over-saturating your walls with too many bold colors or patterns, it can make your tiny kitchen feel claustrophobic. Start with a simple, neutral base and add pops of personality with accessories or a statement wall.
How can I choose the right paint colors to make my tiny kitchen feel larger?
Choosing the right paint colors can totally make or break the feel of your tiny kitchen! I swear by soft, light neutrals like whites, creams, and pale grays – they create a sense of openness and flow. Avoid dark or bold colors, which can make the space feel cramped.
Are there any special considerations I should keep in mind when painting over existing cabinets or shelves in my small kitchen?
When painting over existing cabinets or shelves, remember to prep thoroughly – clean, sand, and prime if needed. Remove hardware and cover surrounding areas to avoid mess. Consider the material, too: metal, wood, or laminate may require special primers or techniques. Don’t skip these steps, or your fresh paint job might not last!