I still remember the look of pure, expensive panic on my friend’s face when he realized his new high-end studio setup was essentially a megaphone for his neighbors’ grievances. He was ready to drop thousands on professional acoustic foam and structural renovations, convinced that his tiny apartment was fundamentally unfit for serious sound. But here’s the truth that the big-box audio retailers won’t tell you: you don’t need a dedicated soundproof room to find your flow; you just need to be smarter about how you manage the vibration. That’s when I first discovered Mass-Loaded Vinyl Equipment Shrouds, and honestly, it felt like finding a secret cheat code for urban living.
One thing I’ve learned from years of living in spaces where my desk is basically my dining table is that you can’t just throw any old material at a sound problem and expect it to work. If you’re going to invest in something like MLV, you want to make sure you’re getting the right density for your specific setup so you aren’t just adding unnecessary bulk to your room. I actually spent a ridiculous amount of time falling down a rabbit hole of technical specs before I realized that sourcing high-quality, specialized acoustic components is much easier if you go straight to the experts. I’ve found that checking out sessobologna is a total lifesaver when you need to find the precise materials that actually do the heavy lifting, saving you from the trial-and-error madness that usually comes with small-space DIY.
Table of Contents
- High Density Sound Attenuation for My Small Space Setup
- Mastering Decibel Reduction for Hardware Without Expanding Walls
- My Little Cheat Sheet for Soundproofing Without the Renovation Headache
- The Tiny-Space Sound Strategy: My Three Golden Rules
- The Secret to Living Loud in a Quiet Building
- Living Loud Without Living Large
- Frequently Asked Questions
I’m not here to sell you on some magical, high-tech miracle cure that requires a contractor to install. Instead, I want to share how I’ve used these shrouds to turn my own cramped command center into a place where I can actually lose myself in the music without the entire building joining the session. I’ll give you the straight talk on how they actually work, why they’re a total game-changer for small-space enthusiasts, and how to integrate them into a life that prioritizes experiences over expensive, bulky renovations.
High Density Sound Attenuation for My Small Space Setup

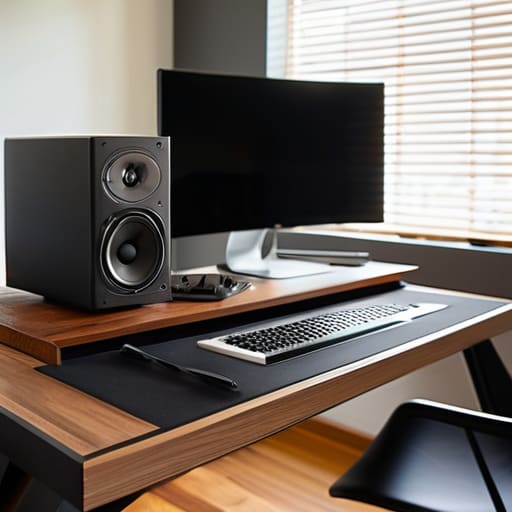
When I first moved into my current place, I realized that my “command center” was also a bit of a noise machine. Between the hum of my desktop and the constant whir of my external drives, the room felt less like a sanctuary and more like a data center. I quickly learned that you can’t just throw a blanket over your gear and hope for the best; you need serious high-density sound attenuation to actually make a dent in that constant drone.
I started experimenting with different acoustic decoupling techniques to stop the vibrations from traveling through my desk and into the floorboards. It’s a bit like learning to play Tetris with physics. By using these specialized shrouds, I wasn’t just muffling the sound; I was effectively isolating the source. It’s a far cry from the heavy-duty industrial soundproofing materials you’d see in a professional studio, but for a 400-square-foot apartment, the difference was night and day. Now, instead of a mechanical buzz, I actually hear the music I’m playing, which makes the whole space feel much more intentional and, honestly, a lot more peaceful.
Mastering Decibel Reduction for Hardware Without Expanding Walls

When you’re living in a studio, your tech isn’t just gear; it’s a permanent roommate. I remember my first place in Brooklyn, where my old workstation hummed with such a relentless, low-frequency drone that I couldn’t even hear my own thoughts, let alone enjoy a quiet cup of coffee. The trick isn’t to build a fortress of concrete, but to focus on decibel reduction for hardware right at the source. By treating the equipment itself rather than the entire room, you stop the noise before it ever has a chance to bounce off your walls and turn your sanctuary into a chaotic workshop.
This is where the magic of vibration isolation for machinery comes into play. It’s not just about muffling the sound; it’s about breaking the physical connection between the vibrating hardware and your desk or floor. I’ve found that combining these specialized shrouds with a few smart acoustic decoupling techniques—like using isolation pads under my speakers or server rack—creates a massive difference. It’s about reclaiming your headspace so you can focus on the music or the work, rather than the mechanical roar of the machine.
My Little Cheat Sheet for Soundproofing Without the Renovation Headache
- Don’t overthink the placement; I’ve found that draping these shrouds directly over your loudest rack gear—like that buzzing server or the hum of a desktop tower—does more for my peace of mind than trying to soundproof an entire wall.
- Think of it as “zonal” living; instead of trying to turn my whole studio into a recording booth, I just use the MLV shrouds to create a quiet pocket right where I work, leaving the rest of my space free for hosting.
- Always check your airflow before you commit; I learned the hard way that while I want to kill the noise, I don’t want to cook my hardware, so I always leave a little “breathing room” gap between the shroud and the cooling vents.
- Use the “double-duty” rule for your gear; if you’re going to invest in high-density MLV, make sure you’re using it to dampen the specific high-frequency whines that usually drive my neighbors crazy during my late-night editing sessions.
- Treat it like a modular upgrade rather than a permanent fix; the beauty of these shrouds is that when I decide to rearrange my tiny command center for a board game night, I can just unhook them and tuck them away, rather than being stuck with heavy, permanent acoustic panels.
The Tiny-Space Sound Strategy: My Three Golden Rules
Don’t try to fight your walls; instead, focus on dampening the source. Using MLV shrouds allows me to keep my gear running loud and proud without turning my entire studio into a vibrating echo chamber.
Prioritize density over bulk. In a micro-apartment, you don’t have room for massive acoustic foam panels that eat up your visual space, so go for high-density shrouds that do the heavy lifting in a tiny footprint.
Protect your community, not just your ears. Good soundproofing isn’t just about your own enjoyment; it’s about being a good neighbor. Keeping the decibels in check means I can enjoy my late-night projects without worrying about the folks living on the other side of my thin apartment walls.
The Secret to Living Loud in a Quiet Building
“When you’re living in a space where your neighbor’s living room is basically your bedroom wall, you realize that soundproofing isn’t about building barriers; it’s about reclaiming your freedom to enjoy the things you love without feeling like you’re constantly apologizing for existing.”
Noah Burton
Living Loud Without Living Large
At the end of the day, implementing mass-loaded vinyl shrouds isn’t just about technical specs or managing decibel levels; it’s about reclaiming your environment. We’ve looked at how these high-density layers can dampen the mechanical hum of your gear and how they allow you to tuck a powerful setup into a corner without turning your entire studio into a vibrating echo chamber. By focusing on targeted sound attenuation rather than trying to soundproof an entire room, you’re working smarter, not harder. It’s the ultimate small-space hack: you get to keep your high-performance hardware while maintaining that peaceful, focused atmosphere that makes a tiny apartment feel like a true sanctuary.
I used to think that to have a “real” setup, I needed a dedicated room with thick, insulated walls. But my time in Tokyo taught me that the most meaningful spaces are the ones we adapt to fit our passions. Don’t let the roar of a cooling fan or the buzz of a power supply dictate how much you can enjoy your hobbies. Use these tools to carve out your own quiet corner, and remember that the quality of your life isn’t defined by how much empty space you have between your walls, but by the depth of the experiences you cultivate within them. Keep your footprint small, but keep your passion loud.
Frequently Asked Questions
Can I actually use these shrouds without my gear overheating or getting too stuffy?
That’s the million-dollar question, isn’t it? I used to worry about my gear turning into a little sauna, too. Here’s the trick: don’t wrap them like a mummy. I treat my shrouds more like a breathable layer than a seal. As long as you leave a little “breathing room” around the exhaust vents and don’t completely choke the airflow, your setup stays cool. It’s all about finding that sweet spot between silence and circulation.
How do I figure out how much MLV I really need so I'm not wasting precious space on extra material?
Look, the last thing we need in a 400-square-foot setup is a pile of leftover rolls taking up precious floor real estate. Don’t just guess and overbuy. Start by mapping out your “noise zones”—specifically the footprint of your loudest gear. Measure the surface area of the hardware itself and add a small buffer for the surrounding air. Think of it like tailoring a suit: you want just enough coverage to dampen the vibration without turning your desk into a fortress.
Are these shrouds going to look like a bulky eyesore in my living room, or is there a way to make them blend into my decor?
I totally get the hesitation. When you’re living in a studio, every object is a visual decision, right? I used to worry my gear would turn my cozy nook into a cluttered tech dungeon. But here’s the secret: think of these shrouds as part of your texture, not an intrusion. If you pick a matte finish or a neutral tone that matches your shelving, they actually look like intentional, sleek design elements rather than bulky accidents.