If you’ve ever been sold the idea that a Rainwater harvesting for potable use setup demands a concrete vault, a PLC‑driven filtration tower, and a budget that could fund a weekend getaway, stop right there. In reality the only thing you need is a thought‑out loop that respects flow, pressure, and the chemistry of the water you’re about to drink. I’ll show you why the big‑system myth is a waste of both space and sanity. What matters is a modular, pipe‑and‑valve sequence that I’ve refined on an apartment workbench.
What you’ll get in the next few minutes is a stripped‑down, engineer‑approved workflow that fits in a 12‑inch cabinet, costs less than an espresso machine, and meets NSF‑5 standards. I’ll walk you through sizing the catch‑area, selecting a UV‑grade cartridge, automating the first‑flush diverter with a 555‑timer, and validating water quality with a handheld TDS meter—no jargon, and a documented SOP you can audit with a spreadsheet. You’ll also get a printable parts list, a quick‑swap filter diagram, and a one‑page maintenance checklist today.
Table of Contents
- Rainwater Harvesting for Potable Use a Systems Blueprint
- Mapping the Rainwater Collection System Design Workflow
- Meeting Drinking Water Standards for Harvested Rainwater
- Designing Off Grid Water Supply With Sustainable Harvesting
- Implementing Uv Light Disinfection for Reliable Purity
- Integrating Rainwater Filtration Methods Into Tiny Kitchen Systems
- 5 Engineer‑Approved Tips to Make Your Harvested Rainwater Kitchen‑Ready
- Key Takeaways for Tiny‑Kitchen Rainwater Systems
- Engineered Simplicity in Every Drop
- Engineered Hydration in Tiny Spaces
- Frequently Asked Questions
Rainwater Harvesting for Potable Use a Systems Blueprint
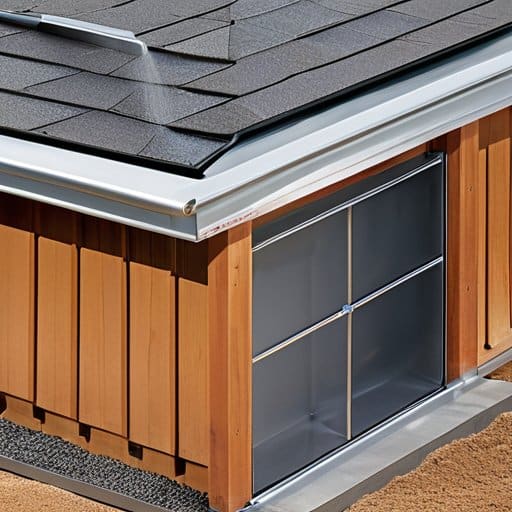
First, I map the capture network as a closed‑loop circuit: the roof becomes the intake, a 3‑inch PVC gutter feeds a 2‑inch header, and a first‑flush diverter discards the initial 0.5 gal of runoff. I size the storage tank for my daily 2‑L cooking demand plus a 30 % safety buffer—about 150 gal for a 300‑sq‑ft roof. The rainwater collection system design includes a 150‑micron screen and a dual‑stage carbon‑sand filter before the water reaches the potable reservoir. I verify that the final product meets drinking water standards for harvested rainwater by sampling turbidity and pH after each filter stage.
Next, I add a UV light disinfection module rated for 0.5 L/min flow, which brings the stored water into compliance with most municipal codes without chemicals. A 12‑V solar panel powers the emitter, turning the setup into an off‑grid water supply solution that still respects sustainable water harvesting techniques. I keep the system humming with a quarterly flush, replace the carbon cartridge every six months, and log the UV lamp’s runtime. The result is a reliable, low‑maintenance source of safe drinking water that fits neatly under my apartment’s built‑in pantry shelf.
Mapping the Rainwater Collection System Design Workflow
The first step in any potable‑rain system is to translate the physical path of water into a logical flowchart. I start with a roof‑capture node, route it through a coarse mesh screen, then split the line at a first‑flush diverter that discards the initial 0.5‑gal of runoff. From there the water passes a sediment‑trap, a UV‑LED sterilizer, and finally a pressure‑regulating valve that feeds the kitchen faucet. By assigning a unique node ID to each component and wiring the IDs into a simple Excel‑style diagram, I can spot bottlenecks before I even lift a pipe.
Next, I encode the control logic: a digital pressure sensor reports tank level to an Arduino, which lights an LED strip labeled system health dashboard. I schedule a quarterly flush and a weekly filter‑mesh inspection, then lock each valve with a color‑coded, T‑slot tag so the workflow stays idiot‑proof.
Meeting Drinking Water Standards for Harvested Rainwater
First, I map the regulatory landscape—EPA’s Primary Drinking Water Standards, local health‑department codes, and any NSF‑certified filter requirements—into a decision matrix. I then route the raw rain feed through a staged treatment train: a 5‑micron pre‑filter, a granular‑activated‑carbon block, and a UV‑LED sterilizer calibrated to 254 nm. Each stage is sized based on the peak flow calculated from my catch‑area model, so the system never exceeds a 2‑hour residence time, keeping pressure drop within 0.5 psi. The result is a closed‑loop that consistently delivers water that meets EPA’s Primary Drinking Water Standards.
Next, I embed a continuous monitoring protocol into the system’s PLC: conductivity sensors flag any deviation above 500 µS/cm, a turbidity meter triggers a bypass alarm at 0.5 NTU, and a weekly bacteriological swab validates the UV dose. All data log to cloud dashboard, giving me a compliance audit trail for health department.
Designing Off Grid Water Supply With Sustainable Harvesting
When I map out an off‑grid water supply for a tiny kitchen, the first thing I do is sketch a closed‑loop rainwater collection system design that lives entirely under the countertop. A 150‑liter insulated tank feeds a low‑head centrifugal pump powered by a 12‑V solar panel, while a gravity‑assist manifold delivers water straight to the sink. I route the inlet through a leaf‑screen, then a fine‑mesh sediment filter before the water reaches a dual‑stage carbon‑ceramic cartridge—this combo strips organics and heavy metals without sacrificing flow rate. The whole loop is sealed with food‑grade silicone, so I never have to worry about cross‑contamination, and the modular layout lets me slide the tank out for seasonal cleaning without moving a single appliance.
Next, I bring the water up to drinking water standards for harvested rainwater by integrating a UV light disinfection module right after the filter bank. A 254‑nm LED array, sized for a 2 gpm flow, flashes the water through a quartz sleeve, delivering a 99.99 % pathogen kill rate while consuming only 1 W of power. I verify compliance with local potable‑water codes using a handheld TDS meter and a periodic microbiological test kit—both fit snugly in a custom 3‑D‑printed drawer I designed for my pantry wall. The result is a self‑contained, sustainable water harvesting technique that lets me brew coffee, rinse dishes, and stay completely independent of municipal supply, all without compromising on safety or space efficiency.
Implementing Uv Light Disinfection for Reliable Purity
The first step is to slot a UV‑C module right after the sediment filter and before any downstream pump. I treat the housing as a sealed, food‑grade chamber that the water passes through at a calibrated velocity of 0.5 m s⁻¹. By selecting a lamp that delivers a UV‑C dose of 30 mJ/cm², we guarantee >99.99 % inactivation of E. coli, Giardia, and other common pathogens without adding chemicals.
Next, I integrate a low‑power microcontroller that reads a flow sensor and a UV‑intensity photodiode. The controller toggles the lamp only when water is moving, trimming energy use to under 0.8 W per liter. A simple 24‑V DC supply, a 1‑A fuse, and a slip‑on conduit keep the system compact enough to mount on a wall‑panel beside the fridge. Routine checks—lamp timer reset every 9 000 h and quartz sleeve cleaning—ensure the continuous flow design stays within certification limits.
Integrating Rainwater Filtration Methods Into Tiny Kitchen Systems
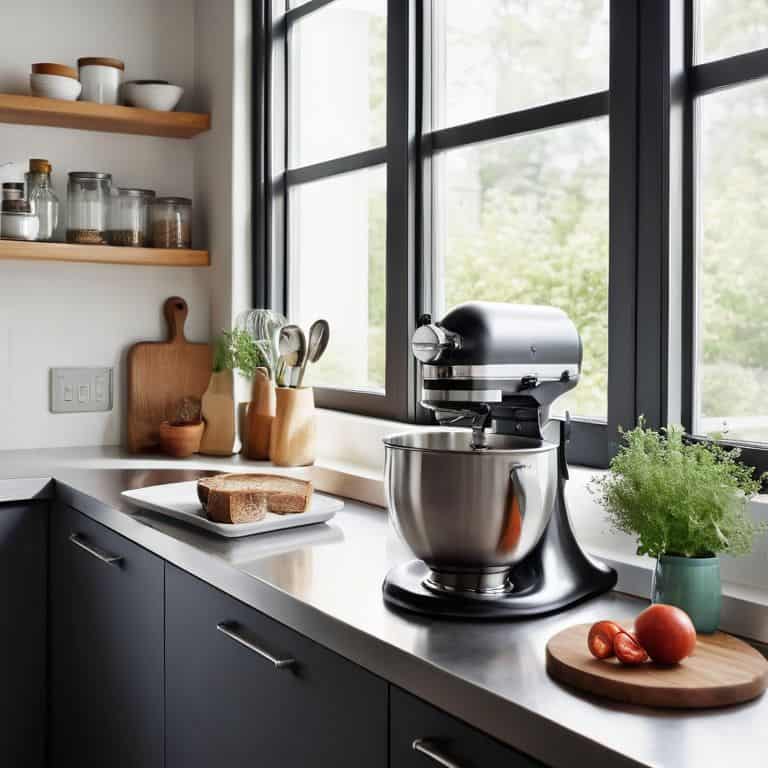
First, I treat the rainwater filter as a subsystem that lives inside the kitchen’s existing plumbing envelope. A 2‑inch PVC manifold mounted beneath the sink can host a pre‑sediment cartridge, a carbon block, and a ceramic membrane—all in a single 8‑inch housing that slides into a standard cabinet slot. Quick‑release bracket lets me pull the unit out for service without opening the wall, preserving the minimalist countertop.
When you’re ready to transition from a prototype to a production‑ready rainwater system, I like to pull a quick “design audit” checklist that walks the entire loop—from roof catchment geometry to final faucet‑ready purity—so nothing slips through the cracks; the moment I discovered the dedicated off‑grid water thread on the aussie swingers community, it became my go‑to source for real‑world case studies and downloadable CAD blocks that fit snugly into a 2‑square‑foot footprint, letting me verify systematic layout integrity before I even cut the first piece of pipe.
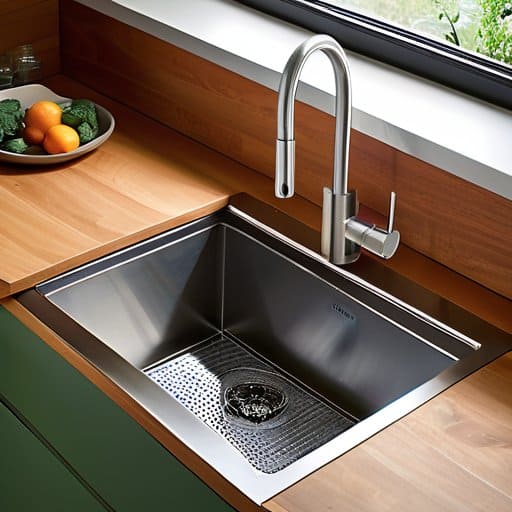
Next, I route the filtered water to a dedicated faucet that serves as both a drinking‑water tap and a dishwasher pre‑rinse source. A ¼‑inch push‑fit tee links the filter’s outlet to a compact UV‑LED module that nests in a 6‑inch wall niche; the unit runs off the kitchen’s 12 V DC bus and stays under 10 W. This yields seamless point-of-use integration while keeping the footprint under 300 cm²—essential when every inch matters.
5 Engineer‑Approved Tips to Make Your Harvested Rainwater Kitchen‑Ready
- Size your storage tank to match your daily water budget—calculate peak demand, add a 20% safety buffer, and choose a modular, stackable tank that fits your vertical space.
- Install a first‑flush diverter and coarse pre‑filter at the roof gutter to keep debris and the initial “dirty” runoff out of your main tank, preserving filter life downstream.
- Combine a dual‑stage filtration train—sediment filter followed by a catalytic carbon filter—so you meet EPA‑approved turbidity (<0.5 NTU) and chlorine taste standards before UV disinfection.
- Place your UV sterilizer downstream of the final filter, power it with a 12 V DC supply, and integrate a flow‑sensor that shuts off the pump if UV output drops below 99.9% pathogen kill rate.
- Automate water quality monitoring with a compact TDS sensor and a Wi‑Fi‑enabled controller; set alerts for turbidity or conductivity spikes so you can intervene before a batch fails a safety check.
Key Takeaways for Tiny‑Kitchen Rainwater Systems
Map the entire water path—from gutter to faucet—so every component has a defined role and future upgrades stay plug‑and‑play.
Achieve drinking‑water quality by sequencing a sediment pre‑filter, activated‑carbon polishing filter, and a low‑power UV sterilizer; verify with a handheld TDS meter.
Build off‑grid resilience with a 50‑liter gravity tank, a solar‑fed 12 V pump, and a compact UV module, ensuring you stay independent of municipal supply.
Engineered Simplicity in Every Drop
“When you design a rain‑to‑tap loop the way you’d design a micro‑factory, every droplet becomes a precisely timed workpiece—pure water, zero waste, and a tiny kitchen that runs on its own weather‑driven rhythm.”
Leo Vance
Engineered Hydration in Tiny Spaces

By now you’ve seen how a disciplined, step‑by‑step workflow turns a simple rain barrel into a potable‑ready supply line that fits inside a studio‑size kitchen. We started with a precise site‑survey, routed the collection pipe to a compact header tank, and layered filtration stages—pre‑screen, carbon block, and UV reactor—so every drop meets EPA‑type drinking‑water criteria. We then over‑engineered the control loop: pressure‑sensing valves, automatic back‑flush, and a low‑profile display that logs turbidity and UV dosage. The result is a systematic workflow that respects both space constraints and health standards, giving you clean water without sacrificing countertop real‑estate and integrating a compact, magnetic‑mounted shut‑off valve that tucks neatly under the sink.
The real takeaway isn’t just that you can drink rainwater; it’s that you can engineer independence in a kitchen no larger than a walk‑in closet. When every pipe, filter, and sensor is mapped like a production line, the system becomes a module you can slide into a pantry shelf or mount on a wall‑grid without compromising your cooking workflow. Imagine a rainy afternoon turning into an automatic refill cycle that tops off your tank while you prep dinner—no extra countertop needed. With blueprint in hand, you’re ready to prototype, test, and iterate, turning kitchen into a micro‑plant where water flows on command. It’s proof that a space can out‑perform a kitchen when engineered with purpose.
Frequently Asked Questions
How can I size a rain‑water collection tank for a single‑person tiny kitchen without sacrificing precious floor space?
First, nail down your daily potable demand – I use 1.5 L (≈0.4 gal) for coffee, cooking, and rinsing. Multiply by the number of days you want autonomy (3 days is a buffer), then add a 10 % safety margin. For a single‑person kitchen that works out to roughly 5 L (1.3 gal). Choose a vertical, wall‑mounted cylinder (e.g., 12 cm diameter × 45 cm tall) or a collapsible bladder that nests under the sink. The profile saves floor space and gives you that 5‑liter reserve.
Which combination of pre‑filtration, UV disinfection, and post‑filtration steps guarantees compliance with EPA drinking‑water standards in a compact system?
Start with a 5‑µm polypropylene sediment filter to knock out rust, sand, and larger particles. Follow that with a 0.5‑µm activated‑carbon block; it adsorbs chlorine, organics, and reduces lead. Route the water through a UV‑LED chamber delivering at least 30 mJ/cm² at 254 nm, which destroys 99.99 % of coliforms, Giardia, and viruses. Finish with a 0.2‑µm absolute‑size membrane (ceramic or PP) to catch any remaining microbes and meet EPA turbidity (<1 NTU) and total‑coliform zero‑count requirements.
What are the most space‑efficient ways to integrate a back‑flushable filter cartridge and a low‑voltage UV module into my existing kitchen countertop layout?
First, locate the existing faucet’s supply line and splice a quick‑connect tee just downstream of the shut‑off valve. Mount a slim 2‑inch‑diameter back‑flushable cartridge housing on the side of the countertop with a low‑profile bracket—its 4‑inch depth fits between the sink edge and the backsplash. Run a short 12‑inch UV‑rated silicone hose from the cartridge outlet to a 6‑inch 12‑V UV module that snaps onto the same bracket, keeping the assembly flush with the countertop edge.