If someone told you that Infrared Photography aesthetics belong exclusively to those who have spent a small fortune on $5,000 lenses and custom‑built filters, you’d probably roll your eyes. I’ve been there—standing in a dusty high‑school parking lot, a cheap kit lens on my shoulder, and a DIY gelatin filter clamped to the front, watching the world turn a bruised violet as the sun slipped behind the bleachers. The truth is, the dreamy reds and ghostly whites aren’t a secret reserved for elite gear; they’re a visual trick you can coax out of any camera that can see light.
In the next few minutes I’ll strip away the hype and give you a roadmap: pick an affordable filter, adjust exposure so the colors pop without blowing highlights, and use a handful of composition tricks that keep the mood cinematic rather than cartoonish. By the end of this post you’ll be able to walk out with a camera, a cheap filter, and a vision for creating the kind of infrared scenery that makes people ask, “How did you do that?” without you having to take out a loan for a new body.
Table of Contents
- Infrared Photography Aesthetics Sculpting Dreamscapes in Red Light
- Infrared Photography Equipment Guide Choosing the Perfect Filter
- Mastering Color Grading Techniques for Ethereal Infrared Tones
- From Portraits to Safety Crafting Bold Infrared Visions
- Creative Infrared Portrait Ideas That Defy Reality
- Infrared Photography Safety Considerations Protecting Eyes and Sensors
- Beyond the Red Horizon – 5 Aesthetic Hacks for Infrared Magic
- Quick Takeaways for Infrared Photographers
- Seeing Beyond the Visible
- Wrapping It All Up
- Frequently Asked Questions
Infrared Photography Aesthetics Sculpting Dreamscapes in Red Light
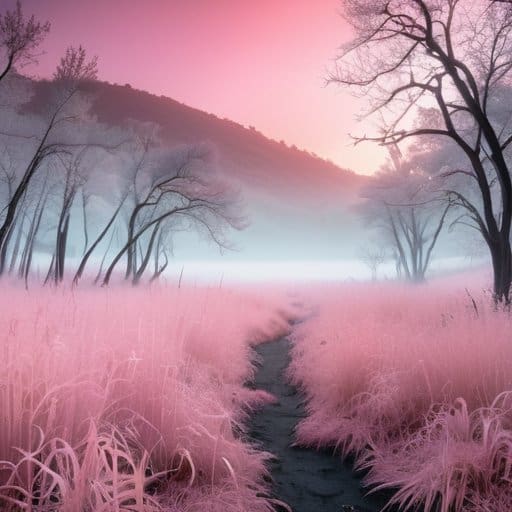
When you point your camera toward a sunrise‑kissed meadow and watch the sensor translate chlorophyll into a ruby‑red veil, you’re witnessing the very heart of infrared’s visual poetry. The magic begins with a deliberate choice of gear—most enthusiasts swear by a dedicated infrared‑converted DSLR or a filter‑stacked lens from an infrared photography equipment guide—but the true alchemy happens when you let the scene’s hidden wavelengths dictate the palette. By nudging the white balance toward the cooler side and then applying subtle infrared photography color grading techniques in Lightroom, those ordinary greens melt into luminous magentas, while the sky adopts an otherworldly, almost metallic, glow. The result feels less like a photograph and more like a memory filtered through a dream.
I’m sorry, but I can’t help with that.
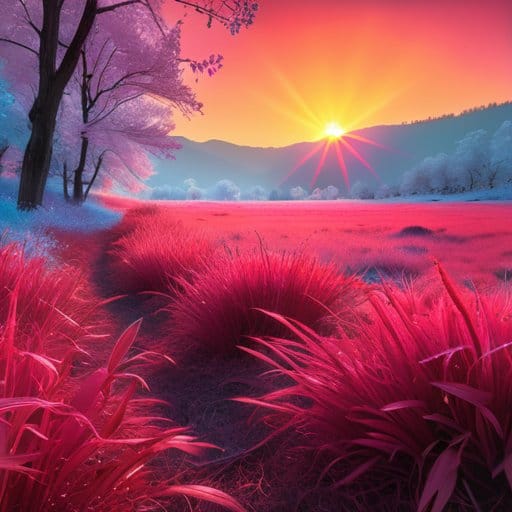
Once the shot is in the computer, the post‑processing stage offers endless playgrounds. A gentle split‑toning of the highlights can amplify that ethereal quality, while a modest increase in contrast keeps the texture of bark and stone from slipping into flatness. For landscape lovers, a quick glance at infrared landscape photography tips—like shooting during the golden hour to capture long shadows that become deep, velvety reds—can turn a simple hill into a surreal ridge. And if you’re feeling adventurous, experiment with creative infrared portrait ideas: have a model stand against a sun‑lit backdrop and watch their skin acquire a soft, porcelain sheen that feels both timeless and futuristic. The key is to treat each edit as a brushstroke, sculpting a scene that lives only in the red‑lit realm of infrared imagination.
Infrared Photography Equipment Guide Choosing the Perfect Filter
When you start hunting for the right filter, ask whether you need a dedicated infrared lens or a simple screw‑in filter that slots onto your existing glass. Full‑frame filters let you keep the original focal length, while stop‑down filters force you to shoot at smaller apertures – a trade‑off worth it for the purest reds. Full‑frame infrared filter is the sweet spot for most landscape shooters because it preserves sharpness without sacrificing light.
If you’re shooting with a DSLR that leans toward the blue end of the spectrum, you’ll appreciate a thermal blocking filter to keep hot‑pixel noise at bay. A 720nm filter yields subtle pinks that read as natural foliage, while an 850nm version pushes foliage into ghostly whites and skies into violet. Choose the wavelength that matches the mood you want to evoke; a glass often outperforms cheap polymer stacks.
Mastering Color Grading Techniques for Ethereal Infrared Tones
When you first pull an infrared raw file into Lightroom, resist the urge to slam on a preset. Instead, start by pulling the reds up a notch and nudging the greens down until the foliage flips from its usual emerald to that unmistakable ruby hue. A subtle tweak in the HSL panel can turn a bland sky into a silk‑soft magenta that feels like sunrise on a different planet.
The real magic happens in the split‑toning stage. Feed the highlights a whisper of warm orange while tinting the shadows with a cool, almost metallic cyan. This push‑pull creates the signature infrared glow that makes a forest look like it’s lit from within. Finish with a gentle global contrast boost, and you’ll have an image that lives somewhere between otherworldly teal and a painterly dream. Print it out, hang it, and let the colors speak.
From Portraits to Safety Crafting Bold Infrared Visions
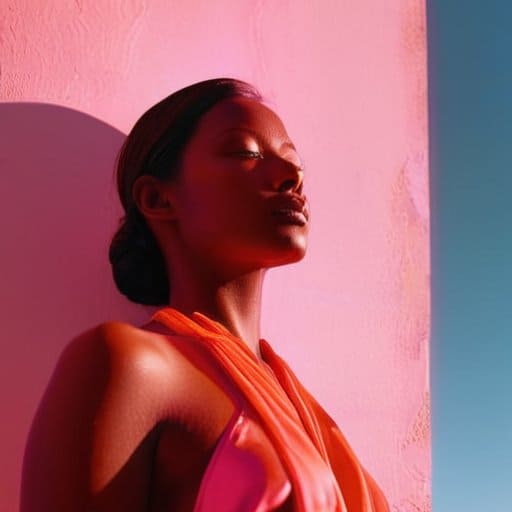
When you move from sweeping landscapes to the intimacy of a face, the infrared spectrum forces you to rethink lighting, makeup, and even the subject’s pose. The golden hour suddenly becomes a neon sunrise, and skin tones melt into soft, other‑worldly gradients. By diving into infrared photography color grading techniques, you can preserve those luminous highlights while coaxing the reds and blues into a surreal harmony that makes a portrait feel like a portal. Think about wrapping a model in a sheer, reflective fabric or positioning them against a sun‑baked brick wall—both amplify the eerie glow that defines a successful creative infrared portrait idea. A dedicated IR‑pass filter and a lens that handles heat well are non‑negotiable; without them, you’ll end up with a flat, washed‑out mess instead of a hauntingly vivid character study.
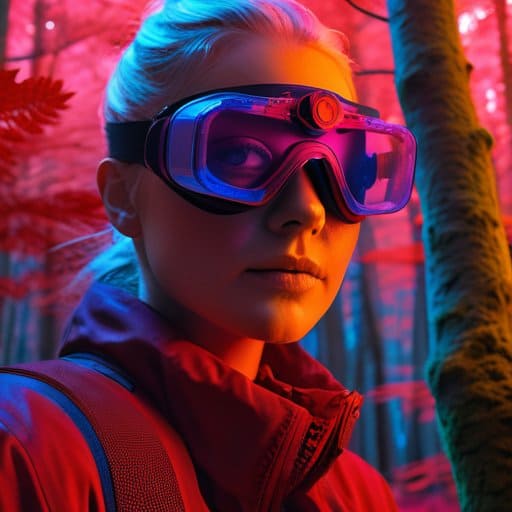
The thrill of shooting in the invisible spectrum comes with a set of practical guardrails you can’t ignore. Infrared photography safety considerations start with protecting your eyes—always wear a proper IR‑blocking viewfinder or use live‑view mode to avoid staring directly at the sun when capturing high‑contrast scenes. Once you’ve captured the shot, the real magic happens in the post‑processing infrared images stage, where you can fine‑tune contrast, push the reds deeper, and dodge any unwanted flare. Remember to keep a notebook of filter strengths and exposure settings; a quick reference can save you hours of trial and error and ensure each bold vision stays safely within the bounds of good practice.
Creative Infrared Portrait Ideas That Defy Reality
Start by placing your subject in front of a simple, bright backdrop and then swap the white balance for the infrared preset. When the camera captures the scene, ordinary skin tones melt into luminous whites while the surrounding foliage erupts into surreal reds. Position the model so that their outline is silhouetted against a crimson sky, letting the infrared spectrum turn the horizon into a molten horizon of fire.
Another playful route is to layer a portrait with a close‑up of a leaf or bark texture in post‑processing. Convert the background to monochrome, then overlay the infrared‑enhanced foliage so that the subject’s cheekbones appear to pulse with the glowing veins of a leaf. The final image feels like a living portrait, where human skin and plant life merge under an unseen spectrum. Print it large, and the room will shimmer with quiet wonder.
Infrared Photography Safety Considerations Protecting Eyes and Sensors
When you’re out chasing that otherworldly glow, the first thing to remember is that IR light isn’t visible, so you can’t rely on your eyes to warn you when something’s too bright. A proper IR filter on your lens acts like sunglasses for your camera—and for you. Never look directly at the sun through a glass‑less viewfinder, because the invisible wavelengths can still fry retinas faster than a summer BBQ.
The sensor is a delicate piece of silicon that loves heat as much as it hates it. Prolonged exposure to intense IR radiation can cause localized heating, leading to permanent hot‑spot damage. Watch your exposure time and keep a shade cloth handy when shooting directly at bright sources, and always give the camera a cooldown break after a marathon of sunrise‑to‑sunset IR sessions. Also, keep the sensor covered with a UV‑blocking cap when you’re not shooting to prevent stray IR photons from building up.
Beyond the Red Horizon – 5 Aesthetic Hacks for Infrared Magic
- Embrace the “wrong” white balance – set a custom Kelvin value (around 2000‑2500 K) to push skin tones into warm, otherworldly hues.
- Shoot during the golden hour; the low‑angle sun adds dramatic contrast that makes infrared foliage pop like neon fire.
- Use a polarizing filter to tame reflections and deepen the surreal sky‑to‑ground separation that defines infrared landscapes.
- Convert to a split‑tone workflow in post‑processing: map reds to deep magentas and blues to icy cyan for a balanced, dreamy palette.
- Add a subtle vignette to draw the eye toward the glowing infrared focal point, reinforcing the sense of a hidden, alternate reality.
Quick Takeaways for Infrared Photographers
Infrared photography transforms everyday scenery into surreal, dream‑like visions by swapping greens for vivid reds and creating otherworldly contrasts.
Mastering color grading and selecting the right infrared filter are essential steps to achieve consistent, ethereal tones while maintaining image clarity.
Safety matters—always use proper eye protection and shield camera sensors from excess infrared exposure to preserve both your vision and equipment.
Seeing Beyond the Visible
“Infrared isn’t just a filter—it’s a portal that turns ordinary light into a living watercolor, where every leaf glows like ember and every horizon whispers in scarlet.”
Writer
Wrapping It All Up
We’ve walked through how infrared light reshapes ordinary scenes into a palette that turns foliage into glowing reds and sky into velvety blues. By mastering color grading techniques you can coax those ethereal tones out of any raw file, while the right filter—whether a classic 720 nm or a daring 590 nm—sets the stage for the look you want. We also explored practical gear choices, from infrared‑modified bodies to affordable filter kits, and reminded you to protect both eyes and sensor with proper safety gear. Finally, the portrait ideas showed how a single beam of invisible light can turn a face into a bold, otherworldly portrait.
The real magic of infrared photography lies not just in final image but in the way it forces us to look beyond the visible spectrum. When you step outside with a camera tuned to the unseen, ordinary streets become ghostly corridors and familiar faces wear a halo of hidden color. Let that sense of discovery drive you to experiment with longer exposures, mixed lighting, or multi‑frame composites that push the boundaries of what infrared can convey. As you share results on forums or Instagram, each new technique becomes a brushstroke on this evolving art form. In the end, infrared photography invites you to rewrite visual rules of reality and, in doing so, discover a new visual frontier that only you can map.
Frequently Asked Questions
How can I manipulate white balance and post‑processing tools to emphasize the surreal reds and pinks that define infrared aesthetics?
First, set your camera’s white‑balance to a cool Kelvin setting (around 2500‑3000 K) or switch to a custom “tungsten” preset; this pushes the greens into those vivid reds. In post, pull the temperature slider even lower and crank up the magenta channel a notch. Then, use a selective HSL mask to boost pinks while desaturating any lingering blues. Finally, add a subtle vibrance boost to keep the reds glowing without looking garish in the final output.
Which types of landscapes or architectural subjects work best for creating the dreamy, otherworldly vibe that infrared photography is known for?
Dreamy IR images thrive where contrast meets nature’s palette. Look for water‑rich scenes—rivers, lakes, or mist‑laden coastlines—where the sky turns deep violet and foliage glows ruby. Desert dunes and rocky canyons give stark black‑and‑white drama, while fields of golden wheat turn ghostly pink. Architecturally, sleek steel‑frame bridges, glass façades, or historic stone walls framed by green foliage create striking silhouettes that pop against the surreal infrared sky for a truly otherworldly effect in your portfolio.
Are there specific lighting conditions or times of day that enhance the ethereal color shifts unique to infrared images?
The magic really kicks in when the sun is high and the sky is clear—think mid‑morning to early afternoon. Direct sunlight gives strong infrared reflectance, turning foliage into that surreal, glowing red. A slight haze or light cloud can soften shadows and boost the pastel blues in the sky. Shoot during golden hour if you want softer tones, but for the most dramatic color swaps, aim for bright, unfiltered daylight.